Create items
Items require an Active SKU and a place to sit in. Complete Build your SKU catalogue (including activation) and Set up your places first, then return here.
This guide walks through creating the Makita 18V Drill #1 item end-to-end — filling the name, picking the place and SKU, filling the Item Properties section, and confirming the item is Present in your warehouse. This is the last step in the setup arc: your template defines what an item can track, your SKU defines the product, your place tree defines where items live, and an item is the physical thing itself.
Creating many items at once? Upload a file instead of filling the form per item.
Background: Items and item states explains what state transitions mean and when they happen. SKUs and the product catalogue covers why the SKU must not be in Draft or Discontinued state before you can create items against it.
Create an item
Step 1 — Open the New Item form
In the sidebar, expand Items and select Items. Click Add Item to open the New Item form.
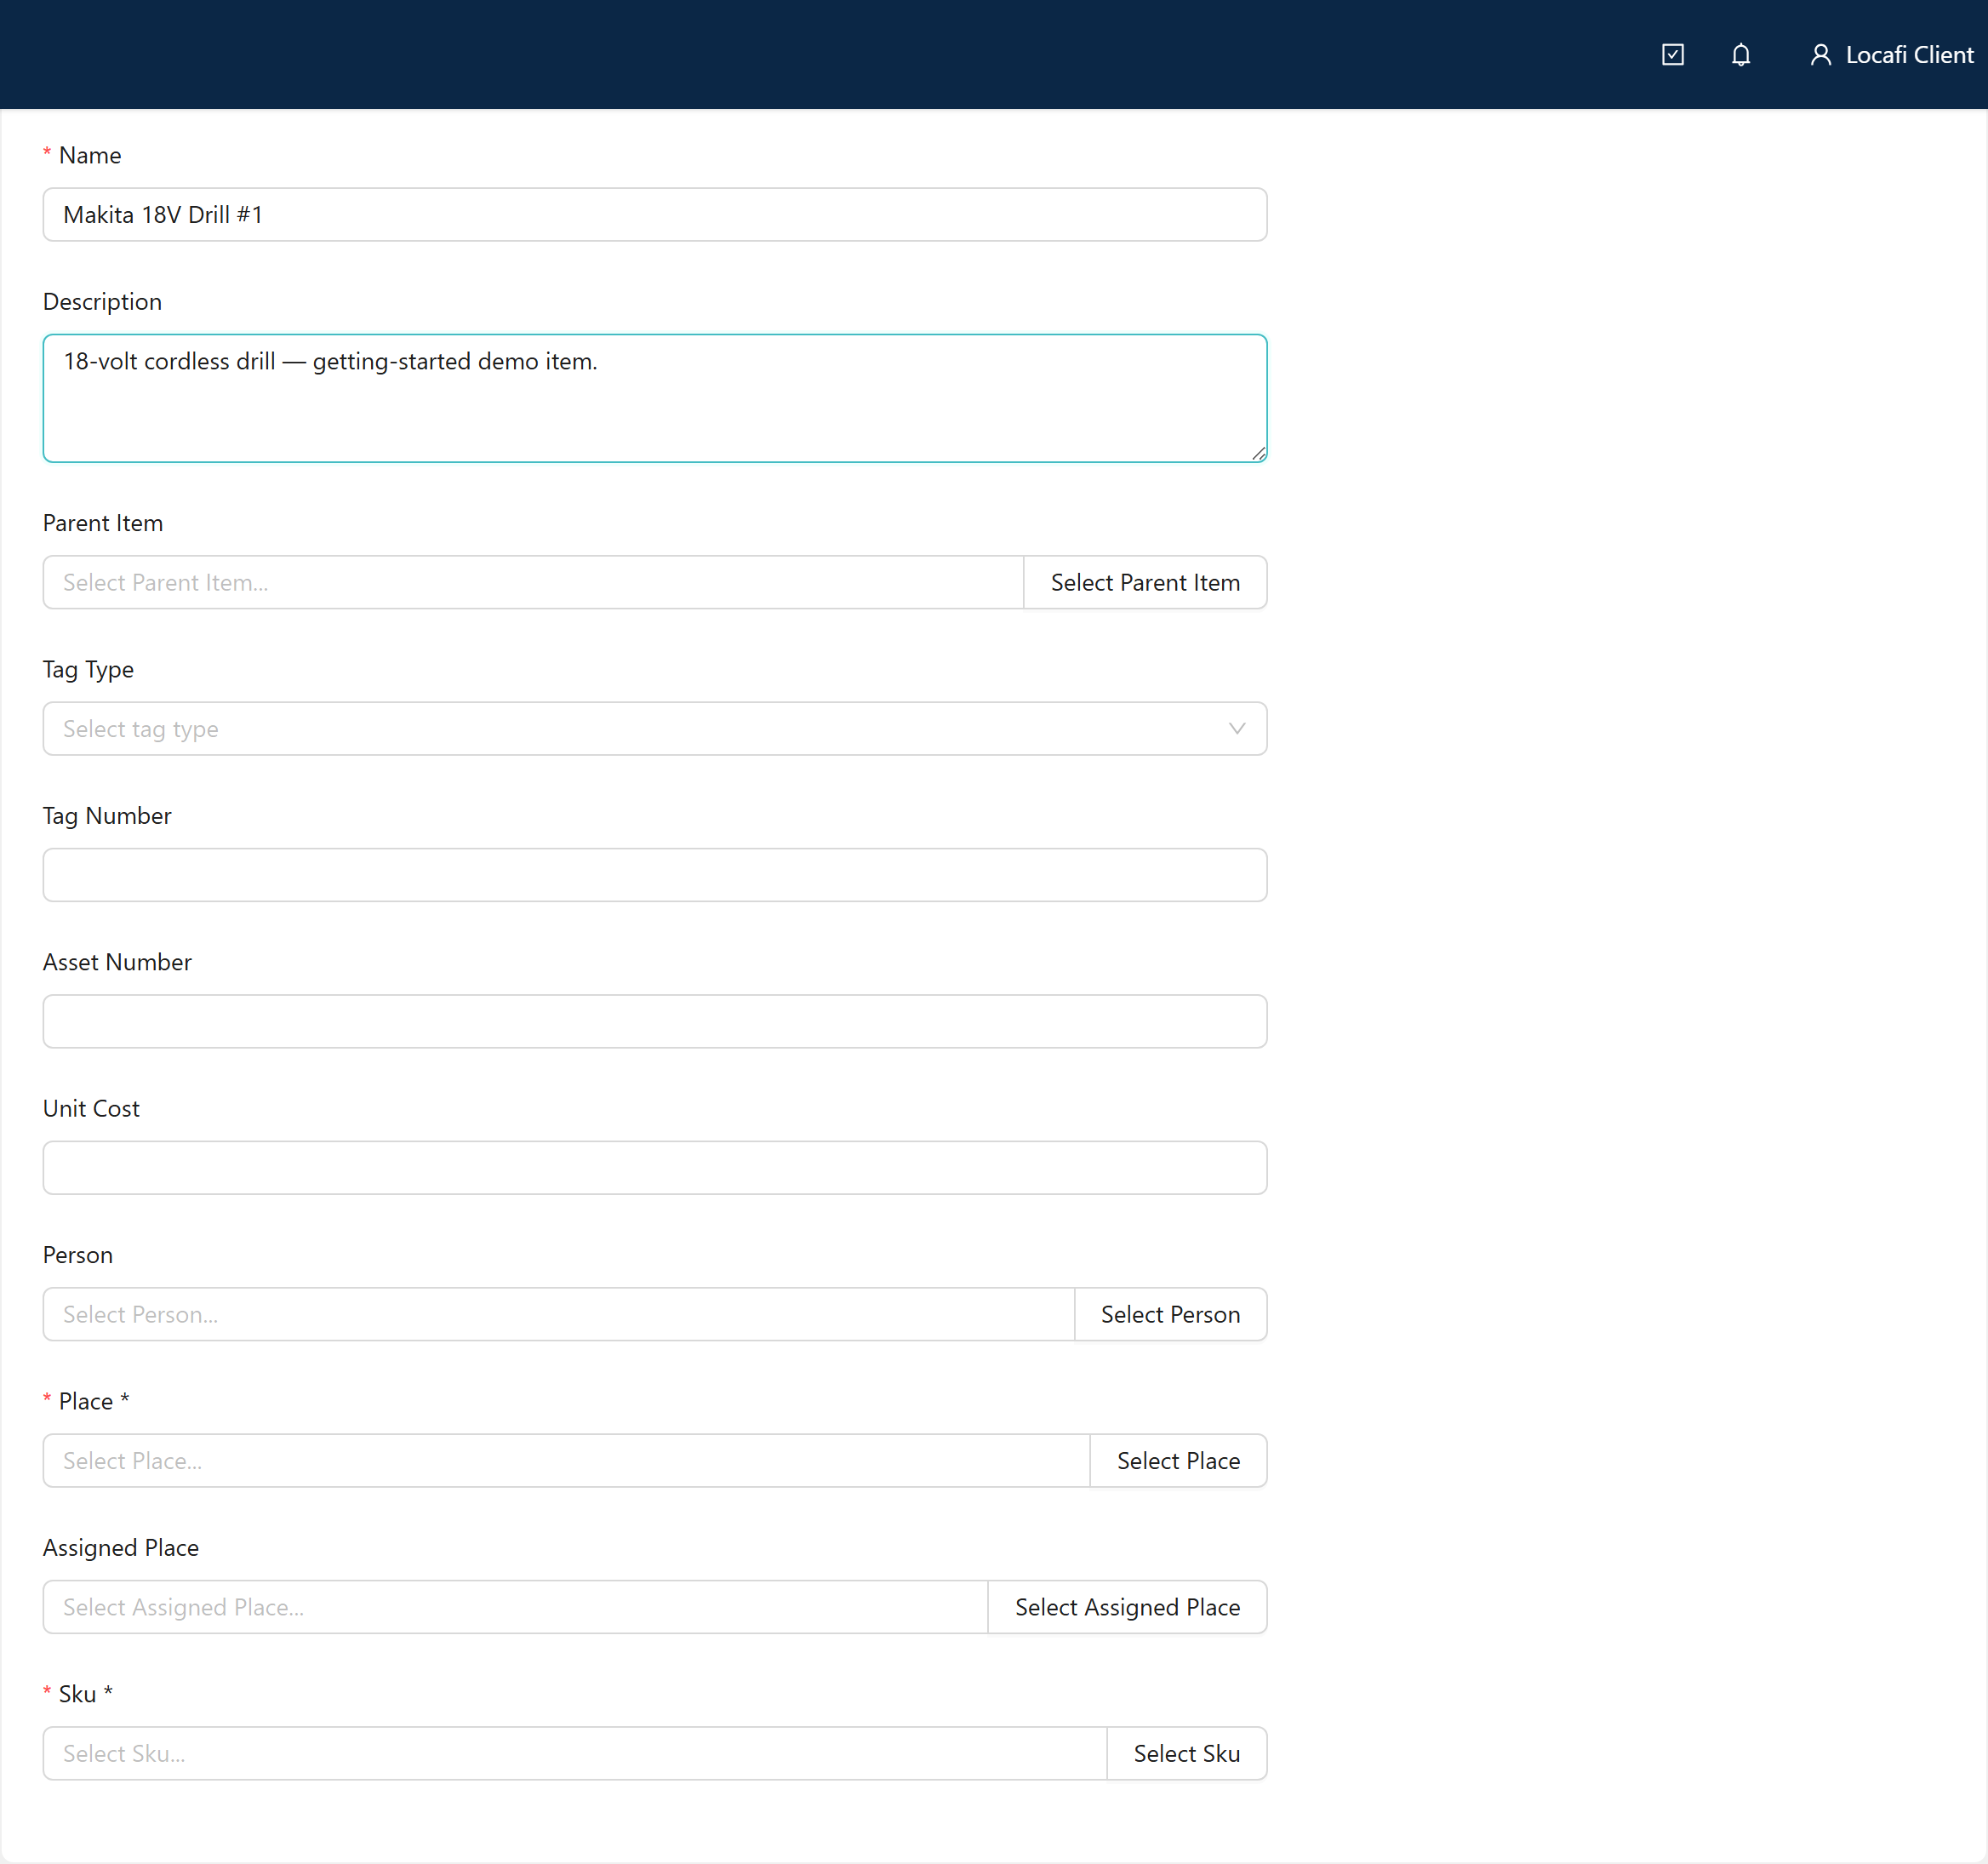
Step 2 — Fill the item name
The first field is Name, which is required. The form shows an inline "Item Name is required!" message if you click Create without filling it.
| Field | Value | Note |
|---|---|---|
| Name | Makita 18V Drill #1 | Required |
| Description | (optional) | Free text |
| Tag Number | (leave blank) | Optional — tags are usually written by a handheld or portal reader; typing one here links the tag immediately. |
| Asset Number | (leave blank) | Optional — your internal asset code |
You can type a Tag Number manually to link a known tag to the item at create time. Most workflows leave this blank here and let the reader write the tag during the first scan.
Fields such as Parent Item, Tag Type, Unit Cost, Person, and Assigned Place appear only when your tenant's configuration enables them. If you do not see them, your deployment does not use them — no action needed.
Step 3 — Pick the place and SKU
These two picks are required, but the form flags them differently from the Name field — no inline message appears as you fill the form. The validation only fires when you press Create:
- Place is required! — a red toast if you click Create without selecting a place.
- SKU is required! — a red toast if you click Create without selecting a SKU.
Complete both picks before clicking Create to avoid either toast.
Pick the place
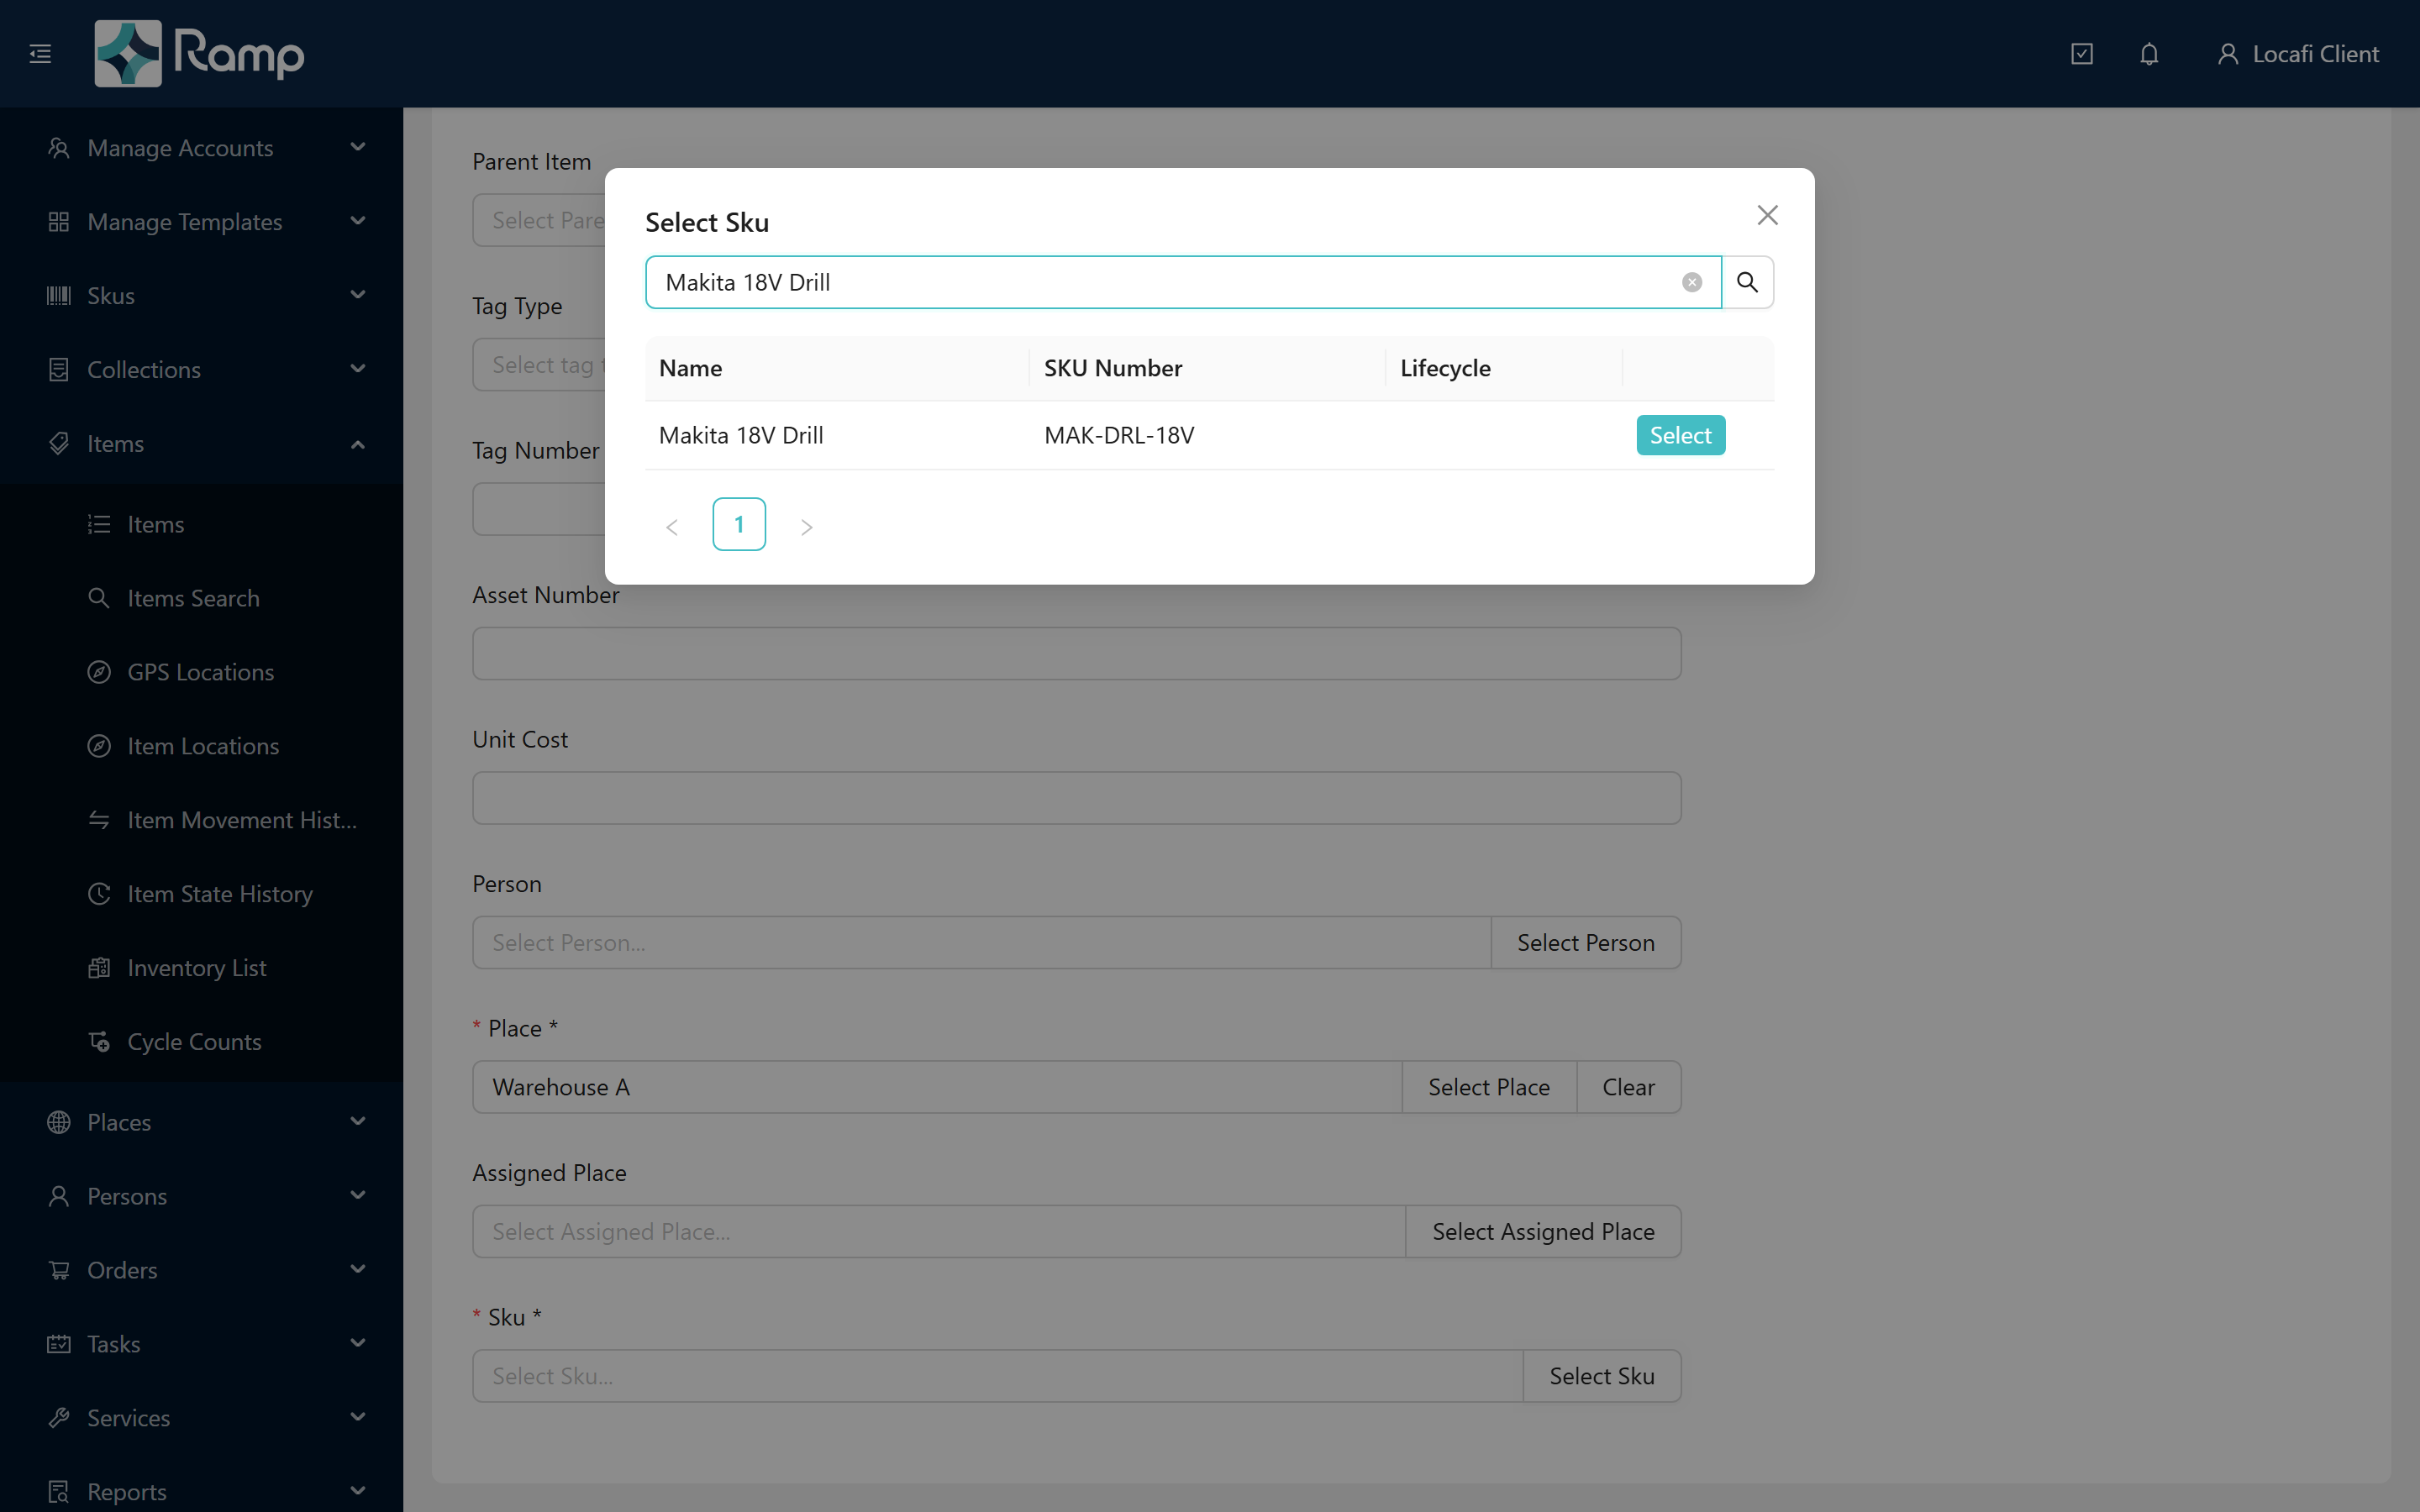
Click Select Place to open the place picker. Search for Warehouse A, then click Select in its row. The dialog closes and the Place field shows Warehouse A.
Pick the SKU
Click Select Sku to open the SKU picker. Search for Makita 18V Drill and click Select.
The SKU picker filters to operational SKUs (any state except Draft and Discontinued). If Makita 18V Drill does not appear, it is still in Draft. Return to Build your SKU catalogue and complete the activation step.
Step 4 — Fill Item Properties
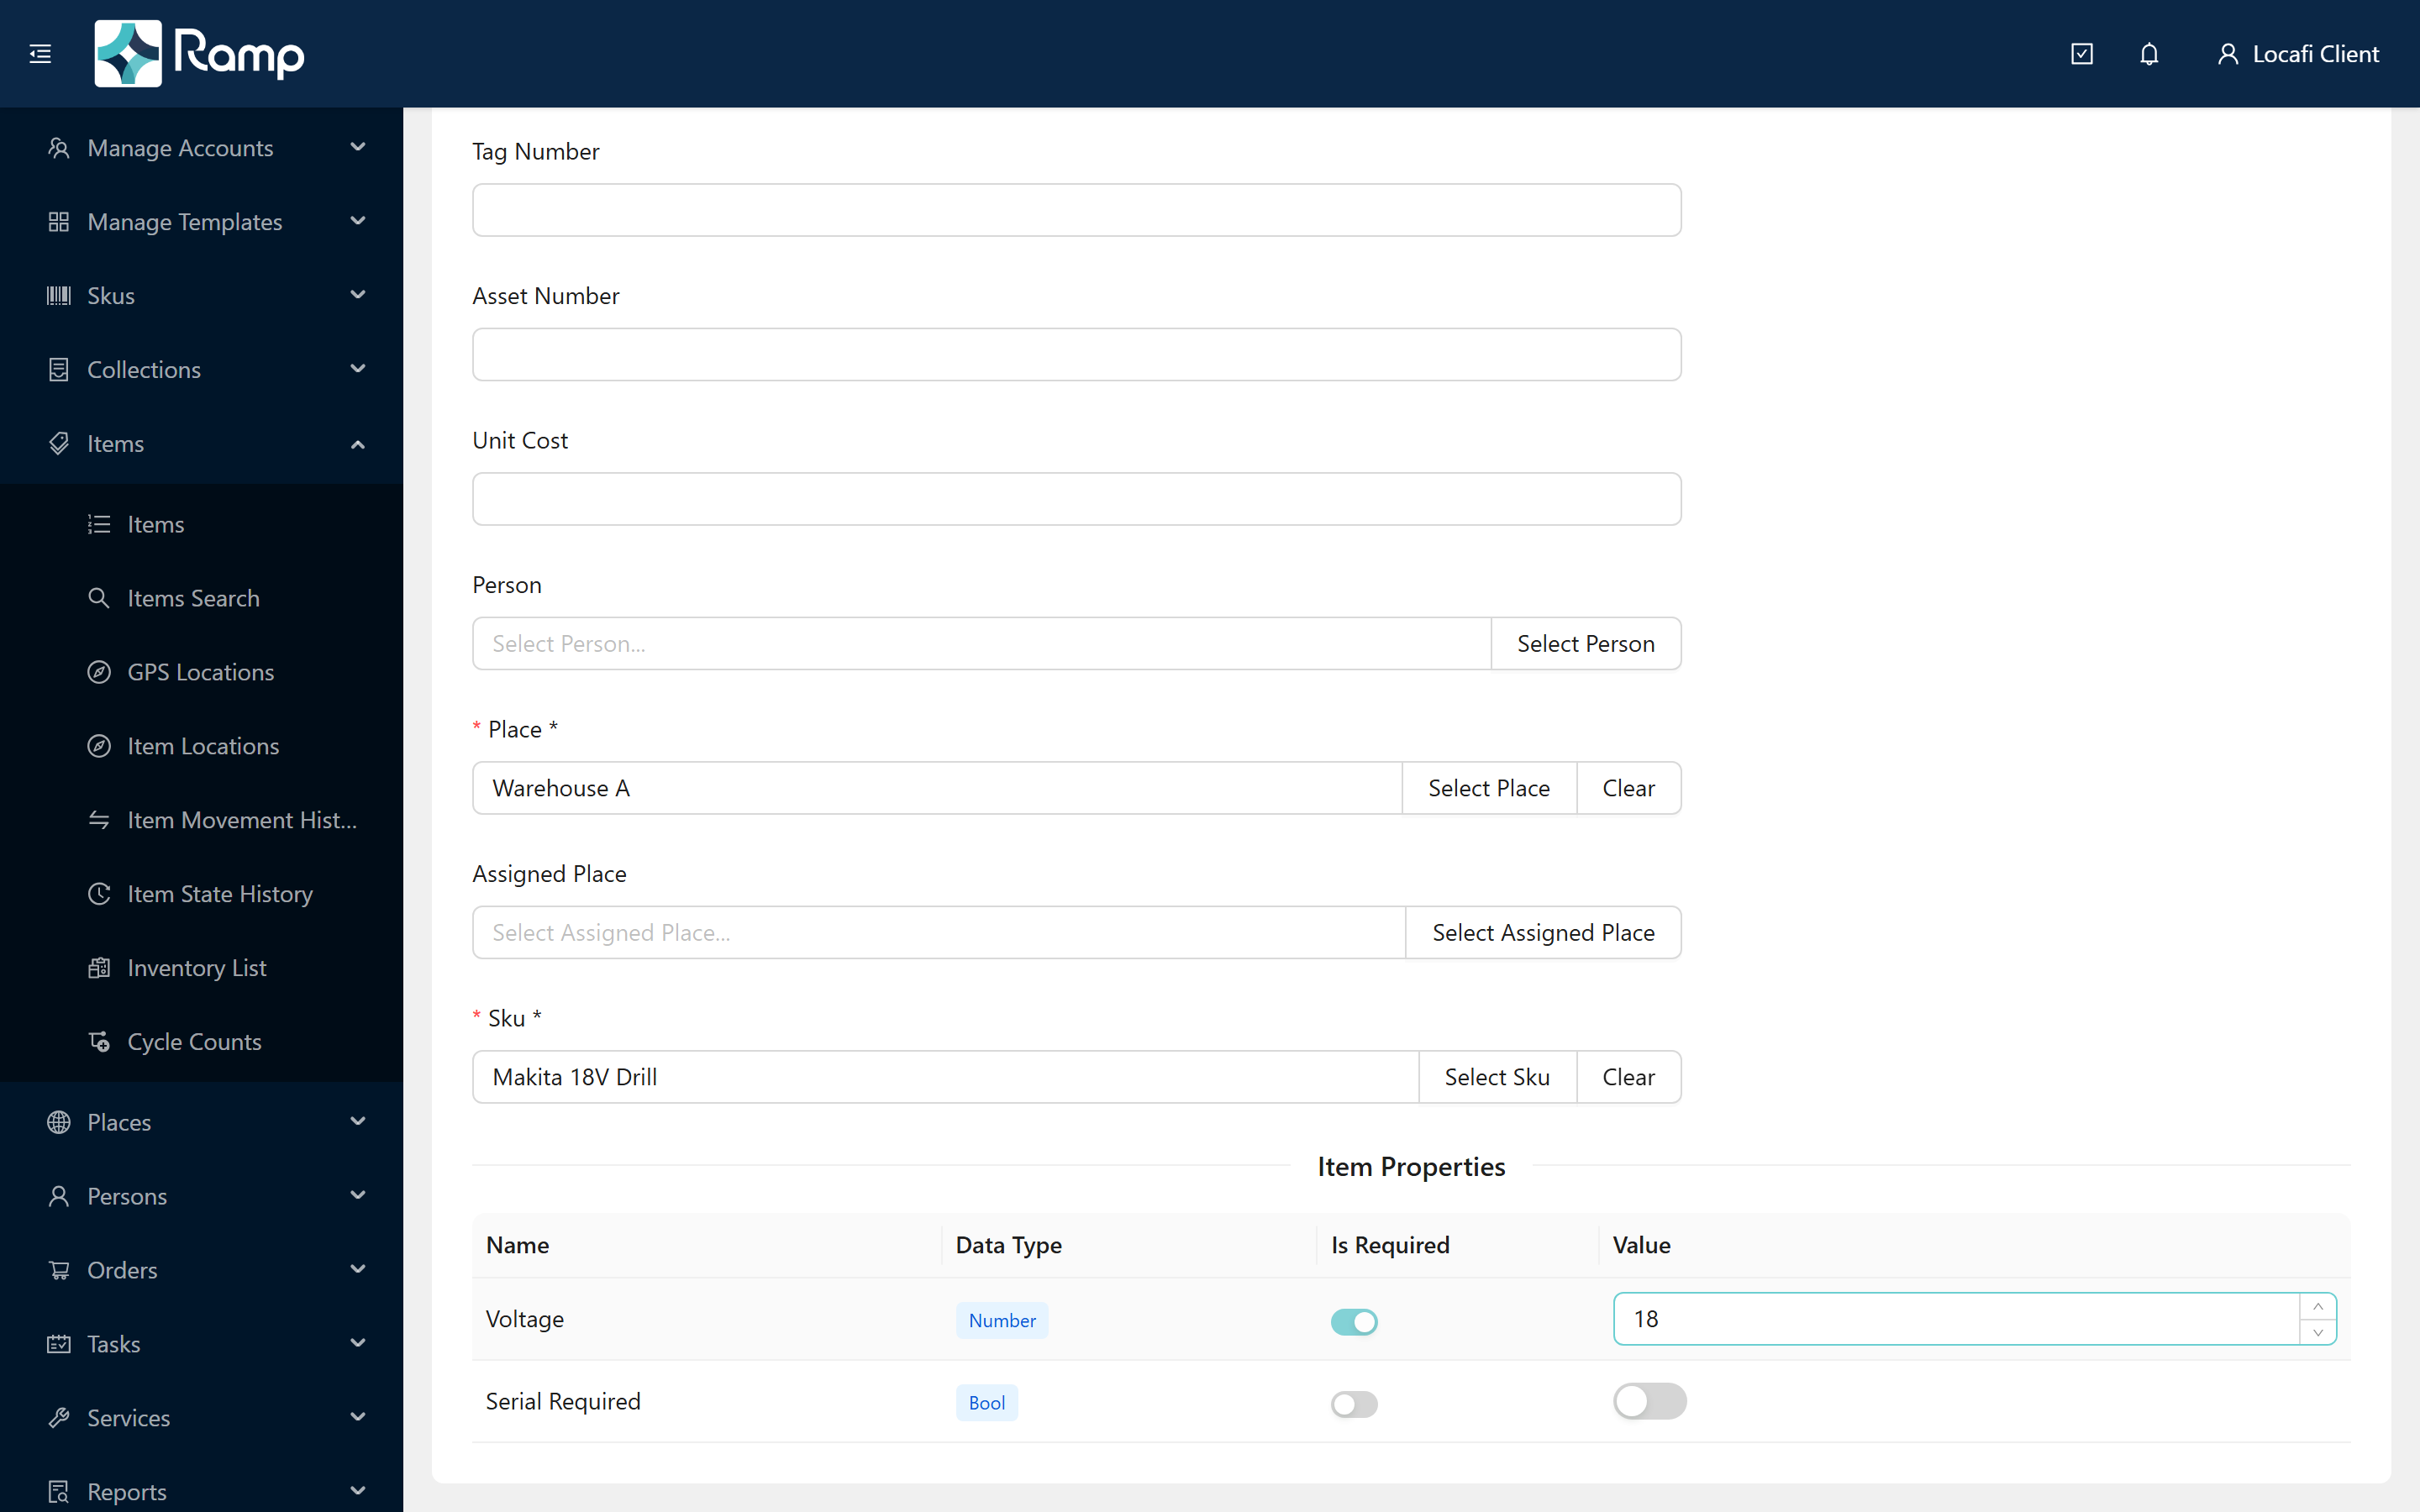
After you select the SKU, the Item Properties section appears below the form fields. It lists the extended properties from the Power Tool template.
| Column | Behaviour |
|---|---|
| Name | Property name from the template |
| Data Type | The data type badge (Number, Bool, etc.) |
| Is Required | Read-only switch — set on the template, cannot be changed here |
| Value | Editable for item-level properties; locked for SKU-level ones |
Fill in the editable property:
| Property | Value | Note |
|---|---|---|
| Voltage | 18 | Item-level Number property — type directly in the cell |
| Serial Required | (locked) | SKU-level Bool — value is set on the SKU, shown here for reference |
Unit Cost is locked when the SKU carries a SKU-level unit cost (the SKU Level Unit Cost switch was on when the SKU was saved). This prevents items from overriding a centrally managed cost.
Background: Templates and extended properties explains item-level versus SKU-level properties and how they inherit from the template.
Step 5 — Quantity and Percent fields
For Standard SKUs these fields do not appear. They only appear for Variable Quantity, Kanban, and Variable Percent SKU types:
- Quantity — appears for Variable Quantity and Kanban SKUs.
- Percent — appears for Variable Percent SKUs, with a calculated read-only Calculated Quantity field below it.
The Makita 18V Drill uses SKU Type Standard, so neither field is shown here.
Step 6 — Create the item
Click Create in the card header. The portal shows the "Item created!" confirmation and returns you to the Items list.
The new row shows:
- State: Present (green) — the item was received at its place and is now visible in inventory.
- Place: Warehouse A — where the item was created.
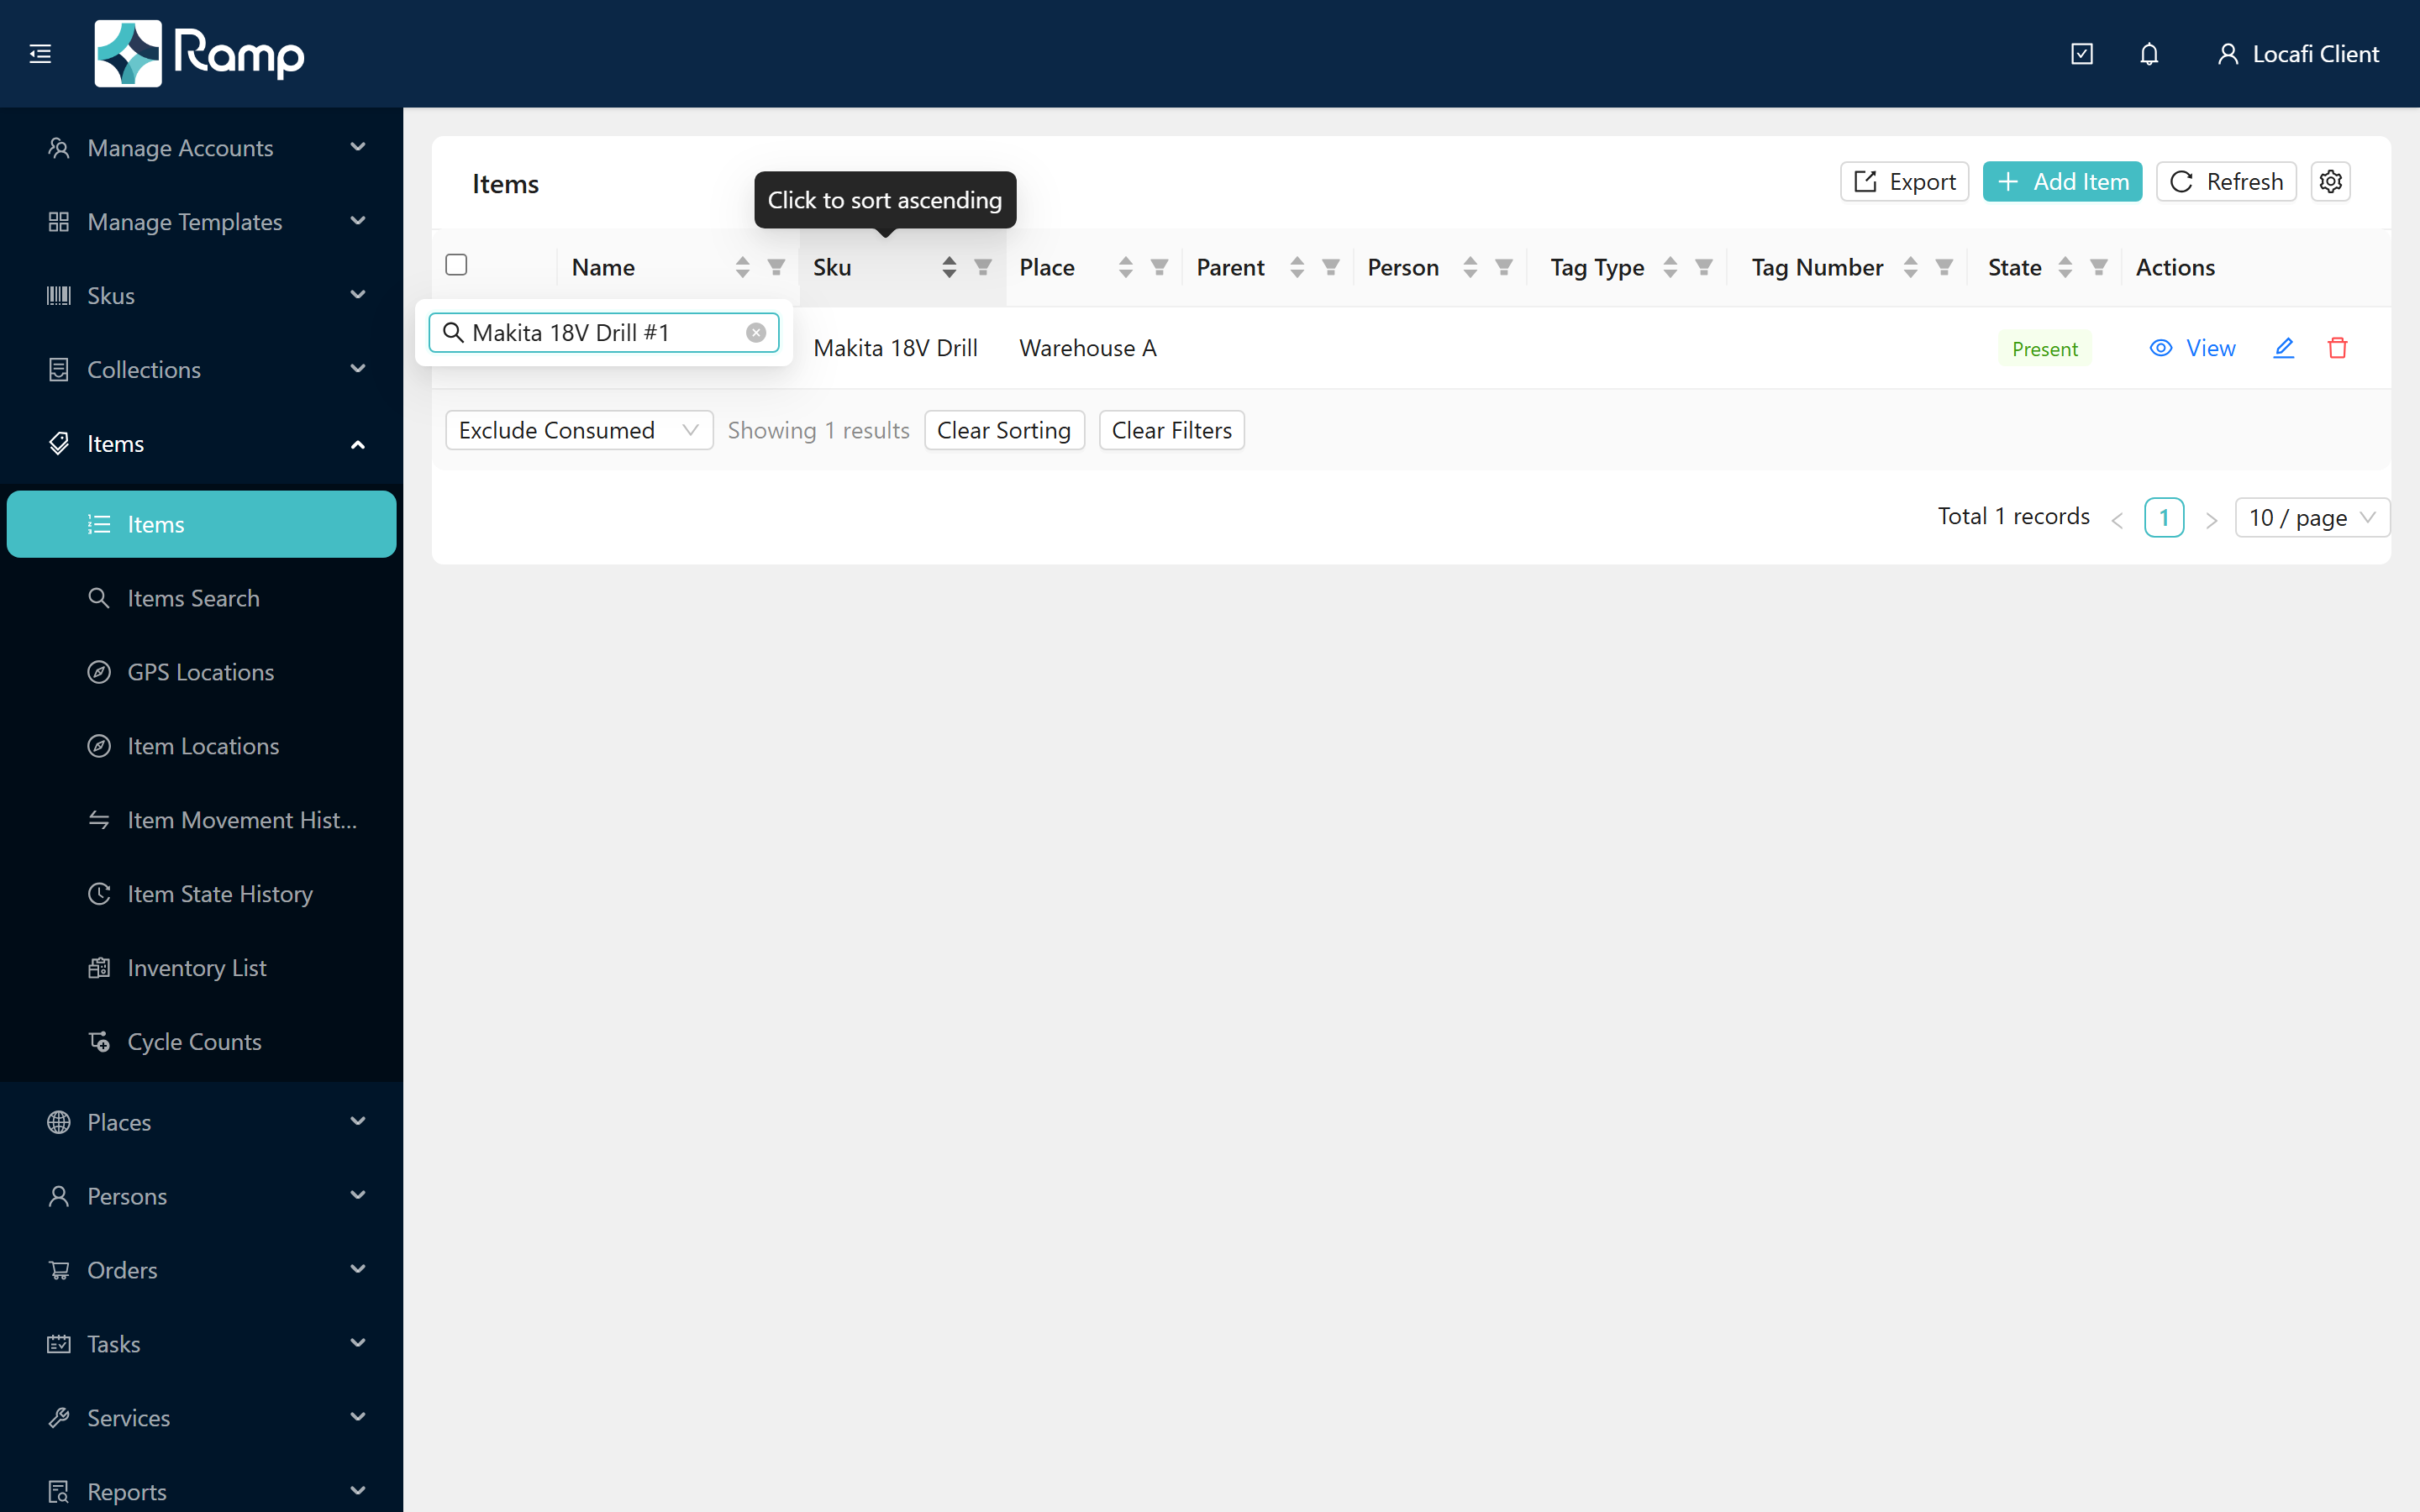
An item enters Present state as soon as it is created at a place. It moves to Missing the first time a stocktake or scan session does not find it where expected. See Items and item states for the full state machine.
You now have a working setup
You have just completed the full setup arc:
- Create a template with extended properties — defined what your items can track (Voltage, Serial Required).
- Build your SKU catalogue — created the Makita 18V Drill SKU and activated it.
- Set up your places — built the Melbourne DC → Warehouse A location tree.
- Create items (this guide) — created the first physical item at Warehouse A.
Your tenant is now ready for day-to-day operations: items are tracked by place, state changes are recorded when readers scan them, and stocktakes compare expected versus found counts across your place tree.
Where to go next: Orders at a glance explains how to move items between places using outbound and inbound orders — the next piece of the operational workflow.
Related: Items and item states · SKUs and the product catalogue · Templates and extended properties · Places and the hierarchy