Build a report
Custom Reports is the portal's report builder. It lets you query inventory data, choose which fields to display, sort the results, and export them. You define the query in four steps, then click Search to run it.
In the sidebar, open the Reports group and select Custom Reports. The page heading reads Custom Reports, and Step 1: Select Report Type stays disabled until the options finish loading (the select shows Loading report options… while it loads).
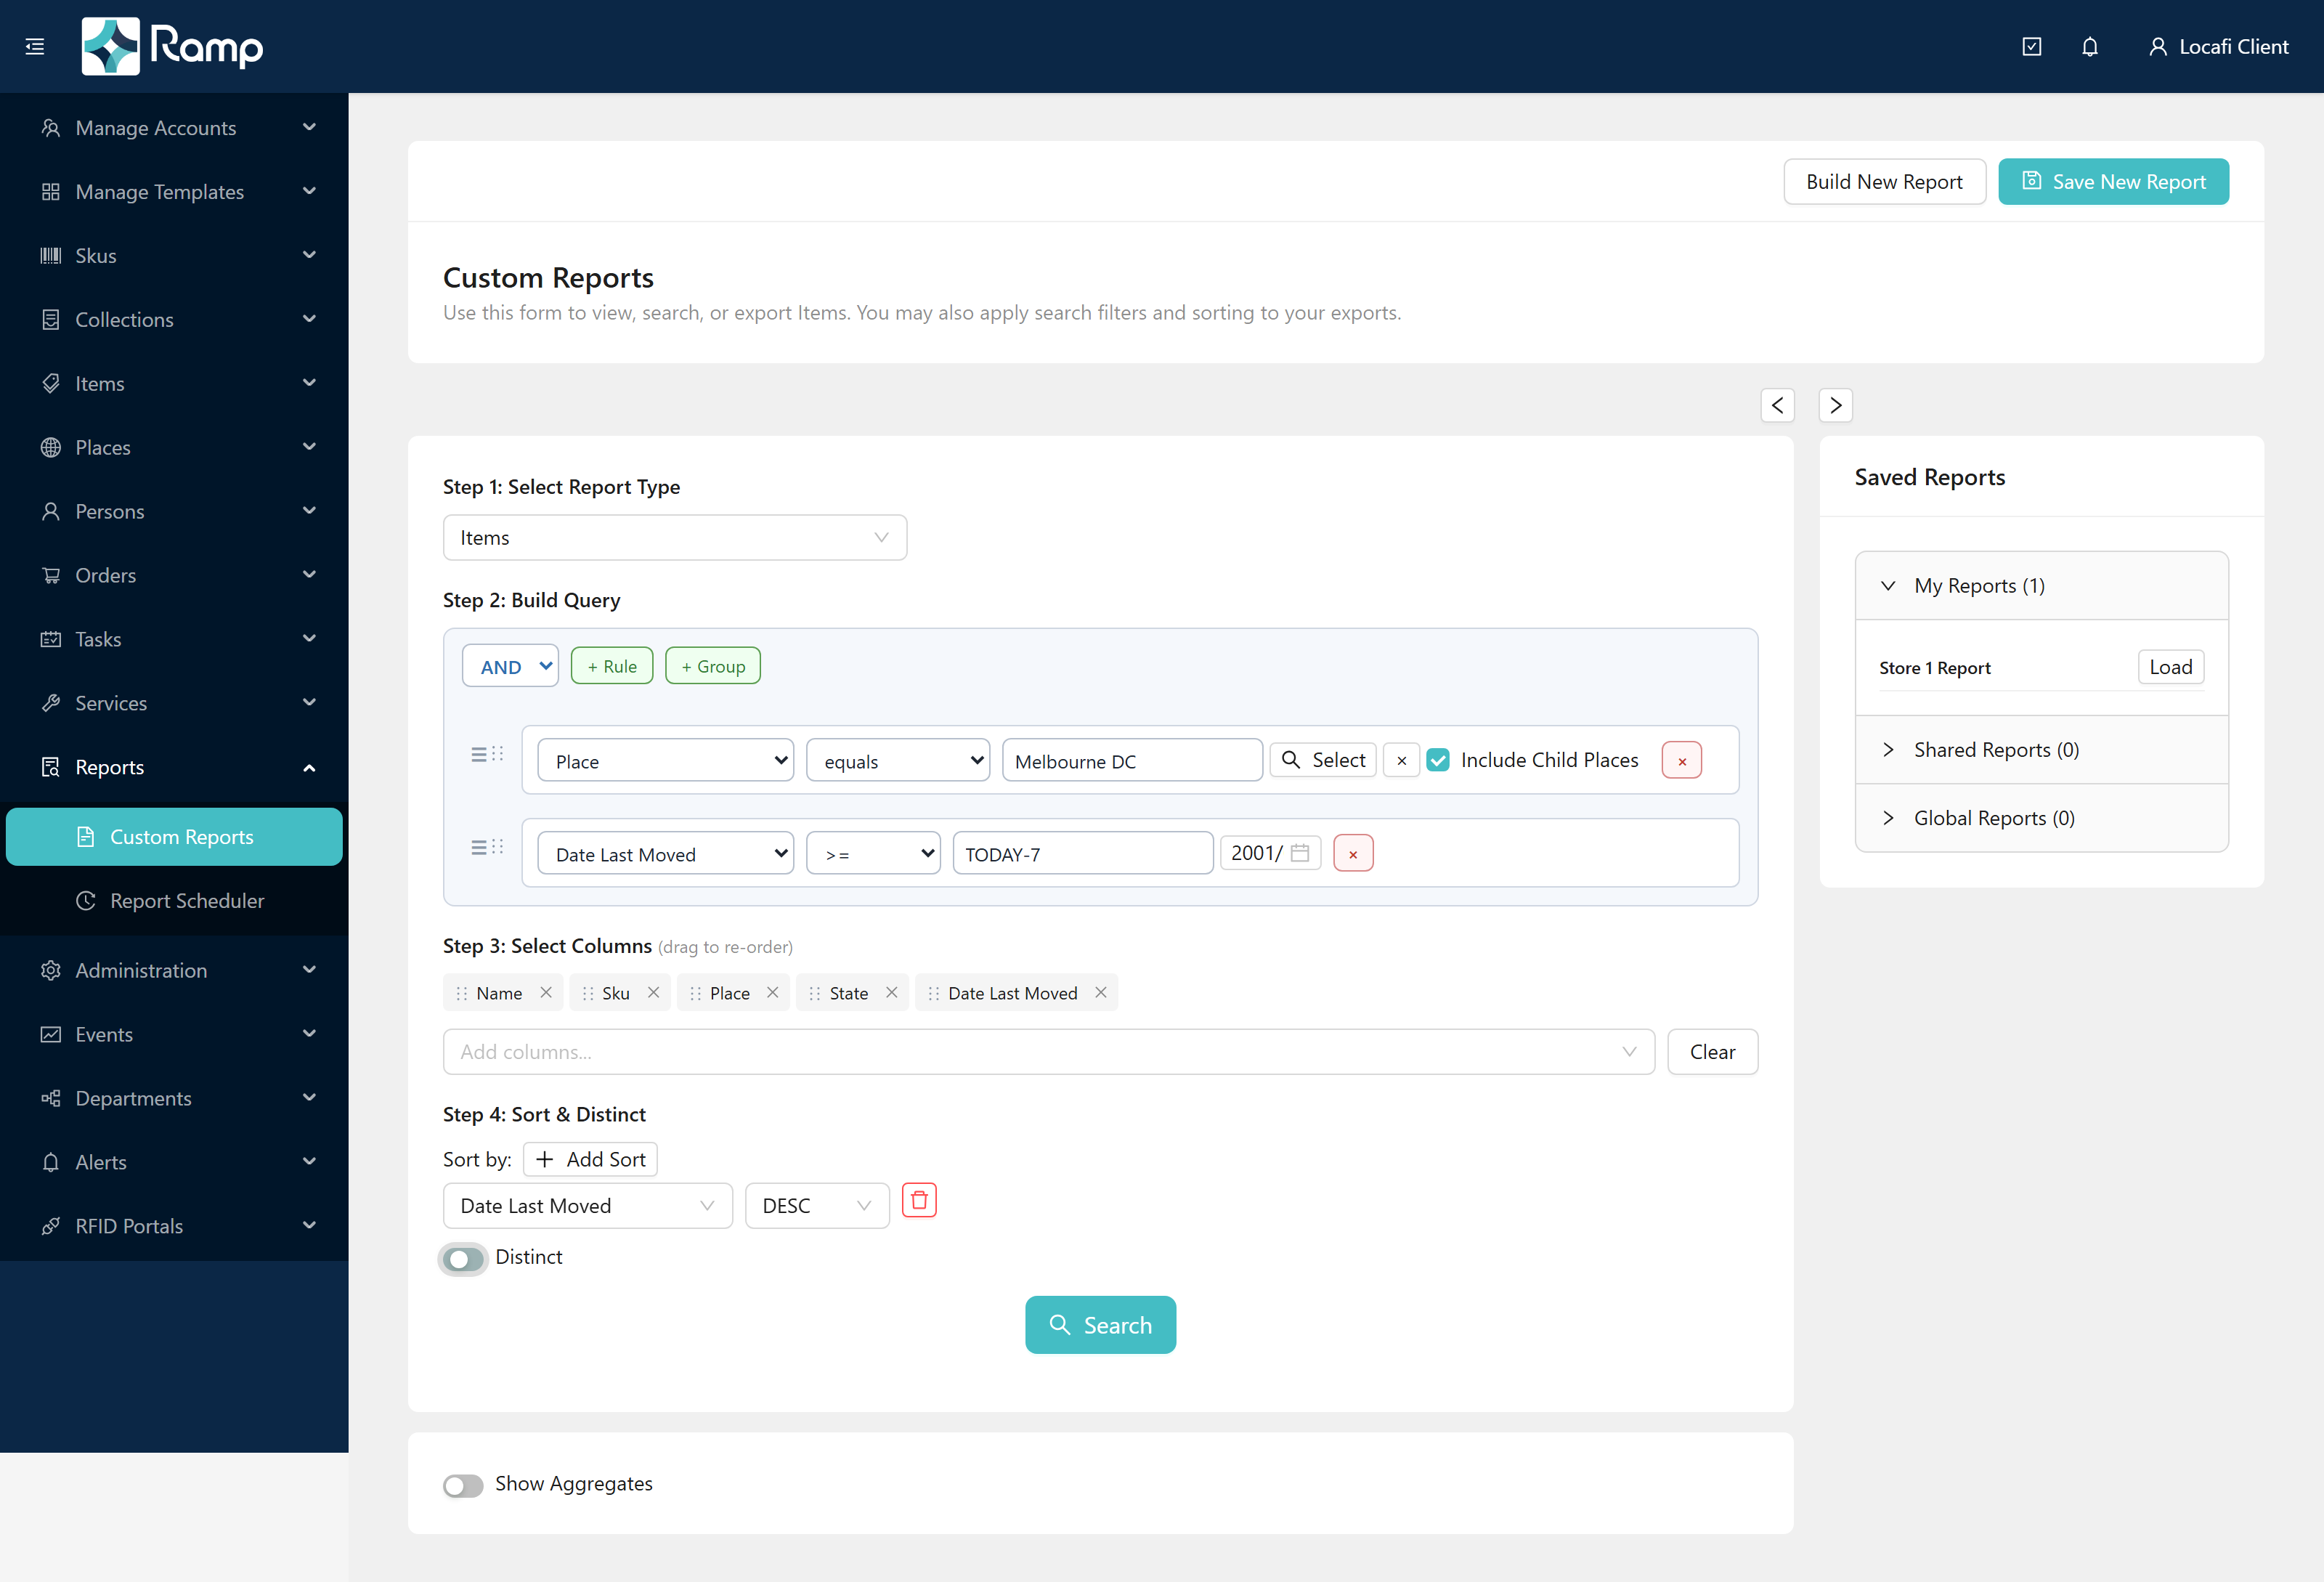
Step 1: Select a report type
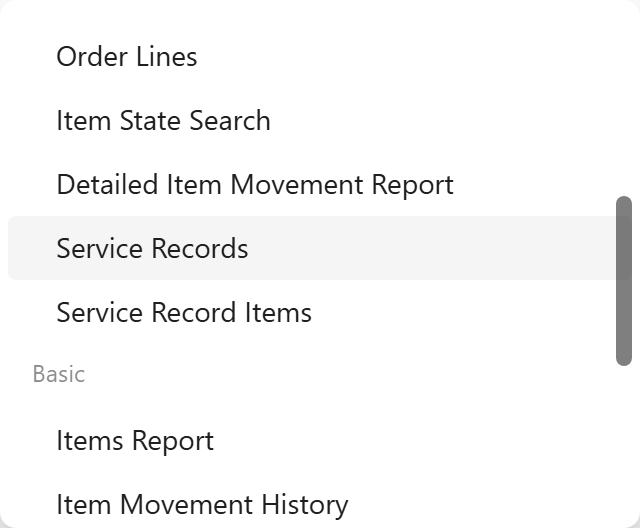
The Step 1: Select Report Type dropdown shows a grouped list of report types. The selector shows --- Select --- until you choose a type.
Report types are divided into two groups:
- Advanced — the full query builder with picker fields, child-place filtering, and page-by-page results. Includes: Items, Skus, Places, Persons, Collections, Tasks, Orders, Order Lines, Item State Search, Detailed Item Movement Report, Service Records, and Service Record Items.
- Basic — simpler lists that also let you filter the results table by column after the search runs. Includes: Items Report, Item Movement History, Item State History, Item Last Seen, Stock Summary, Inventories, Cycle Counts, Order Summary, and Event Records.
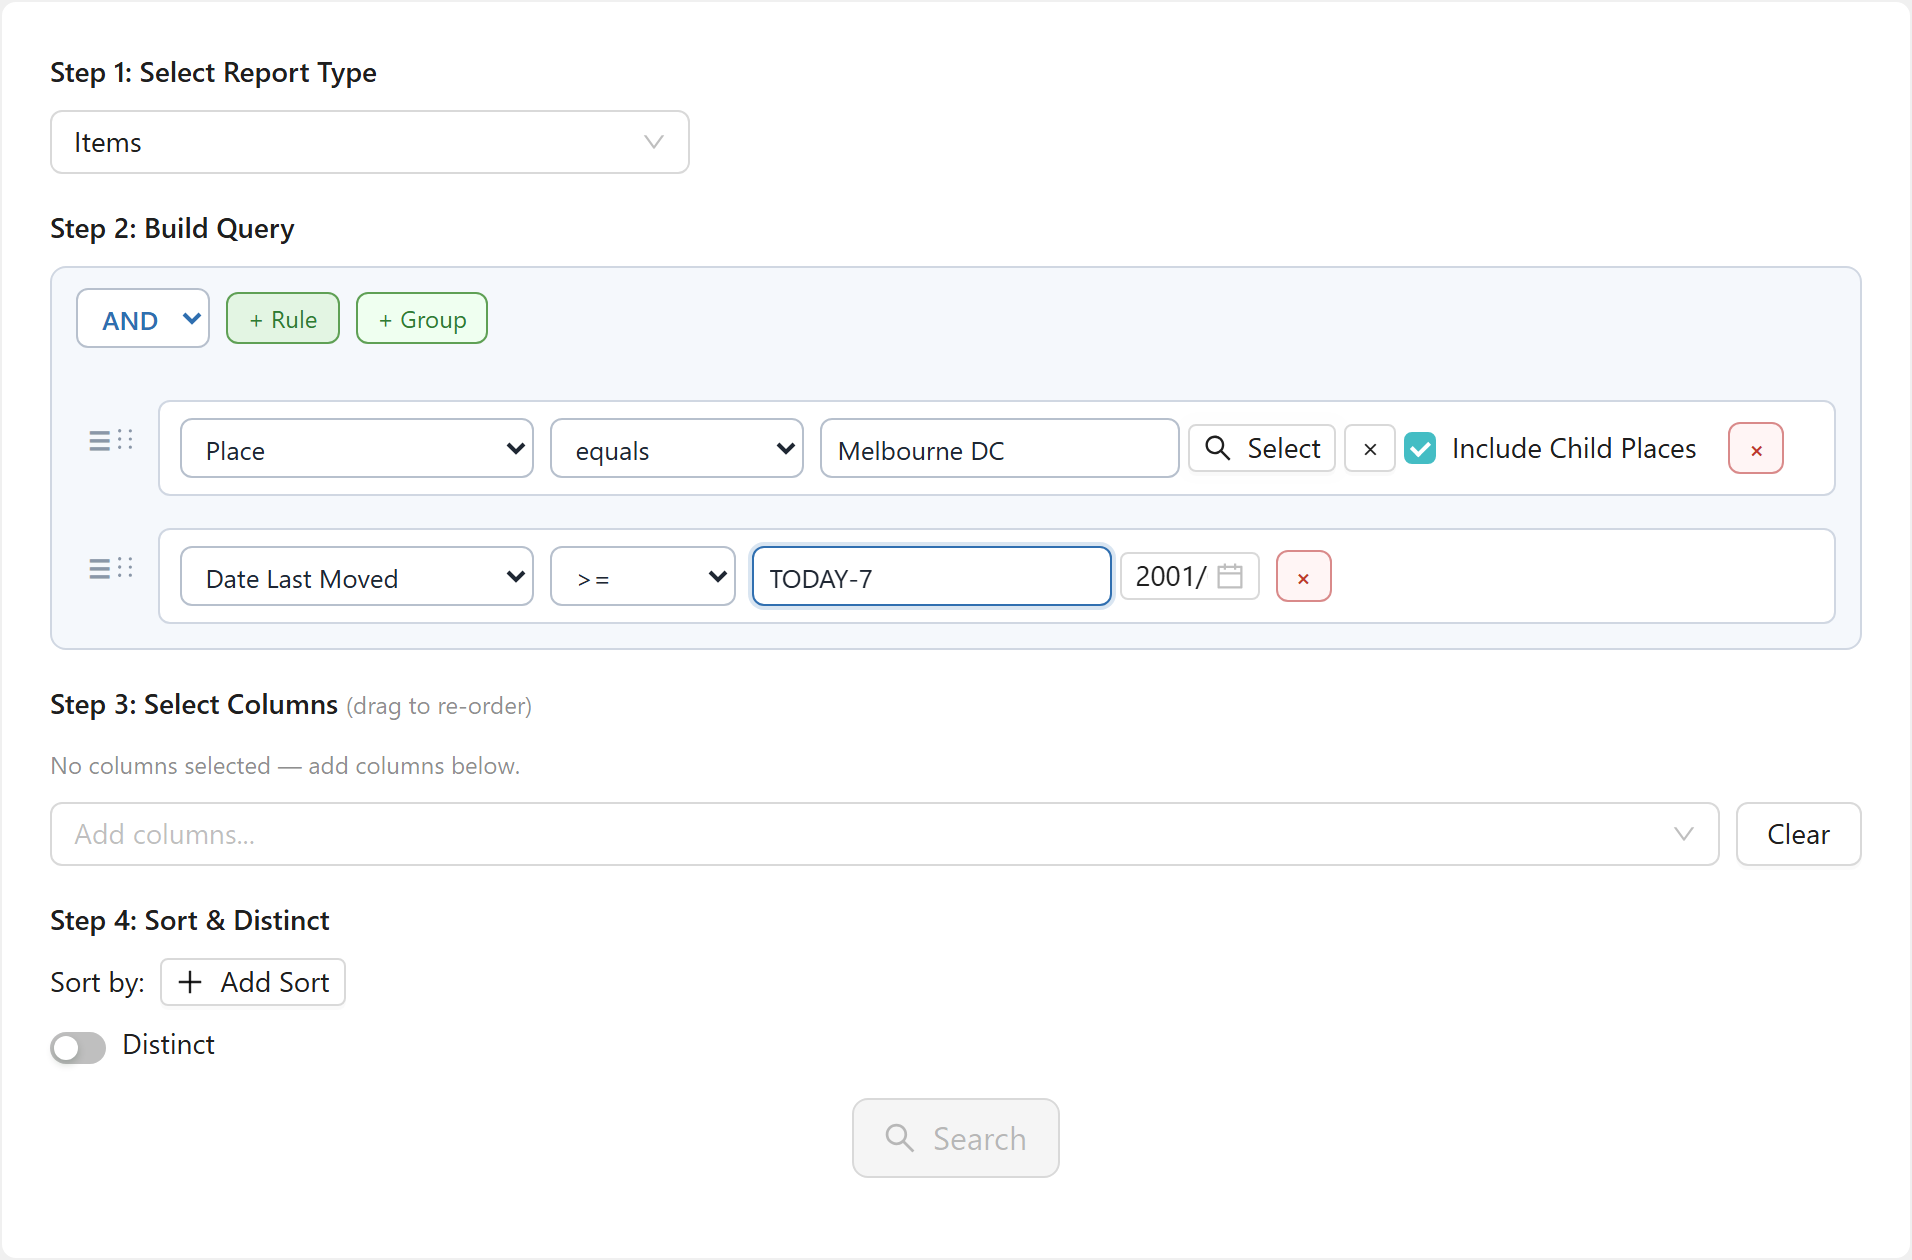
Selecting a type reveals Steps 2 through 4.
Advanced reports run your query against all matching records and return results page by page. Basic reports return a flat list and let you filter and sort the results table directly on the results screen. The differences are covered in Results and exports.
Worked example: Select Items from the Advanced group.
Step 2: Build a query
The Step 2: Build Query card is where you define which records to include in the report.
The query starts with a root group set to AND — meaning every rule in the group must match. Use + Rule to add a filter row, and + Group to add a nested rule group. Each rule row has:
- A field select (what to filter on)
- An operator select (how to compare)
- A value editor (what to compare to)
- A six-dot drag handle for reordering
- A red × to delete the rule
The outermost group is always present — it cannot be removed or reordered.
Picker fields
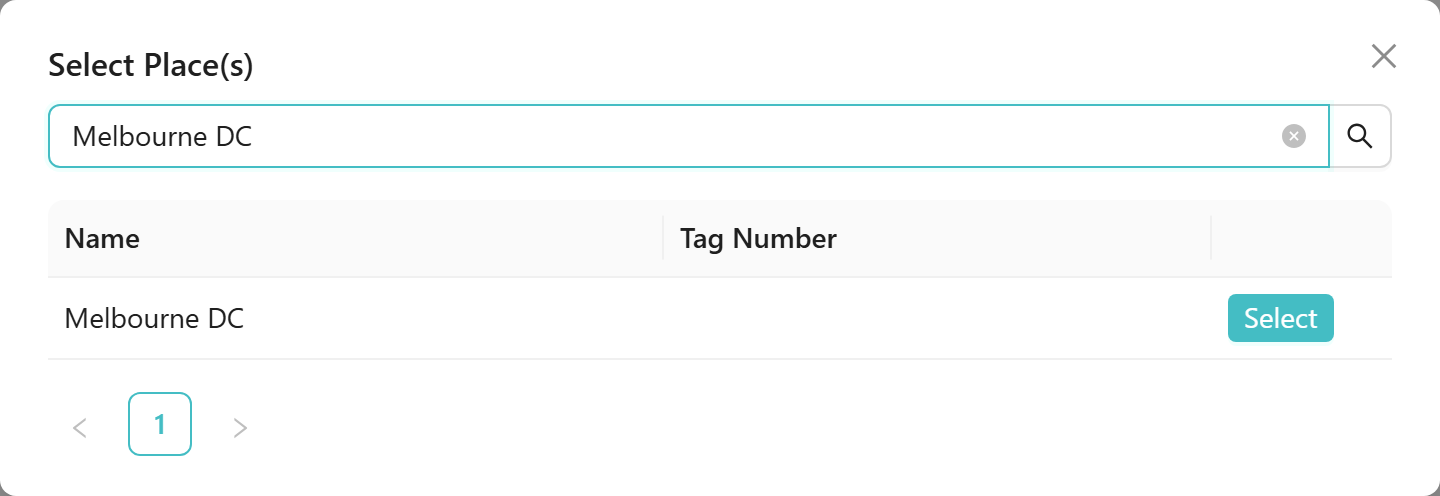
For fields like Place, when the operator is equals, the value editor shows a read-only input with the placeholder (none selected) and a Select button. Click Select to open a search dialog. Type in the search box to filter the list, then click Select on the matching row. The selected name fills the value input.
When the operator is contains, doesn't contain, in, or not in, the picker is replaced by a plain text box (placeholder Enter text) that matches against the displayed name.
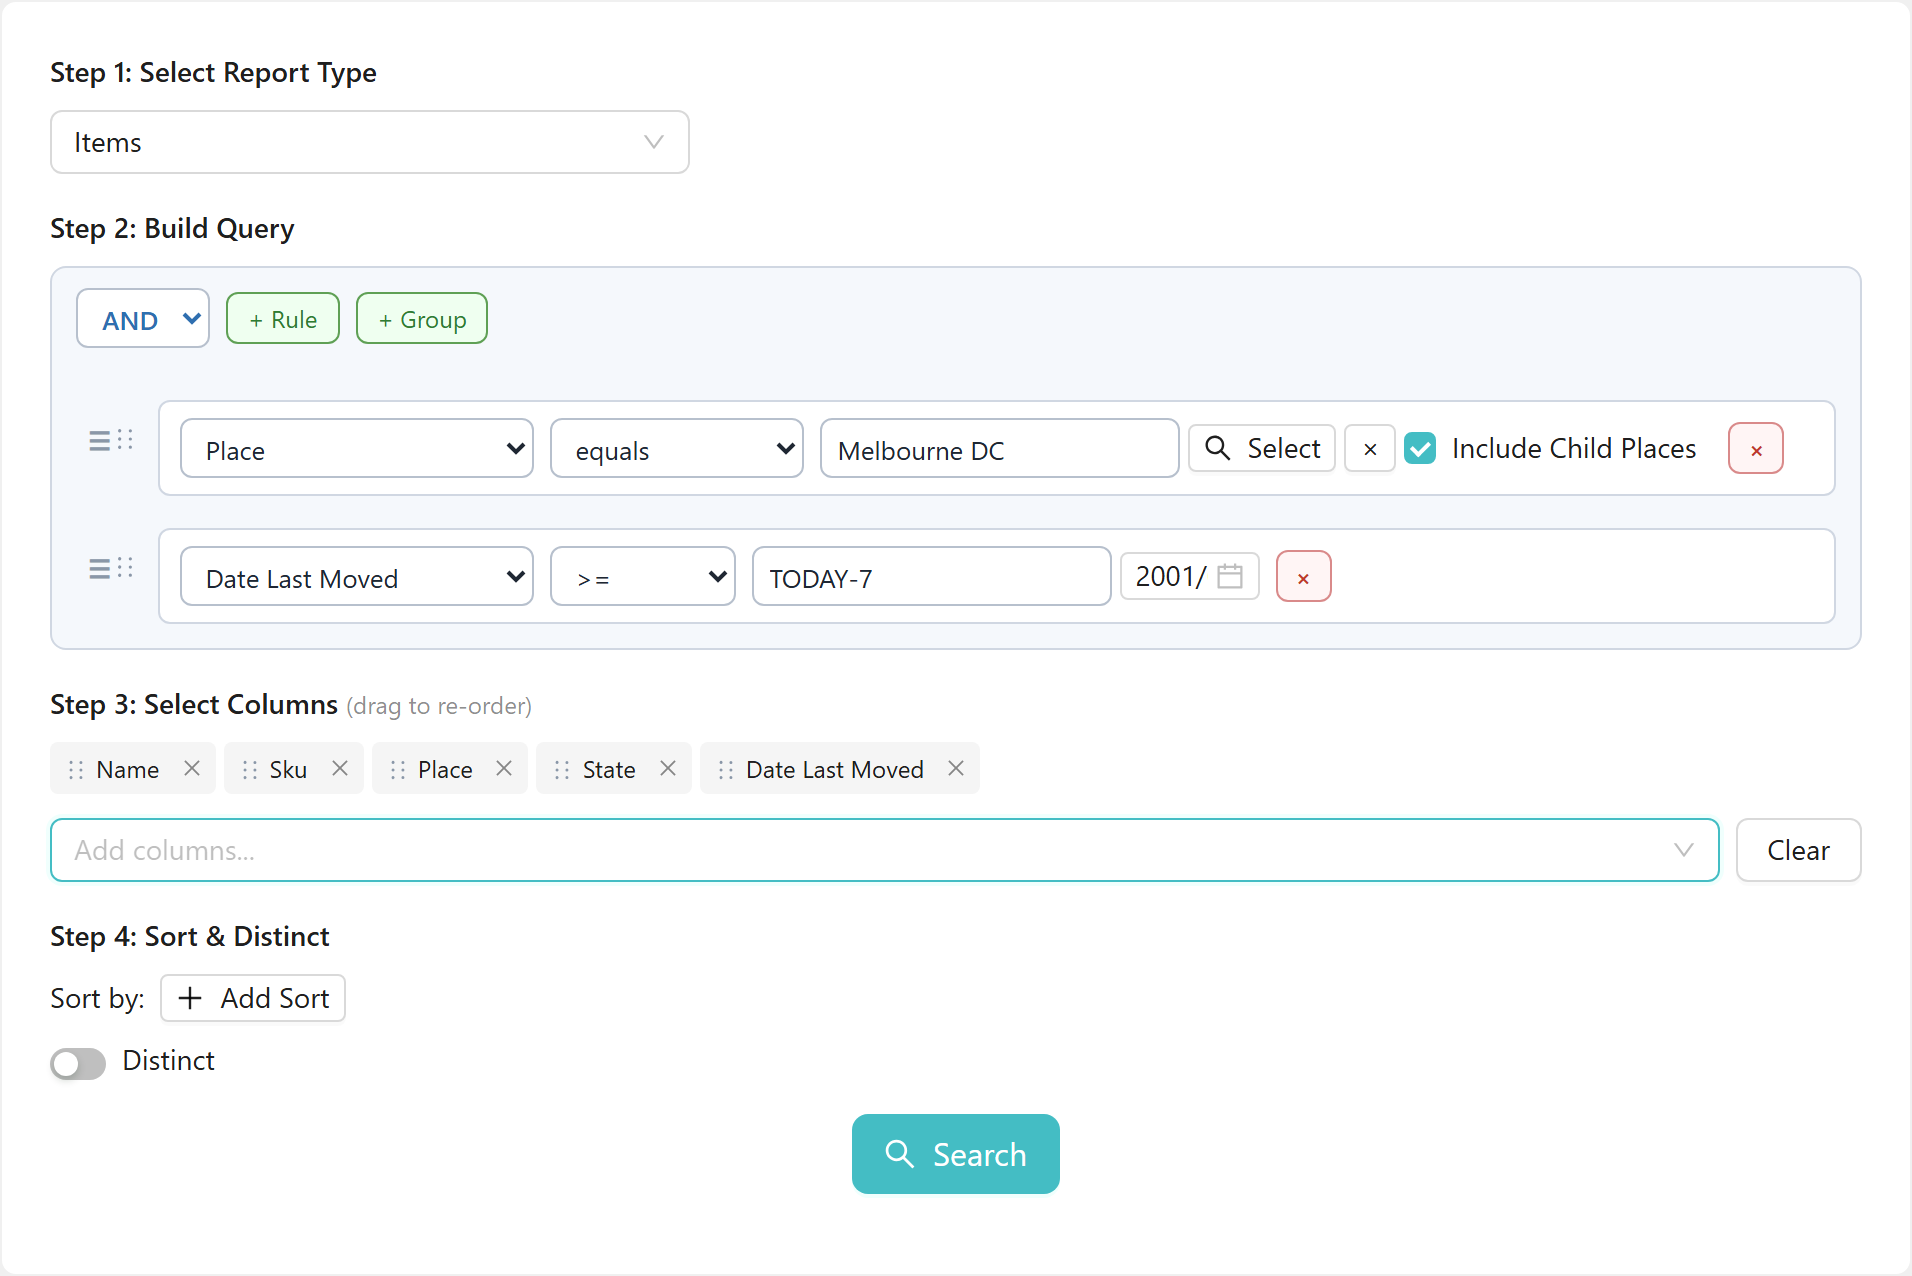
Worked example: Click + Rule. Set the field to Place and the operator to equals, then click Select.
In the Select Place(s) dialog, type Melbourne DC in the search box. When the row appears, click Select.
Include Child Places
Place fields in Advanced reports show an Include Child Places checkbox next to the value. Tick it to include items at sub-places under the selected place, not only items directly at that place.
Worked example: Tick Include Child Places after selecting Melbourne DC.
Date fields and the TODAY keyword
For date fields, the value editor is a free-text input alongside a compact date picker. The input placeholder reads YYYY/MM/DD or TODAY, TODAY-2 and its tooltip reads Type a date (YYYY/MM/DD) or a magic key: TODAY, TODAY-2, TODAY+7. The text input is the source of truth — what you type there drives the filter.
Use TODAY to mean the current date when the report runs. Append -N or +N to go N days into the past or future: TODAY-7 means seven days ago; TODAY+1 means tomorrow.
Worked example: Click + Rule. Set the field to Date Last Moved and the operator to >=, then type TODAY-7 in the value box. This matches items moved within the last seven days.

For the full list of operators, date keywords, and text-match options, see Filters and operators.
Grouping rules with AND / OR
By default all rules in a group are joined by AND. To match records that satisfy one condition or another, click + Group to add a nested group and set its combinator to OR.
The nested group has its own AND/OR toggle, + Rule and + Group buttons, and a red × to remove the entire group.
Example: To find items in Melbourne DC that are either Missing or Consumed, build:
- Root group (AND): Place equals Melbourne DC
- Nested group (OR): State equals Missing / State equals Consumed
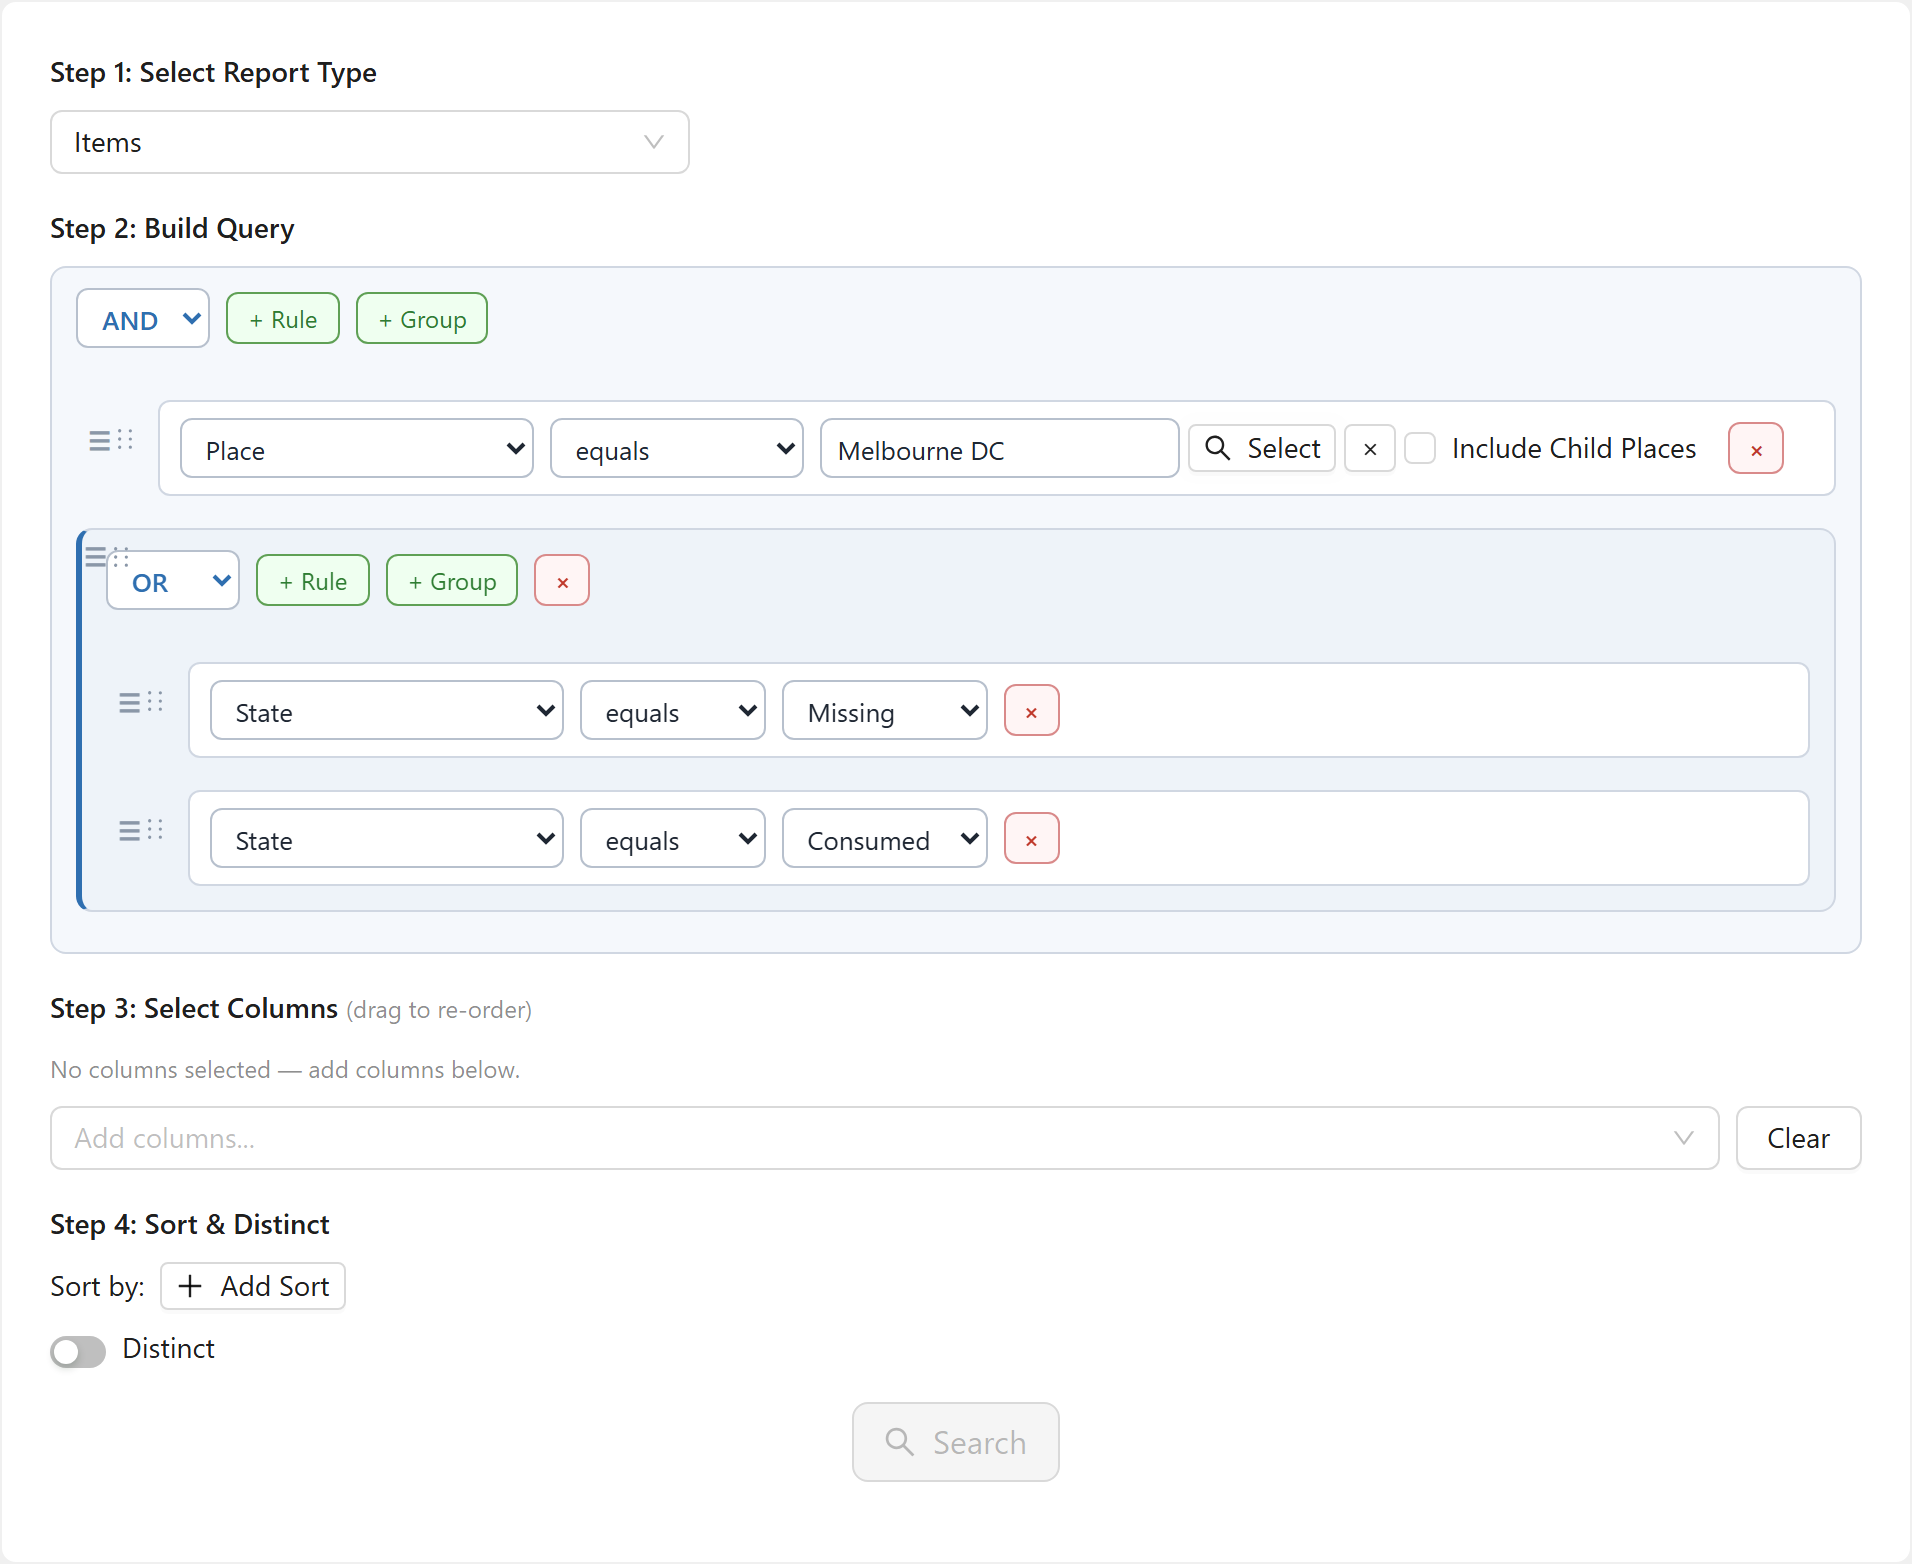
Every rule — and every group except the outermost one — has a six-dot drag handle on the left. Drag a rule handle to reorder it within its group, or to move the rule into a different group. Drag a group handle to reposition the entire nested group. Hovering a handle shows the tooltip: Drag to reorder / move between groups on rule handles; Drag group on group handles.
Step 3: Select columns
The Step 3: Select Columns card subtitle reads (drag to re-order).
Click the Add columns... picker to choose which fields appear in the results and in any export. Options are grouped by category (for example, Item or Extended Properties). Each column you select appears as a draggable tag above the picker, in the order it will appear in the results table and export.
To reorder columns, drag the six-dot handle on a tag (tooltip: Drag to reorder columns). To remove a single column, click its ×. To remove all columns at once, click Clear.
The Search button becomes active as soon as at least one column is added.
Worked example: Add the columns Name, Sku, Place, State, and Date Last Moved in that order.
Step 4: Sort & Distinct
Sorting
In the Sort by: row, click + Add Sort to add a sort rule. Each sort row has:
- A Sort field select — only your chosen columns are available
- A direction select — ASC (ascending) or DESC (descending)
- A bin icon to delete the sort rule
You can add more than one sort row to break ties between equal values.
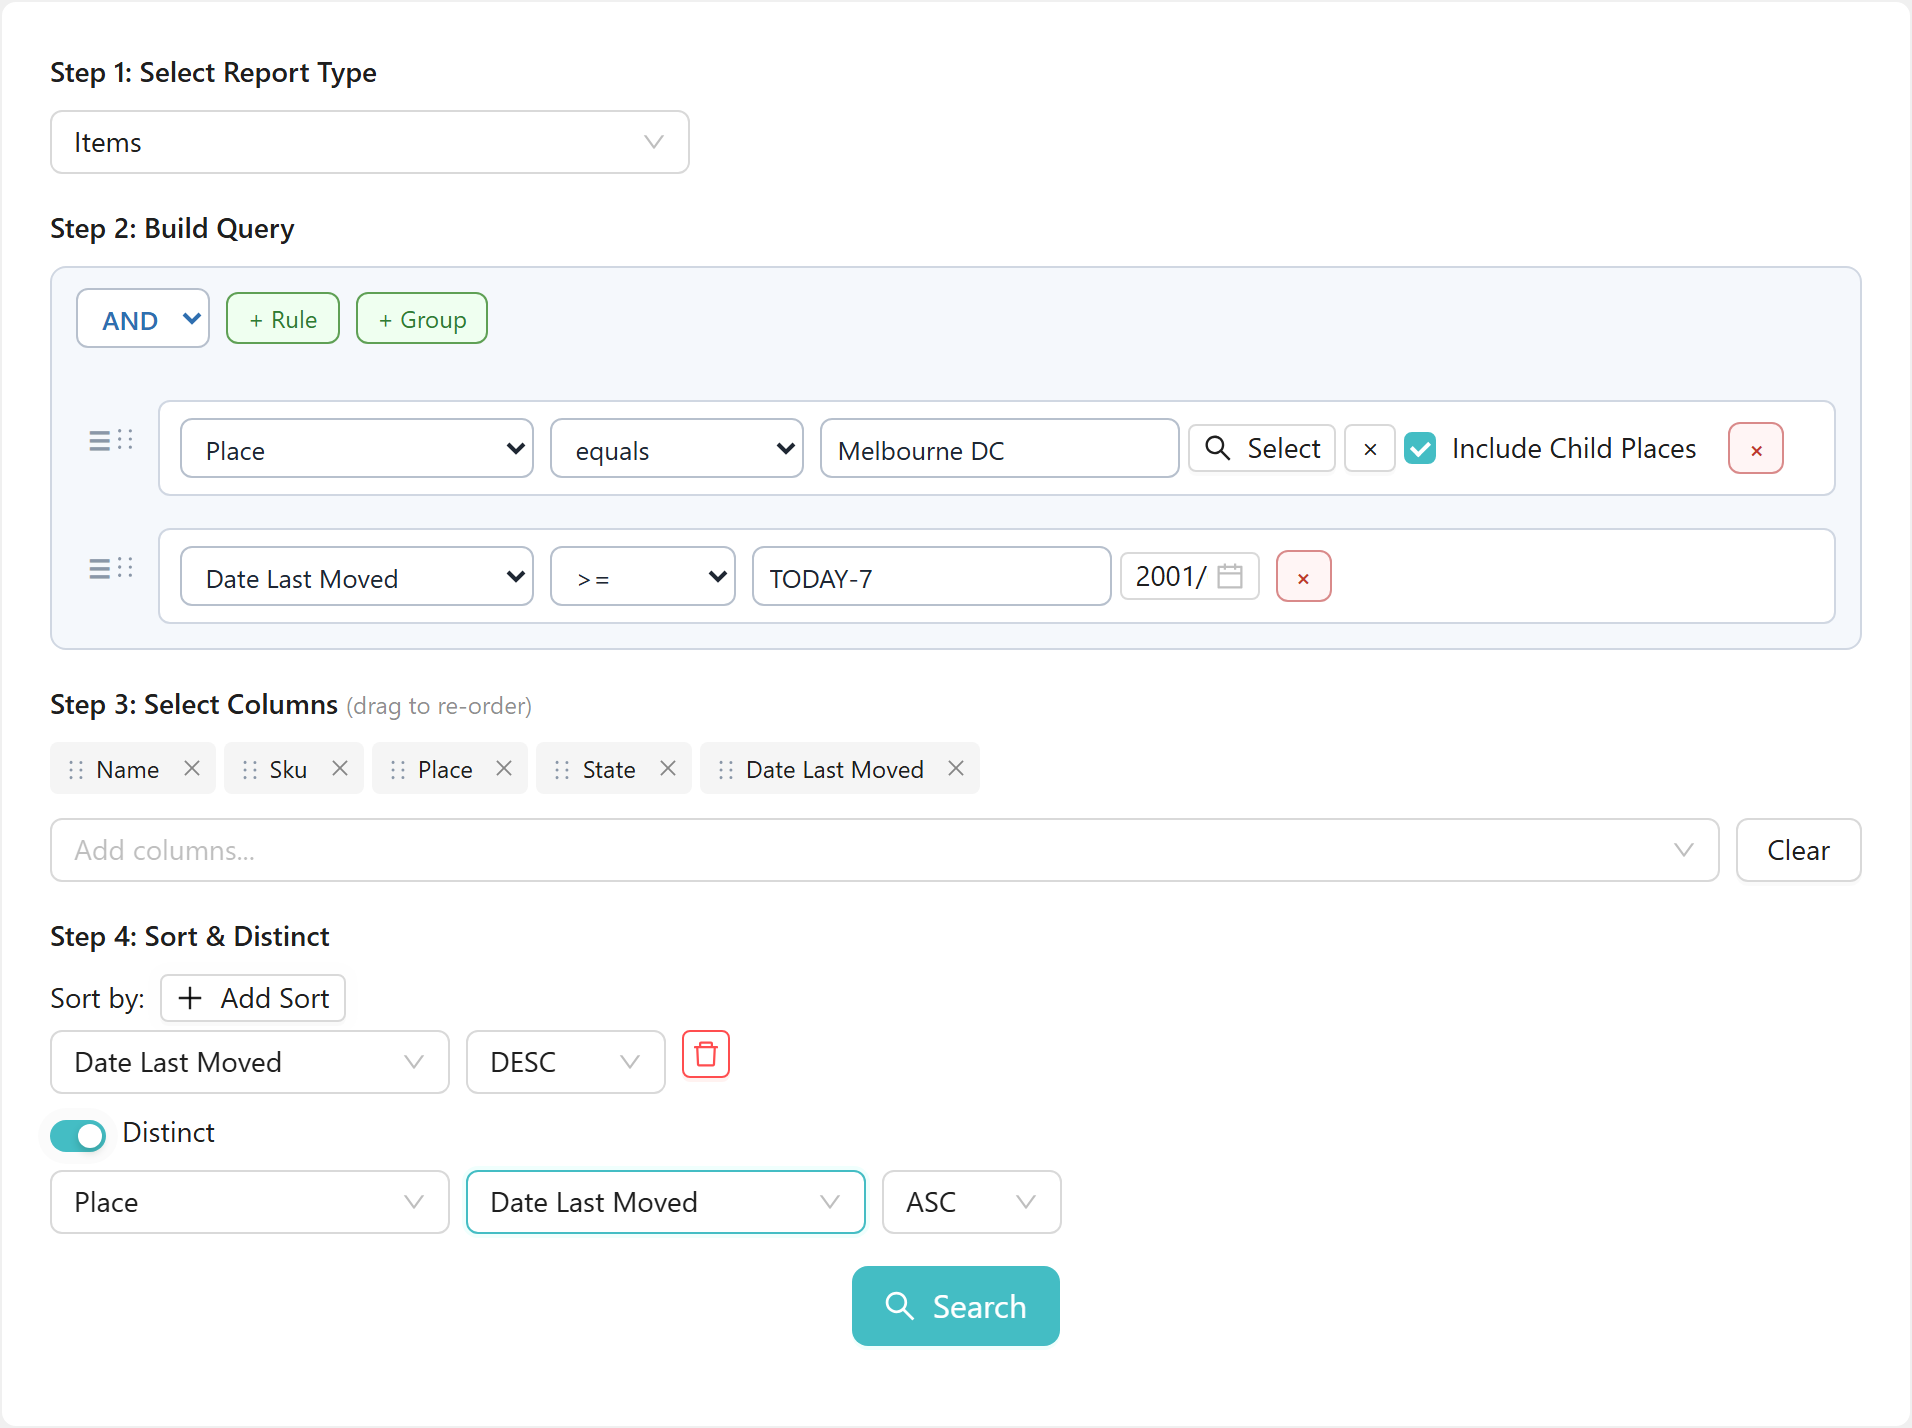
Worked example: Click + Add Sort. Set the field to Date Last Moved and the direction to DESC.
Distinct
Toggle the Distinct switch to deduplicate results. When enabled, two additional selects appear: Distinct by (the field used to identify duplicates, restricted to your selected columns) and Distinct sort by with a direction select (also restricted to your selected columns). The Search button stays disabled until both fields are set.
Run the search
The Search button at the bottom of the builder becomes active when:
- A report type is selected, and
- At least one column is chosen
If Distinct is on, both the Distinct by and Distinct sort by fields must also be set before Search becomes active.
Click Search to run the query. The results load below the builder.
For guidance on reading, paging through, and exporting the results, see Results and exports.
Related guides:
- Filters and operators — the full reference for operators, date keywords, and text-match options.
- Results and exports — how to read, page through, and export the results of a custom report.
- Report templates — save and reuse named report configurations using the Save New Report button.