Set up your places
Every place requires a Place template. If you have not created one yet, follow these steps first — it takes about a minute.
A place is any physical location where items are tracked — a distribution centre, a warehouse floor, a bay, a shelf. The portal models locations as a tree, so item counts and movements roll up from bay level all the way to site level.
This guide builds a three-level tree on camera: Melbourne DC at the root, Warehouse A beneath it, and Receiving Bay beneath that.
Background: Places & the hierarchy explains the tree model and why the parent–child structure matters for inventory counts and movements.
Before you start — create a Place template
Place templates work exactly like Item templates (see Create a template with extended properties), but with Template Type set to Place. This guide uses a template called Demo Site. If it does not exist in your tenant yet:
- In the sidebar, expand Manage Templates and select Templates.
- Click Add to open the New Template form.
- Set Name to
Demo Siteand Template Type to Place — no extended properties are needed for this walkthrough. - Click Create. The template is now available in the Place Template picker.
Create the root location
Step 1 — Open the Add Place form
In the sidebar, expand Places and select Places. Click Add Place to open the Add Place form.
Step 2 — Fill in Melbourne DC
| Field | Value | Note |
|---|---|---|
| Name | Melbourne DC | Required |
| Description | (optional) | Free text |
| Parent Place | (leave empty) | Leaving this empty places Melbourne DC directly under your organisation's root; the Parent column will show your organisation's name |
| Place Type | DC | Optional — identifies the location role |
| Place Template | Demo Site | Required. "Place Template is required!" if left blank. |
Leave ExternalRef and Channel empty for now.
Fields such as Tag Type, Tag Number, Place Code, and GLN are shown or hidden based on your tenant's configuration. If you do not see them, your deployment does not use them — no action needed.
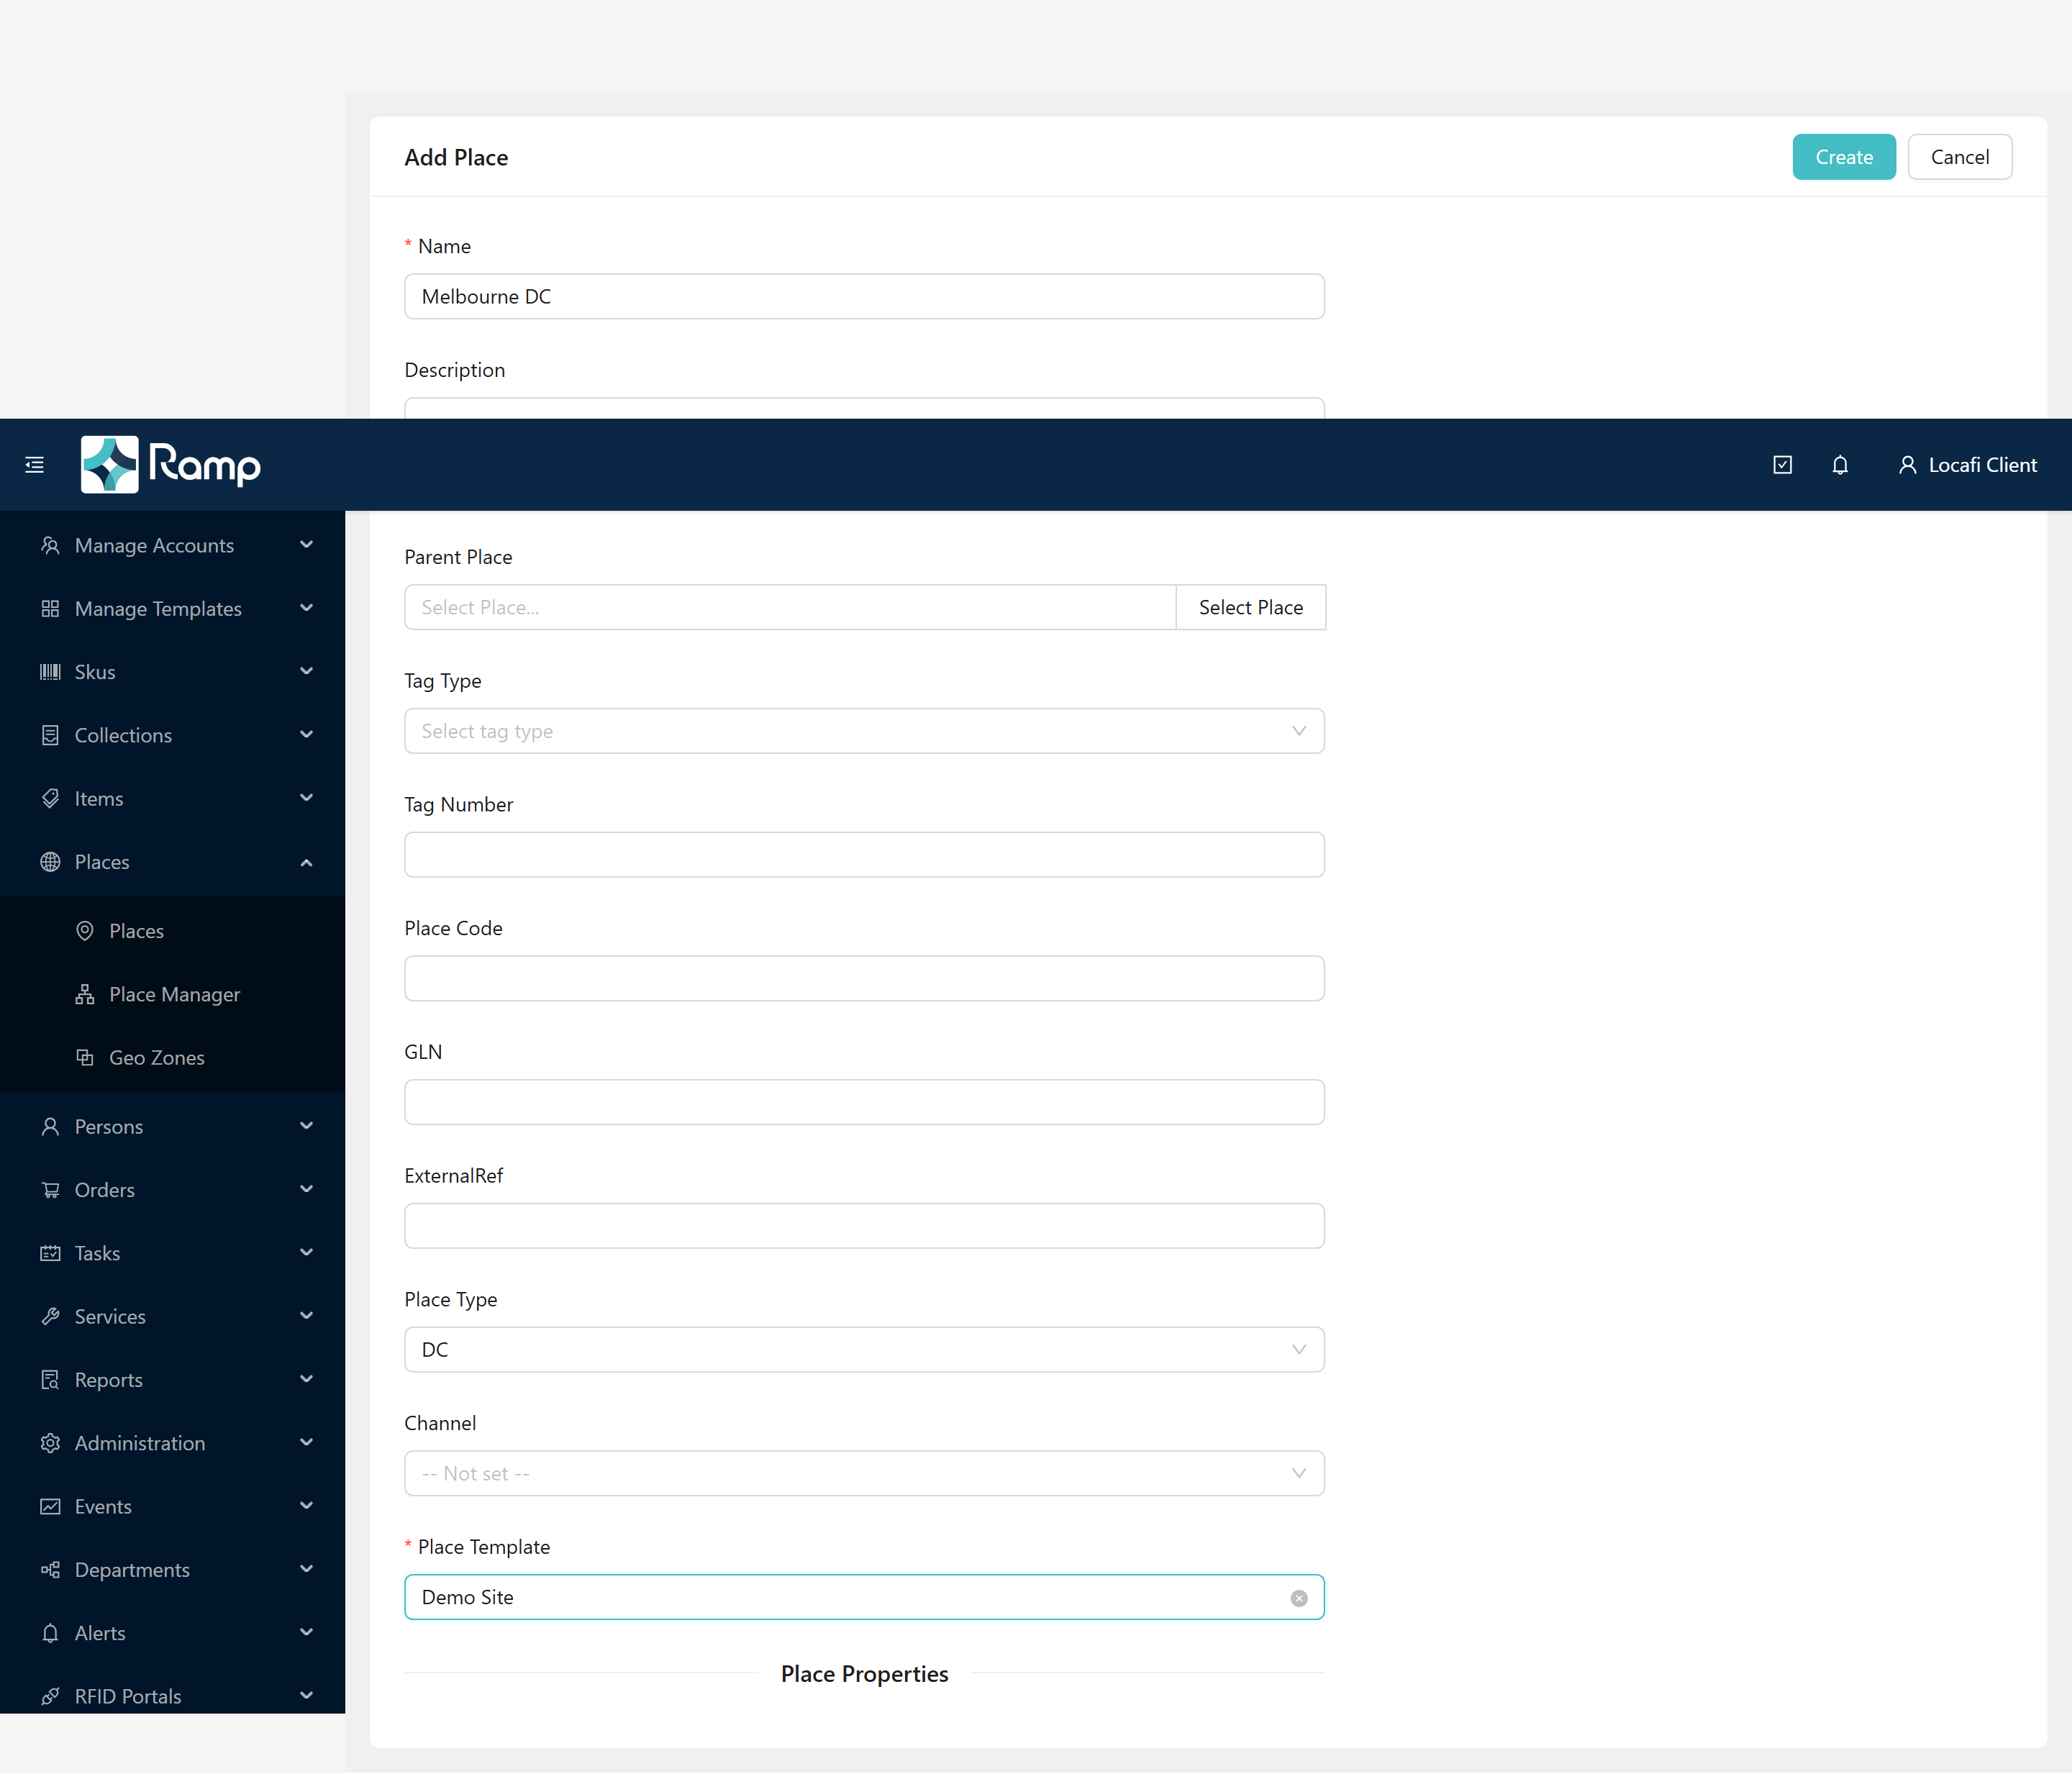
Step 3 — Create Melbourne DC
Click Create in the card header. The portal shows "Place Created!" and returns you to the Places list.
Add Warehouse A
Step 4 — Open the Add Place form again
Click Add Place from the Places list.
Step 5 — Fill Warehouse A and choose a parent
| Field | Value | Note |
|---|---|---|
| Name | Warehouse A | Required |
| Parent Place | Melbourne DC | Click Select Place, search for Melbourne DC, click Select in its row |
| Place Type | Warehouse | Optional |
| Place Template | Demo Site | Required |
The Select Place button opens a picker dialog. Search by name, then click Select in the matching row to confirm the parent.
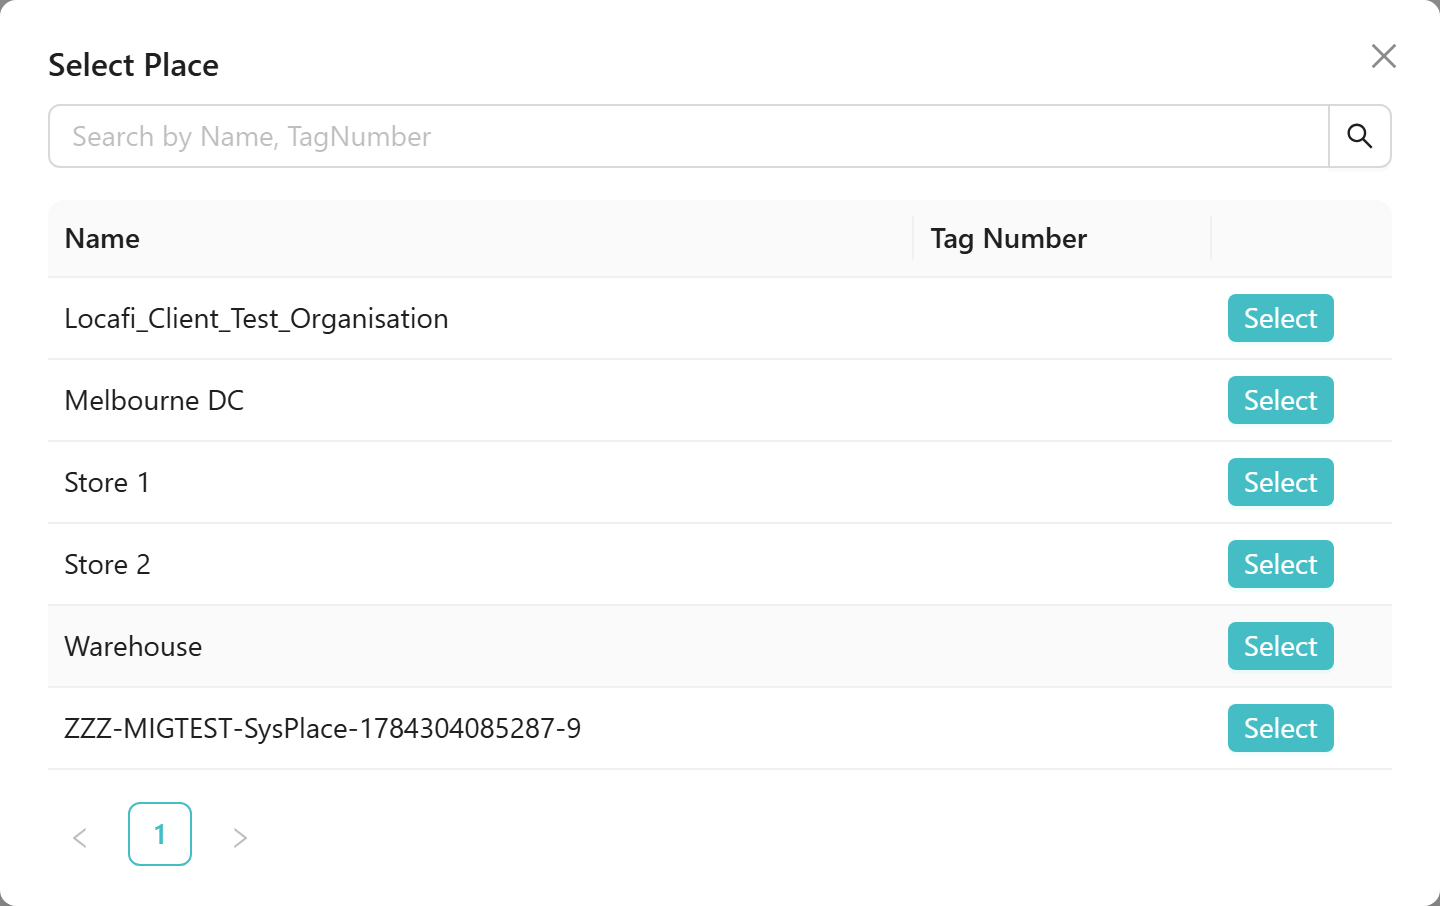
After selecting Melbourne DC the parent field shows its name. Complete the form and click Create.
Add Receiving Bay
Repeat the same steps for the third level:
| Field | Value |
|---|---|
| Name | Receiving Bay |
| Parent Place | Warehouse A |
| Place Template | Demo Site |
Click Create. The tree now has three levels: Melbourne DC → Warehouse A → Receiving Bay.
The Places list confirms the hierarchy — the Parent column shows which location each place sits under.
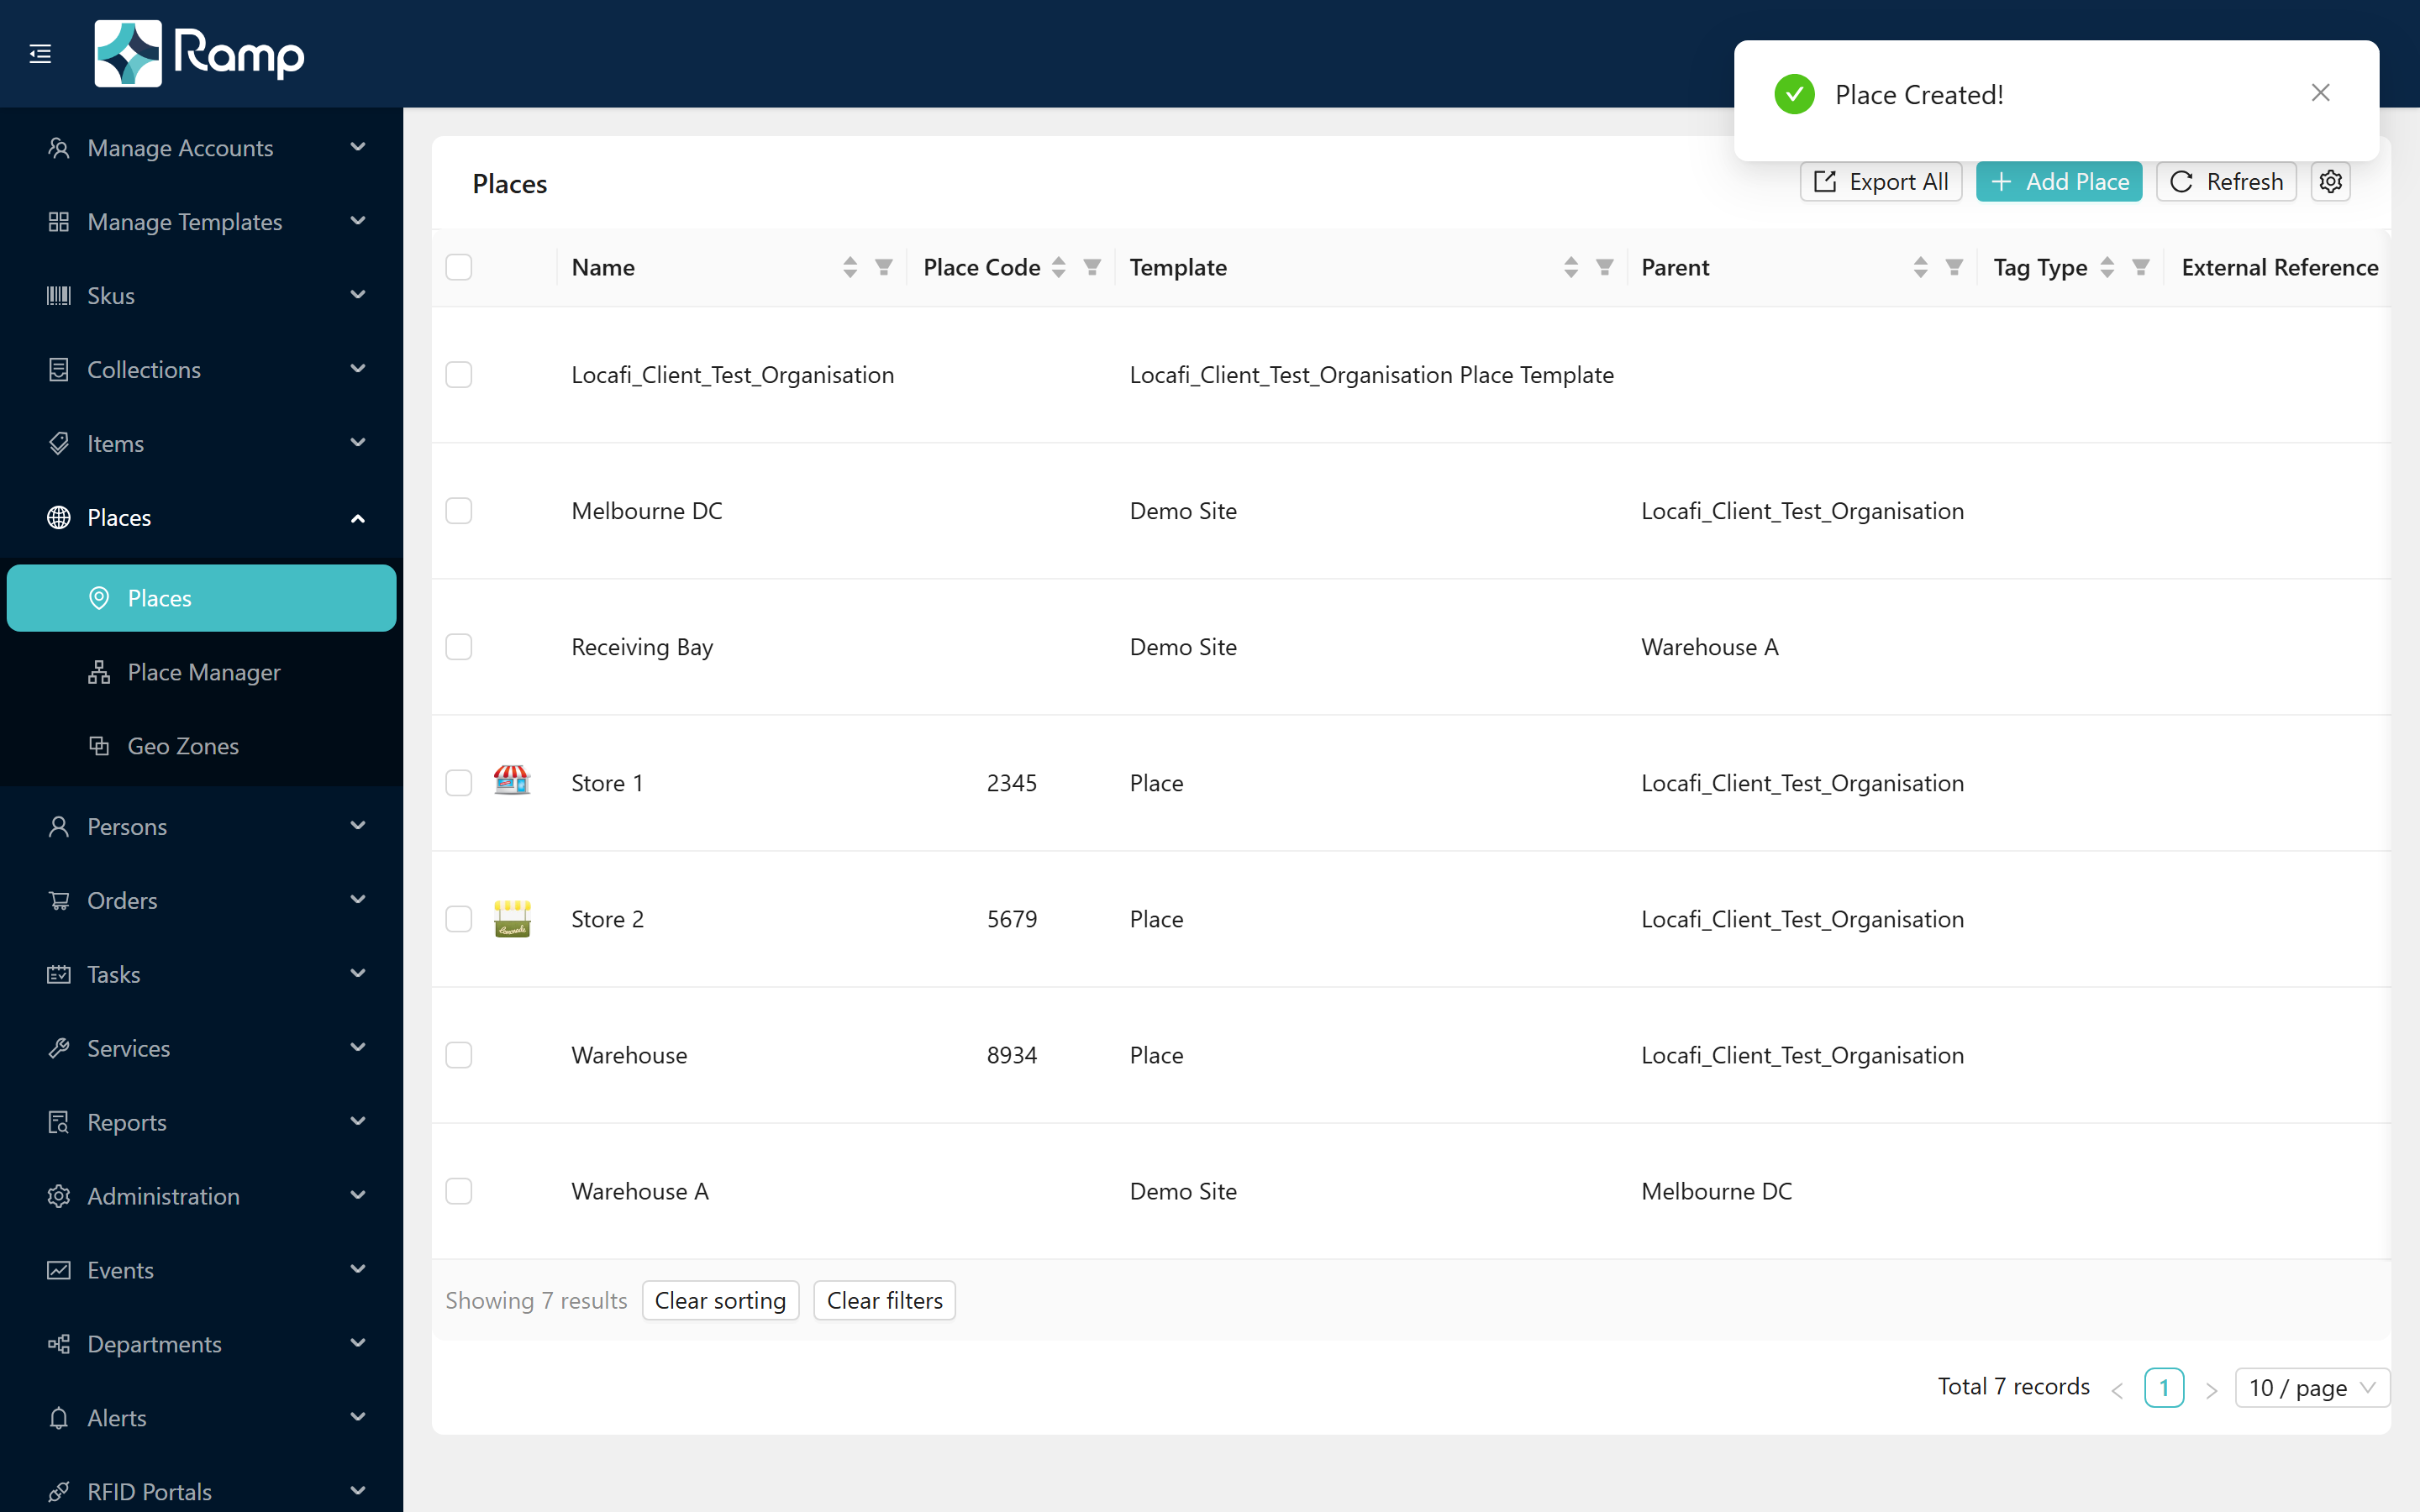
View the hierarchy in Place Manager
In the sidebar, expand Places and select Place Manager to see the live tree with all nodes expanded.
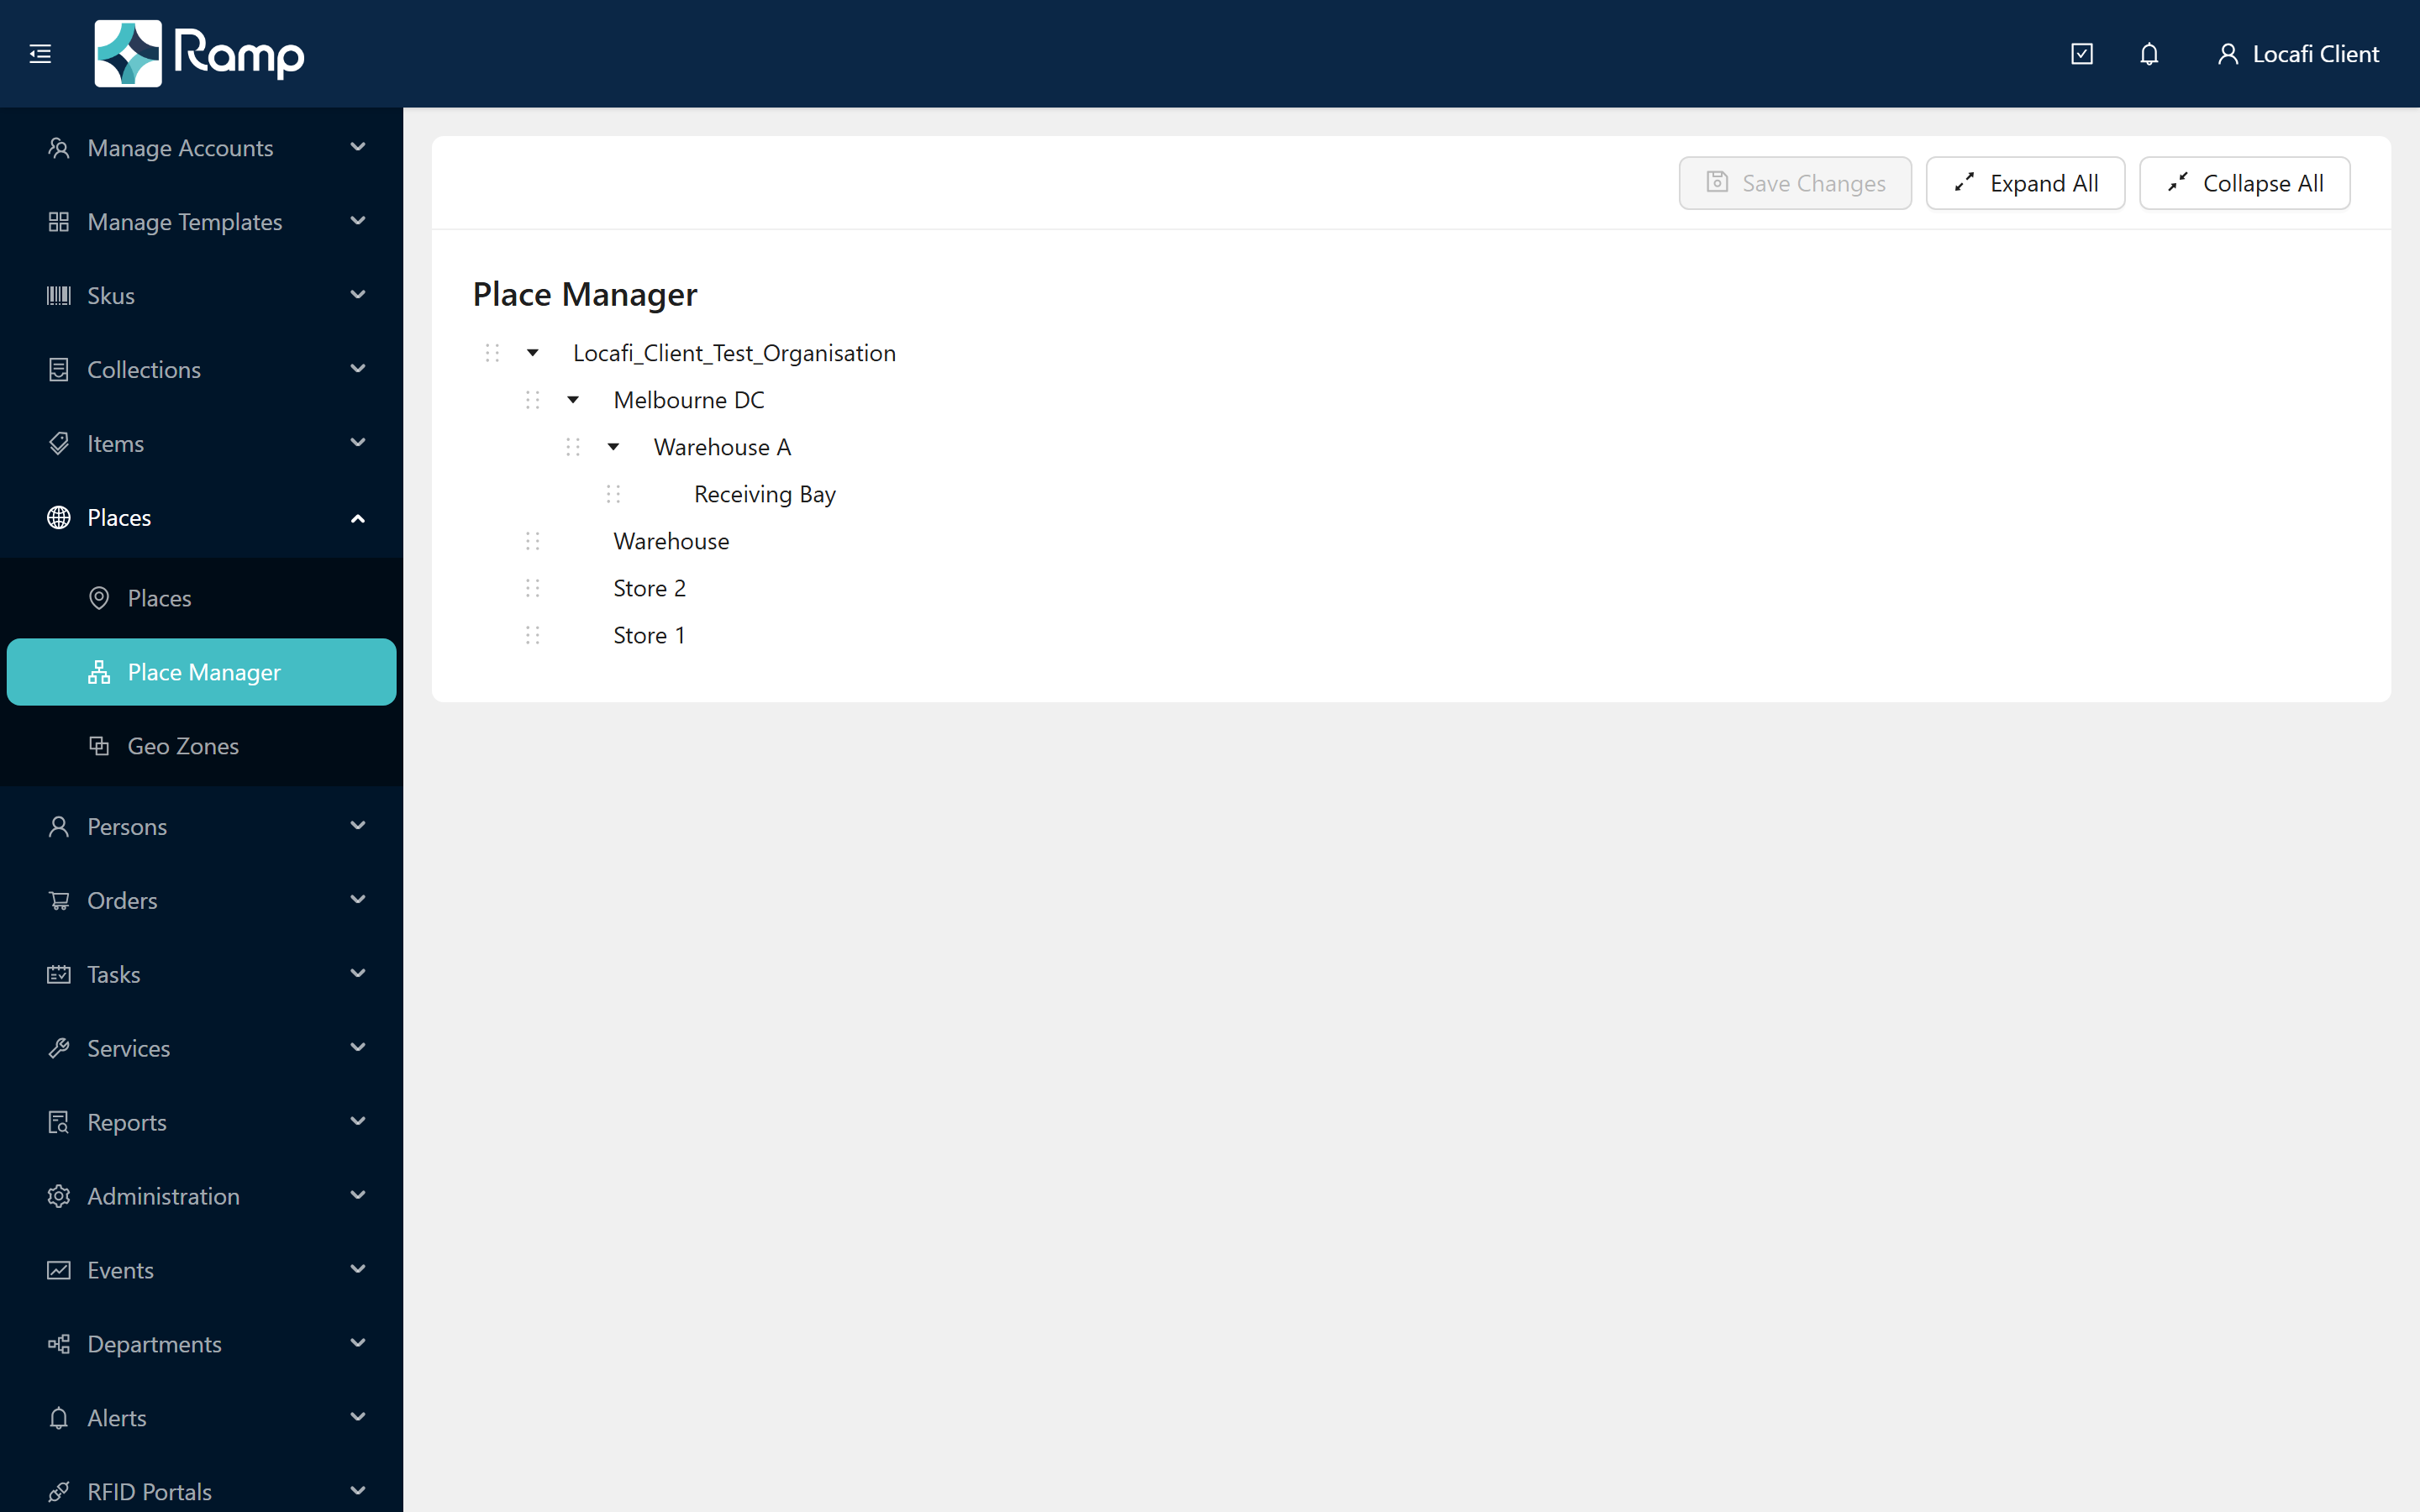
Dragging a node in Place Manager moves it under a new parent immediately — this affects all users and reports. Use it only when you intend to restructure the hierarchy. See Places & the hierarchy for the impact on item counts and movements.
Next step: Create items — place items at Receiving Bay and track their movements through the tree.
Related: Places & the hierarchy · Working with lists · Create items