Set up reference data
Reference data values populate the classification dropdowns on the SKU form. Complete this setup first, then move on to Build your SKU catalogue.
The portal lets you define reusable classification values — brands, categories, sizes, colours, and more — that appear as dropdowns when you create or edit SKUs. This page shows you where they live and how to add them.
Background: Working with lists covers the table controls used on every list page.
Where to find it
In the sidebar, expand Skus and select SKU Properties. The page heading is also SKU Properties.
The sidebar item is SKU Properties (under the Skus group) and the page heading is also SKU Properties — they are the same. Users sometimes expect to find the SKU catalogue here; the SKU catalogue lives on a separate page.
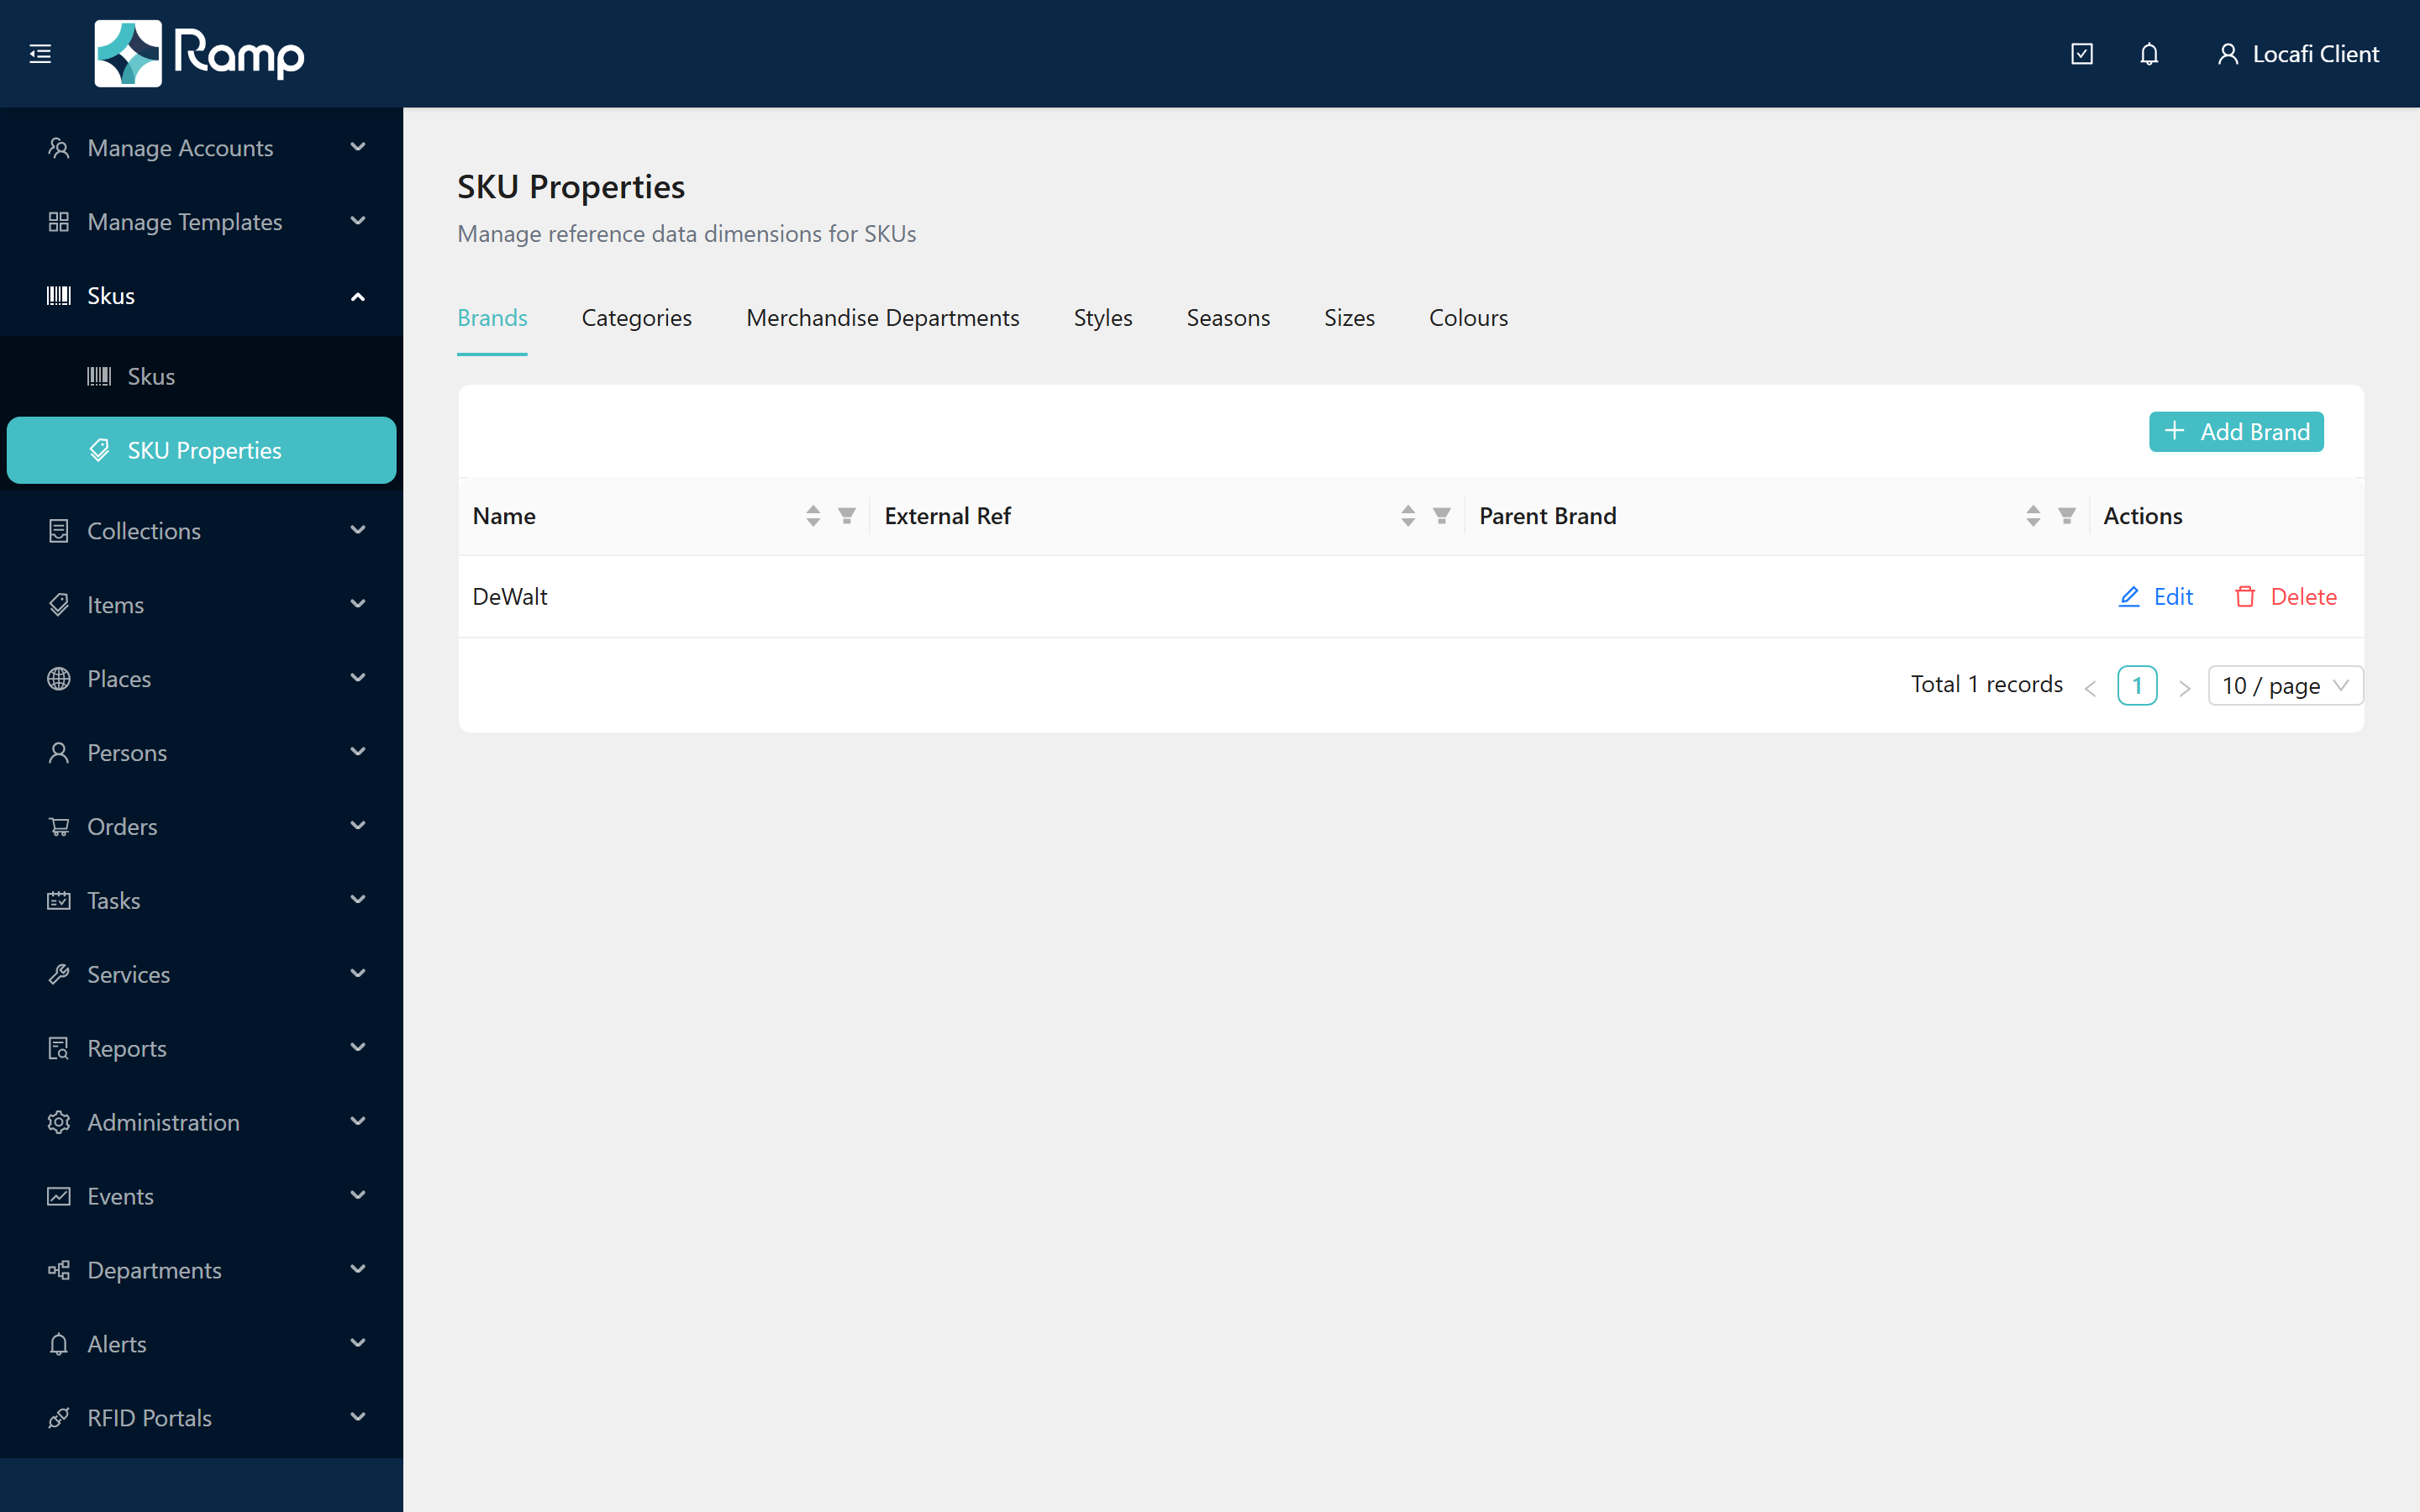
The page has seven tabs: Brands, Categories, Merchandise Departments, Styles, Seasons, Sizes, and Colours. Each tab is an independent table with its own Add, Edit, and Delete controls.
Worked example — adding a brand
Brands appear as a classification dropdown on the SKU form. Here is the complete Add workflow; every other tab follows the same pattern.
Step 1 — Click Add Brand
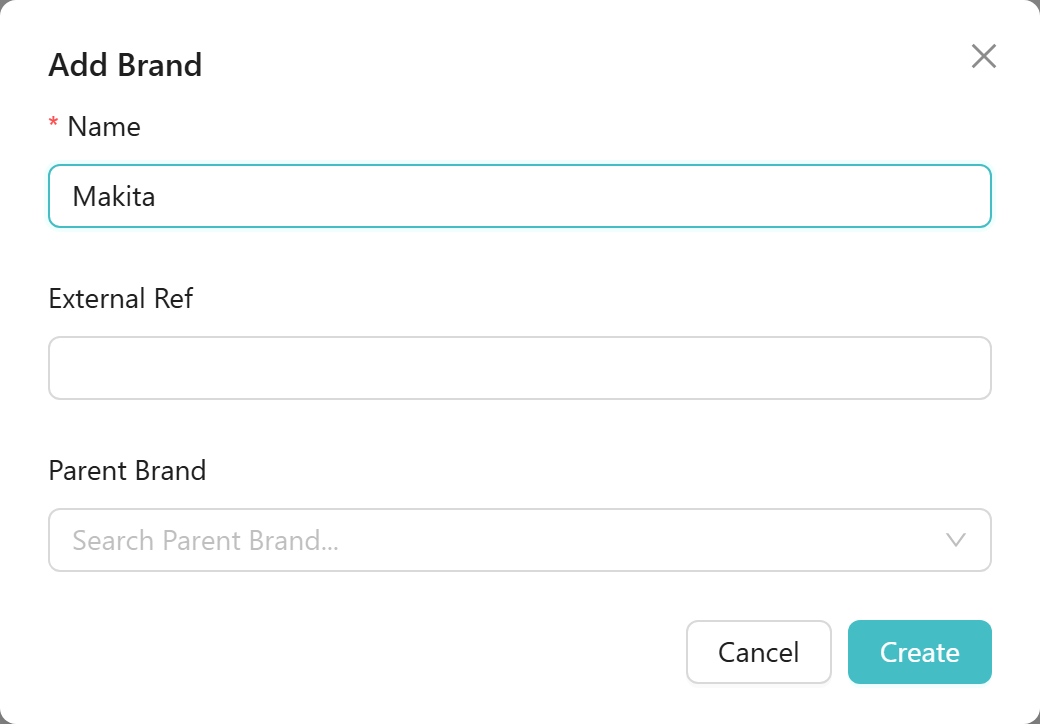
On the Brands tab, click Add Brand in the top-right of the table. The Add Brand modal opens.
Step 2 — Fill in the fields
| Field | Required | Notes |
|---|---|---|
| Name | Yes | — |
| External Ref | No | Your ERP or catalogue reference code |
| Parent Brand | No | Lets you nest brands in a hierarchy; the dropdown searches existing brands and excludes the brand being edited so you cannot create a circular reference |
Step 3 — Create
Click Create. The portal shows the "Created successfully" toast and the new brand appears in the Brands list.
Editing and deleting
To edit a brand, click Edit in its row. The modal title changes to Edit Brand and the confirm button changes to Save.
To delete a brand, click Delete in its row. The portal prompts "This record will be deleted." — click Delete to confirm.
Reference — all seven tabs
Most tabs follow the Name + optional External Ref pattern. The table below lists all fields and calls out the exceptions.
| Tab | Fields | Notes |
|---|---|---|
| Brands | Name (req), External Ref, Parent Brand | Parent Brand nests brands in a hierarchy; excludes self on Edit |
| Categories | Name (req), External Ref, Parent Category | Parent Category nests categories; excludes self on Edit |
| Merchandise Departments | Code (req), Name (req) | No External Ref field |
| Styles | Name (req), External Ref | — |
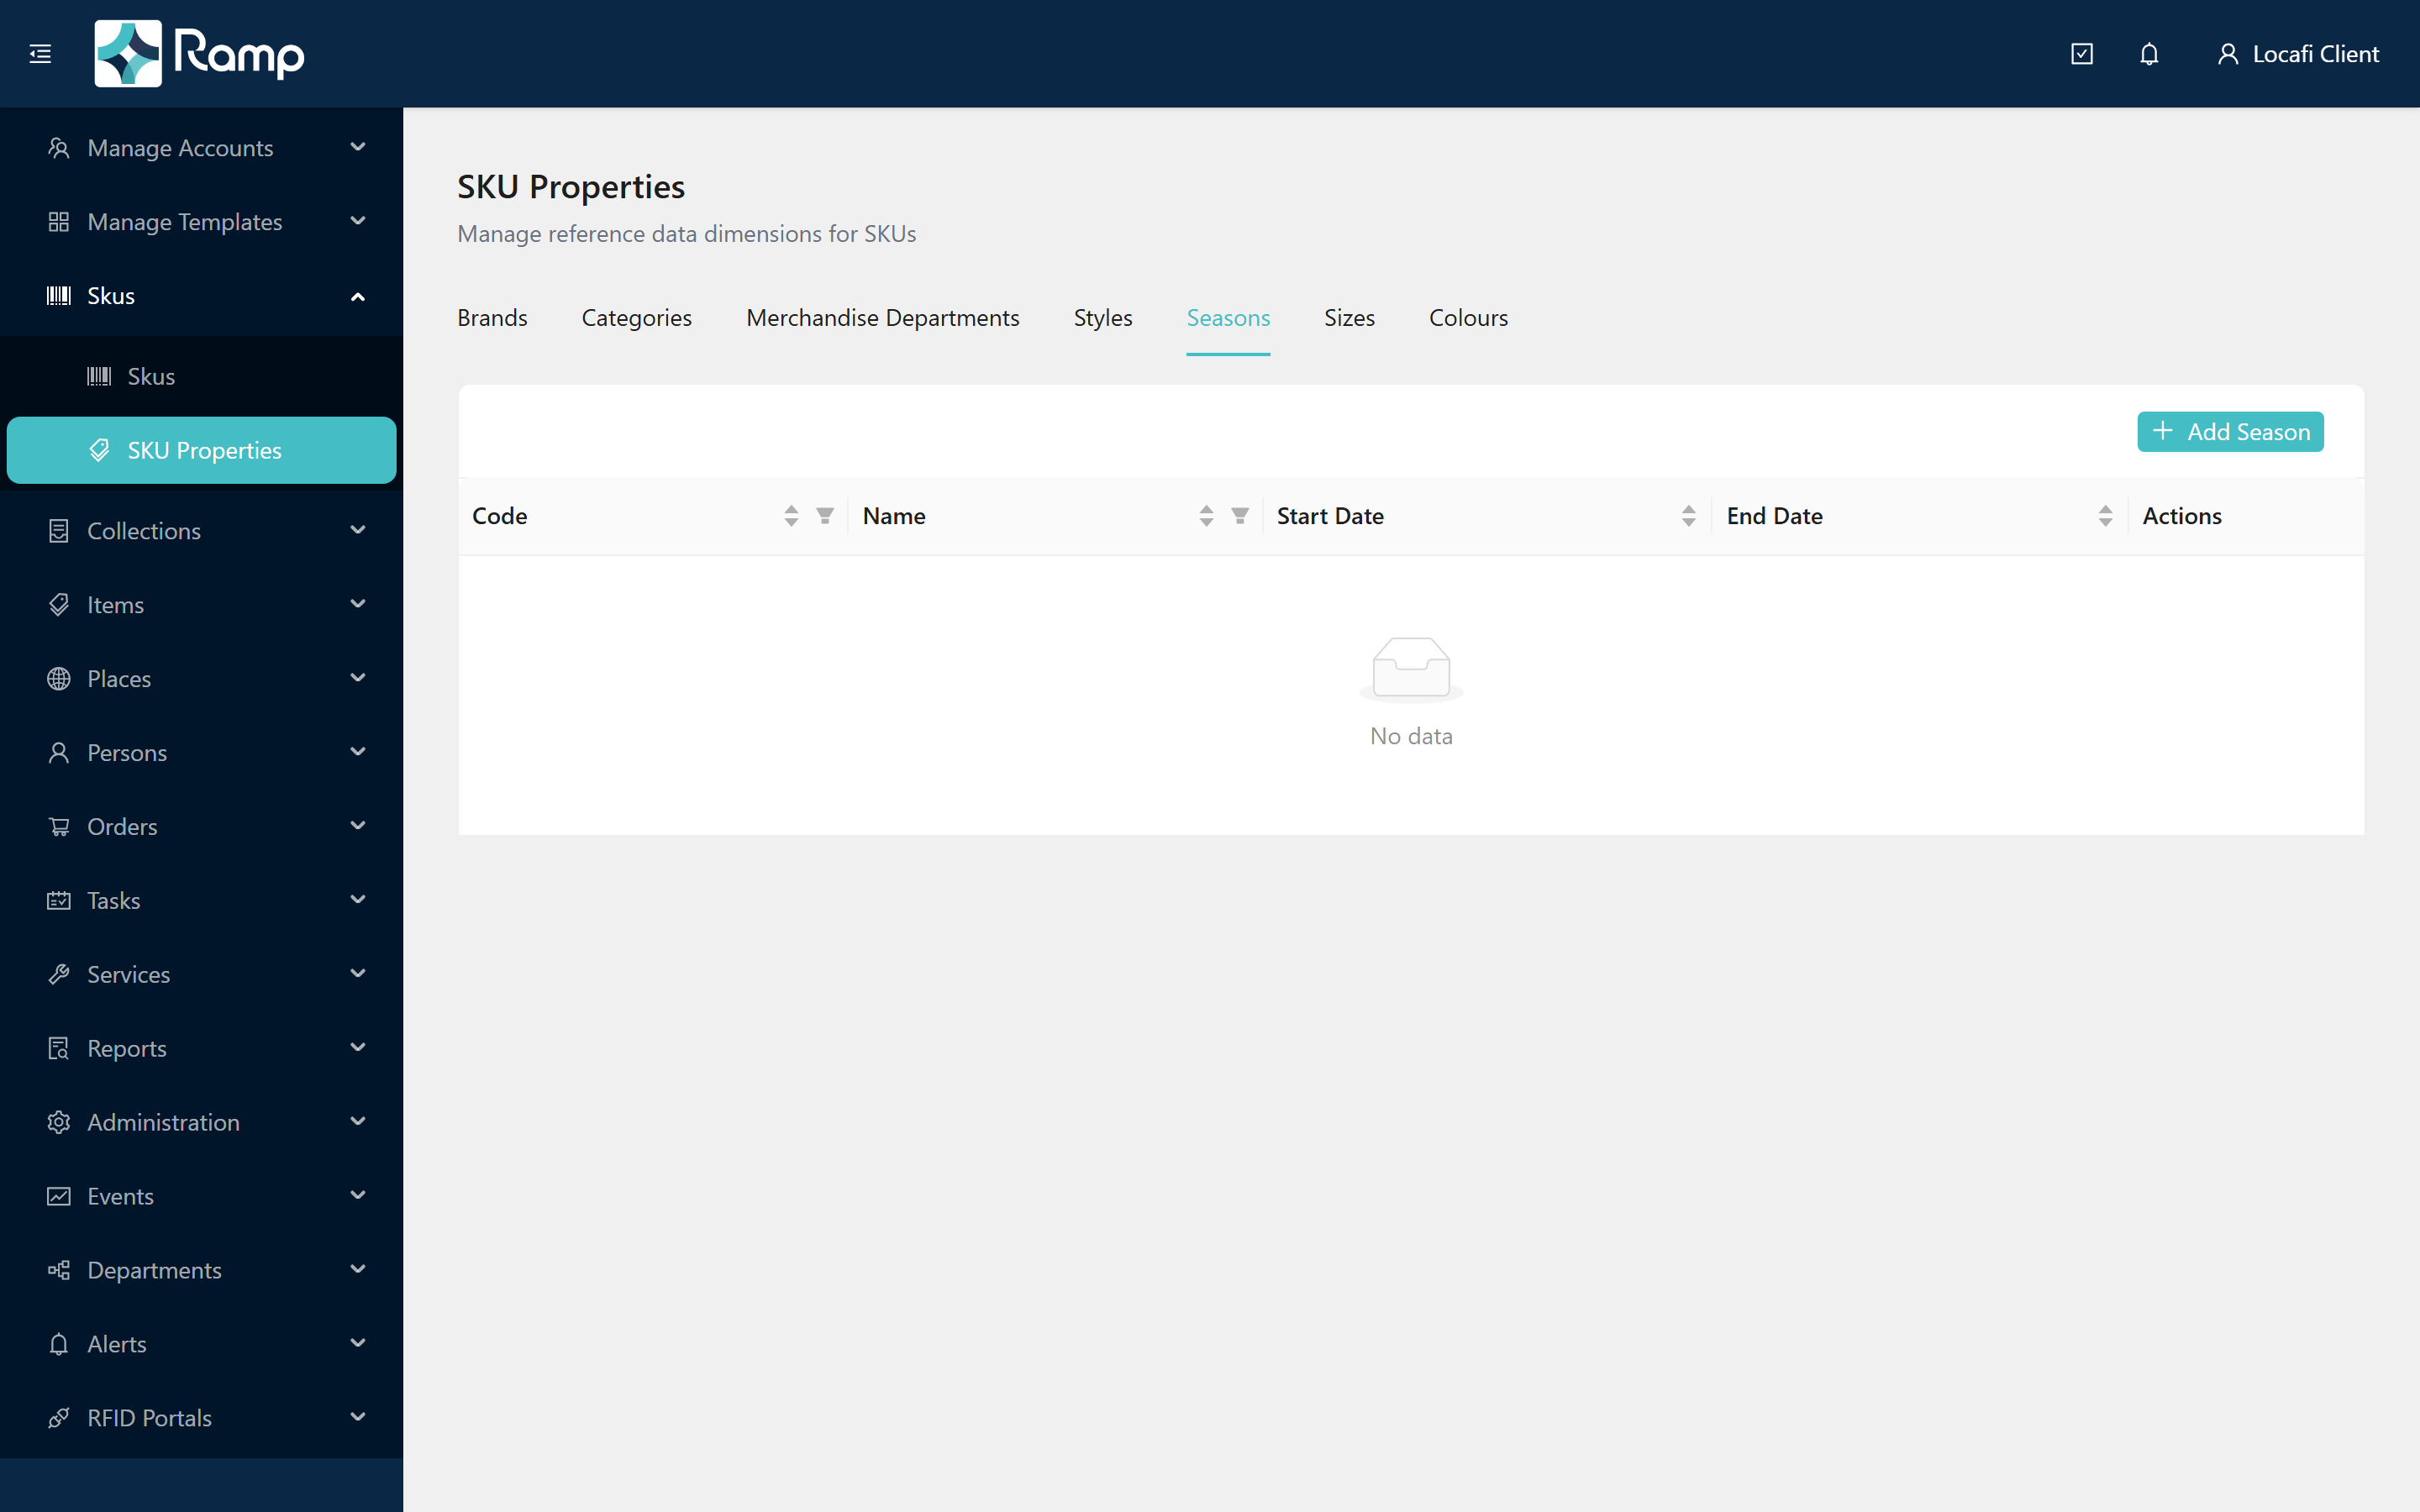
| Seasons | Code (req), Name (req), Start Date, End Date | End Date must be on or after Start Date; the portal shows "End Date must be on or after Start Date" if you enter an earlier date |
| Sizes | Name (req), External Ref | — |
| Colours | Name (req), External Ref | — |
The Seasons tab is the only one with date fields and a code-first layout. Its column structure is Code / Name / Start Date / End Date, rather than the Name / External Ref layout used by every other tab.
Once your reference data is in place, the values appear as classification dropdowns on the SKU form. See Build your SKU catalogue to put them to use.
Related: Create a template with extended properties · Working with lists