Build your SKU catalogue
SKUs require an Item template. Complete Create a template with extended properties first, then return here.
This guide walks through creating the Makita 18V Drill SKU end-to-end — filling the essentials, setting classification, and then activating it. Activation is the step most people miss: a SKU stays locked in Draft until you explicitly set it to Active.
Creating many SKUs at once? Upload a file for SKUs instead of filling the form per SKU.
Background: SKUs & the product catalogue explains the lifecycle states and what each one allows. Set up reference data covers brands and categories if you have not added them yet.
Create a SKU
Step 1 — Open the New Sku form
In the sidebar, expand SKUs and select SKUs. Click Add SKU to open the New Sku form.
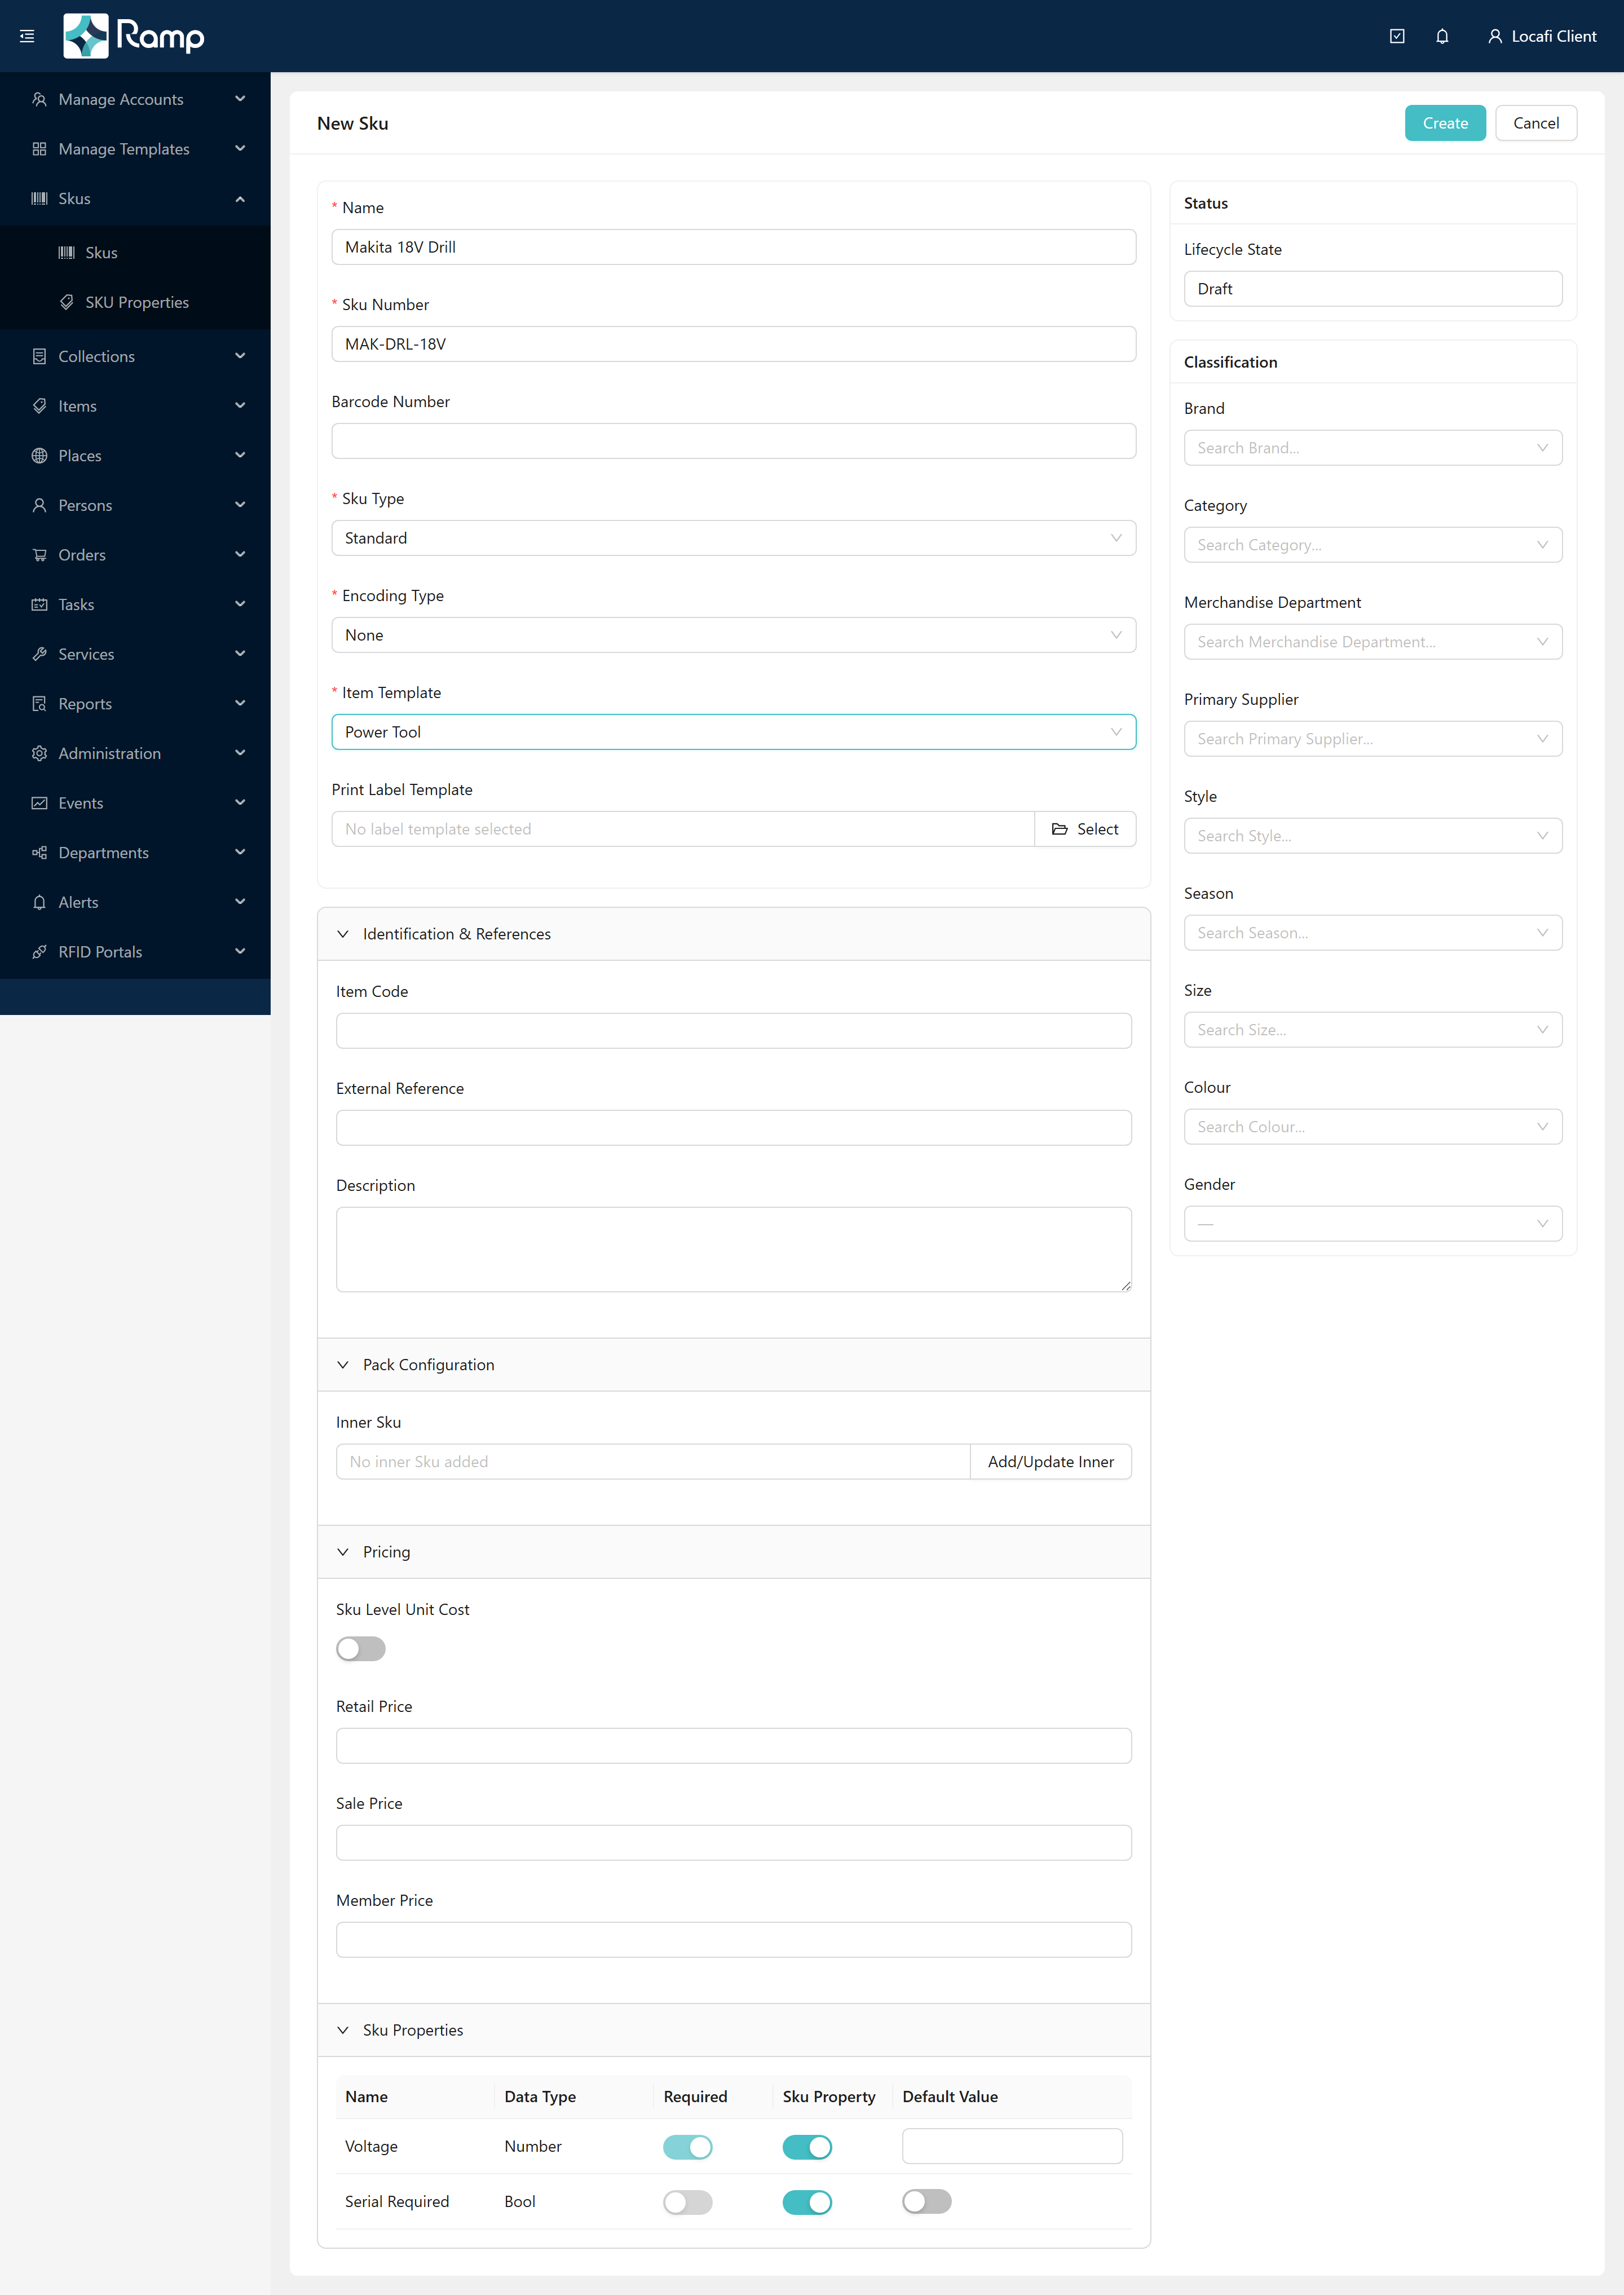
Step 2 — Fill the Essentials
The top card contains the required identifiers:
| Field | Value | Note |
|---|---|---|
| Name | Makita 18V Drill | Required |
| SKU Number | MAK-DRL-18V | Required |
| Barcode Number | (leave blank) | Optional |
| SKU Type | Standard | Required. Variable Percent and Variable Quantity also reveal Lower/Upper Bound fields for weight or count tolerances. |
| Encoding Type | None | Required. Sgtin, Grai, and Custom Prefix reveal prefix fields used for RFID tag-number generation — see SKUs & the product catalogue for how encoding works. |
| Item Template | Power Tool | Required. Auto-selects if only one template exists in your tenant. |
| Print Label Template | (leave blank) | Optional — links a label design to this SKU. |
The right rail shows the Status card with Lifecycle State locked to Draft — all SKUs start in Draft.
Step 3 — Set Classification
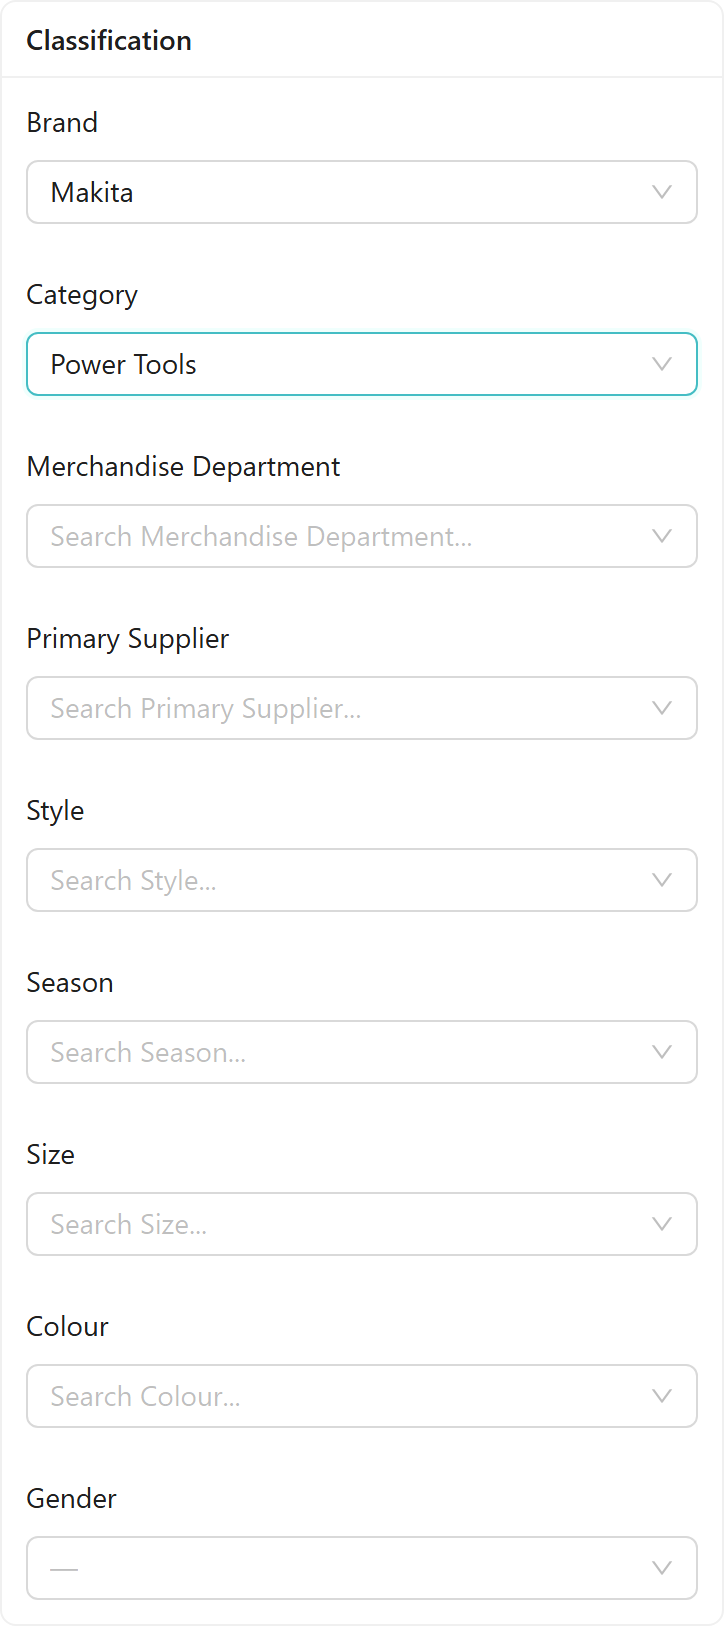
Scroll the right rail to the Classification card. Set Brand and Category (both are searchable dropdowns):
| Field | Value |
|---|---|
| Brand | Makita |
| Category | Power Tools |
Department, Supplier, Style, Season, Size, Colour, and Gender are optional and can be left blank.
If a category does not exist yet, typing in the Category field appends an inline Create new Category "…" option — select it to create the value on the spot without leaving the form.
Step 4 — Review the collapse panels (optional)
Below the Essentials card, four panels are open by default:
- Identification & References — Item Code, External Reference, and Description for cross-system mapping.
- Pack Configuration — links an inner SKU and sets the quantity. One sentence: use this when your outer SKU is a case that contains a separate inner SKU — see the inner/outer section in SKUs & the product catalogue.
- Pricing — the SKU Level Unit Cost switch makes Unit Cost required when on; Retail, Sale, and Member prices are always optional.
- SKU Properties — extended property values inherited from the Power Tool template (Voltage, Serial Required). These carry through to every item created under this SKU.
Open the SKU Properties panel (it is open by default) and fill in the required values the Power Tool template defined:
| Property | Value | Note |
|---|---|---|
| Voltage | 18 | Required Number property |
| Serial Required | (set as desired) | Required Bool toggle — on or off |
These are the required properties your template defined — see Create a template. Leave the other three panels at their defaults.
Step 5 — Create the SKU
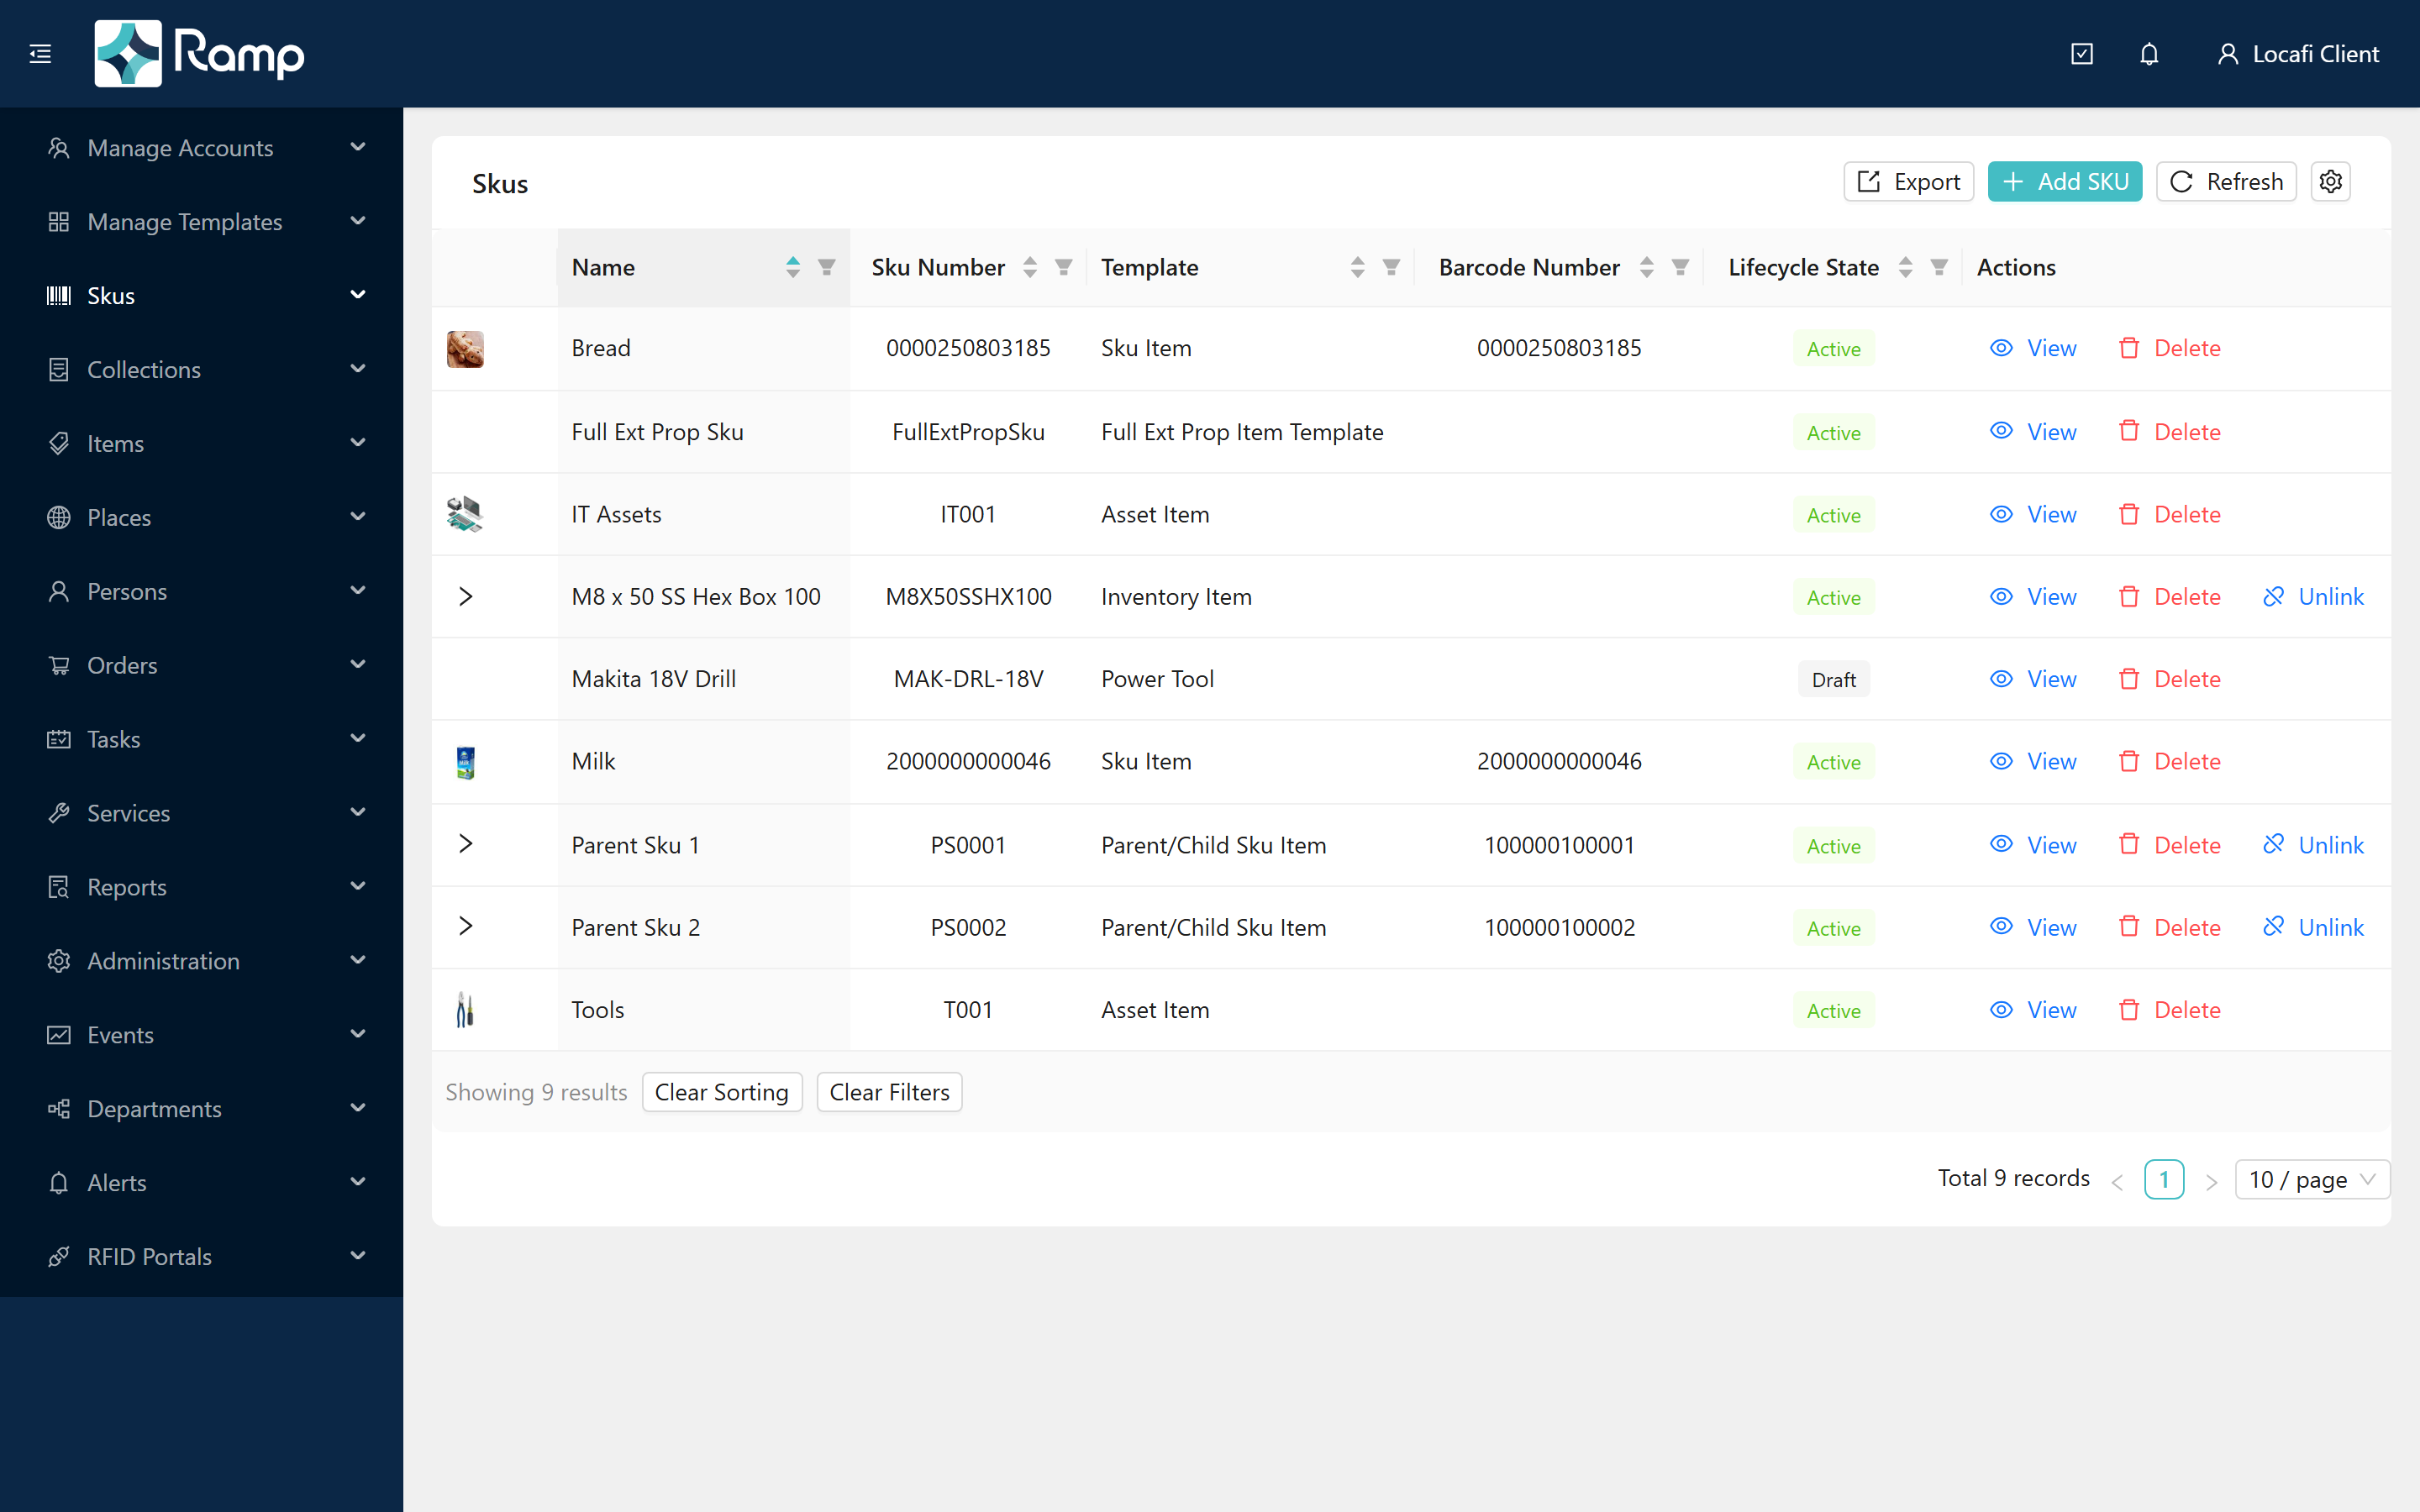
Click Create in the card header. The portal shows the "SKU created successfully." confirmation and returns you to the SKU list. The new row shows a grey Draft badge.
Activate your SKU
A Draft SKU is visible in the catalogue but locked — no items can be received against it and no RFID tags can be generated. You must set it to Active before it is operational.
Creating a SKU and walking away leaves it in Draft. Items received against a Draft SKU will fail. Always complete Steps 6–7 before using the SKU in operations.
Step 6 — Open the SKU and review the warning
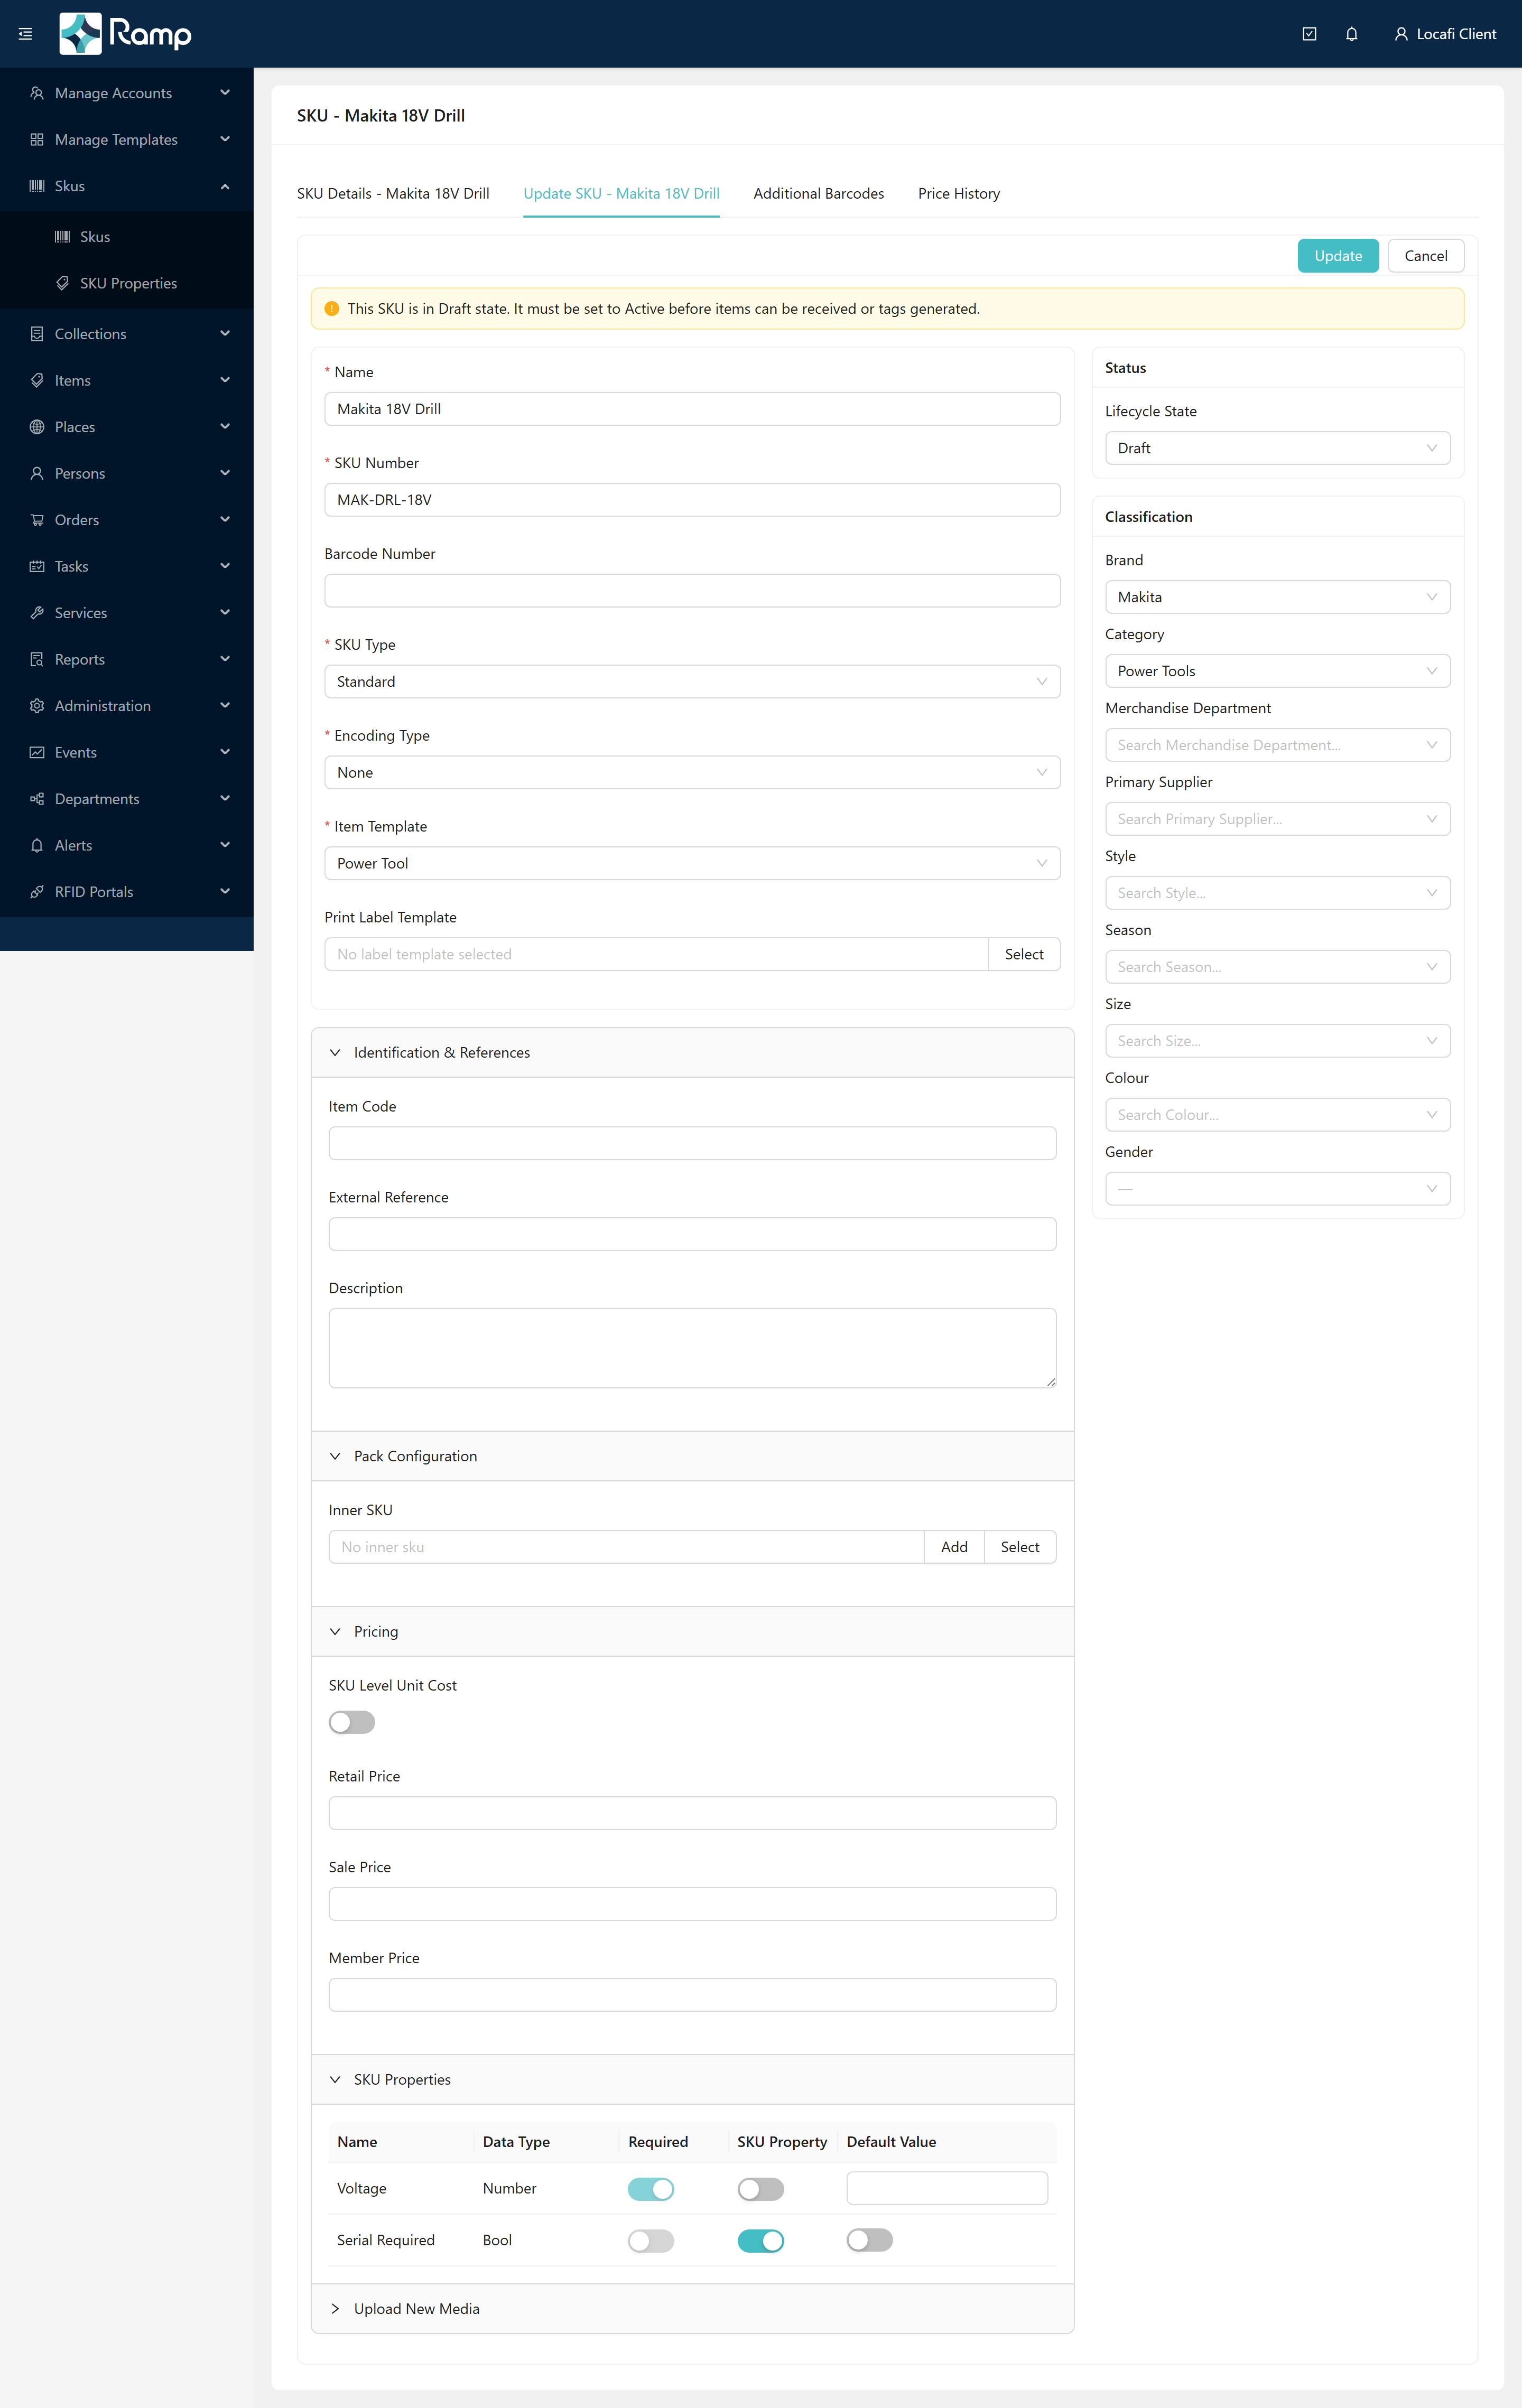
In the SKU list, find the Makita 18V Drill row and click the row action to open it. The edit page opens on the SKU Details - Makita 18V Drill tab. Click the Update SKU - Makita 18V Drill tab.
The top of the form shows a yellow warning:
This SKU is in Draft state. It must be set to Active before items can be received or tags generated.
The Status card in the right rail shows the Lifecycle State selector. It currently shows Draft and offers two choices: Active and Discontinued.
Step 7 — Set the lifecycle to Active and save
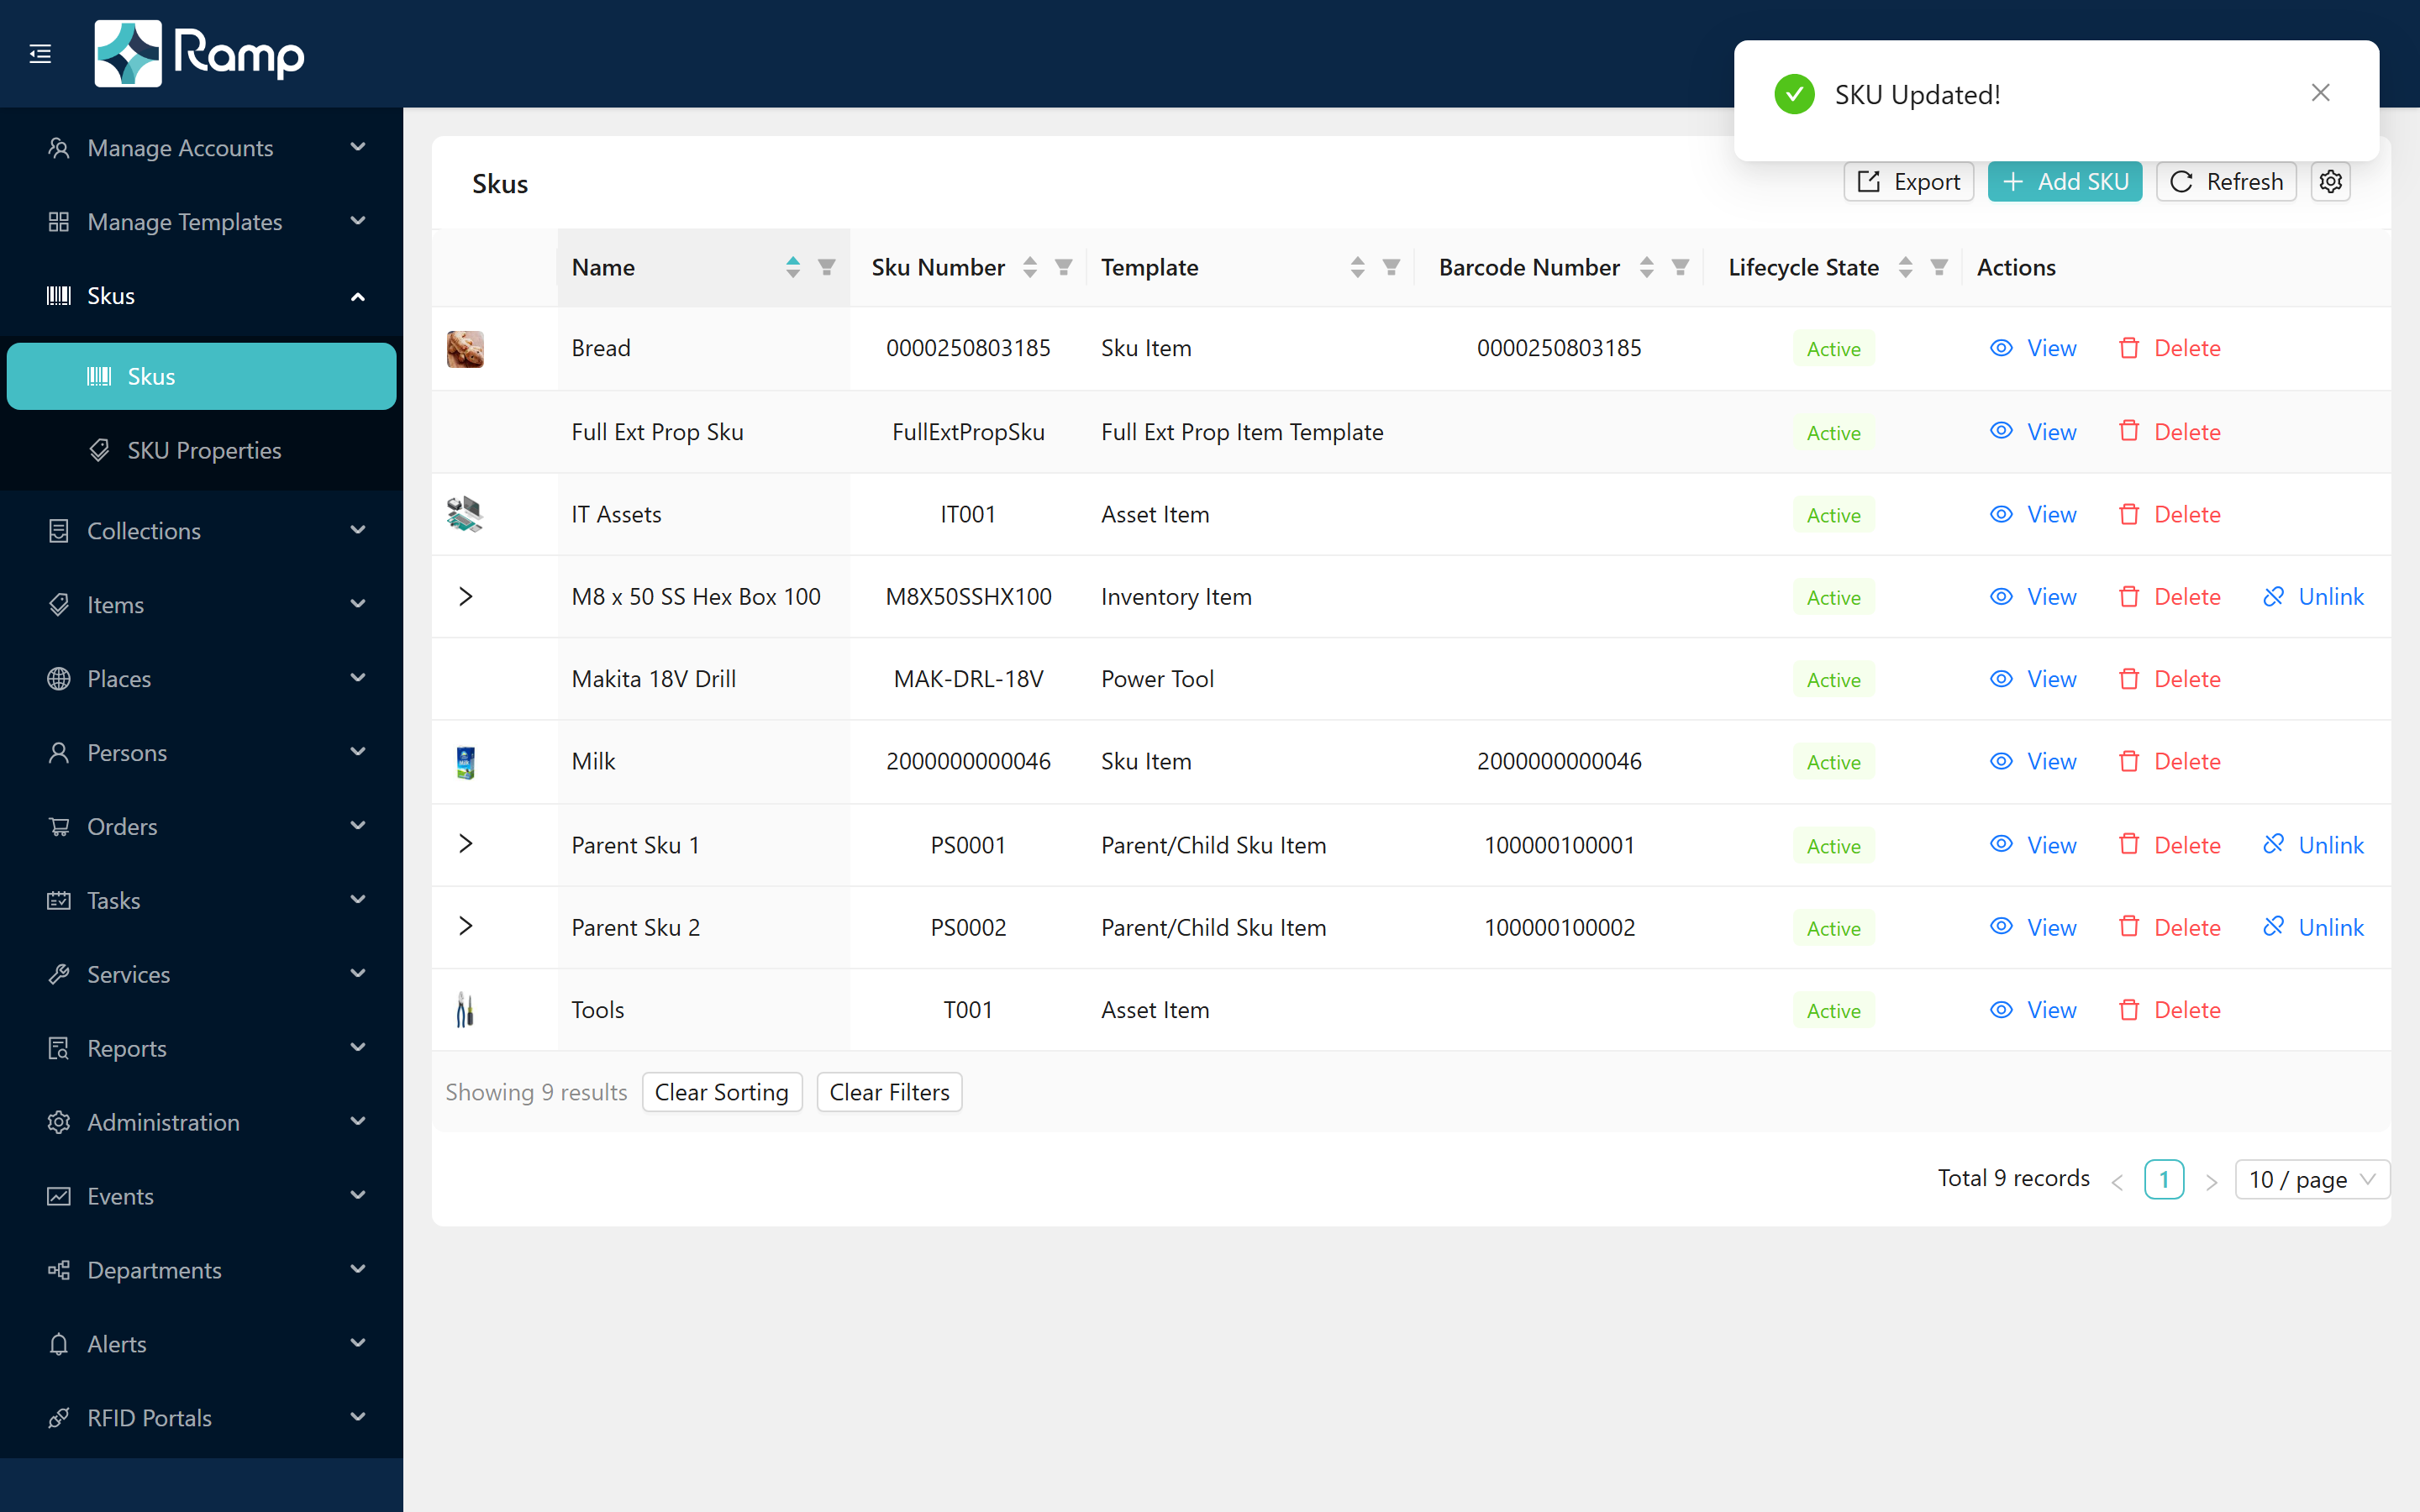
In the Status card, change Lifecycle State to Active. Click Update in the card header. The portal shows the "SKU Updated!" confirmation.
The list now shows a green Active badge — the SKU is operational.
The rule is simple: Draft and Discontinued SKUs cannot receive items or generate tags — any other state can (Active is the natural choice here). See SKUs & the product catalogue for the full lifecycle state machine and the operations each state allows.
Next step: Create items — receive physical items against the Makita 18V Drill SKU.
Related: SKUs & the product catalogue · Set up reference data · Create a template with extended properties