Persons
A person record represents an individual the system tracks — they can carry a tag, belong to a place, and hold photos or documents. A user account is a separate concept: it is the login credential that allows someone to sign in to the portal. Every user is backed by a person record, but many persons exist without a user account.
Open the Persons list
In the left sidebar, expand Persons and click Persons.
The list shows every person record with the columns: Given Name, Surname, Place, Person Template, Tag Type, Tag Number, and Actions. Select rows with the checkboxes to reveal the bulk toolbar.
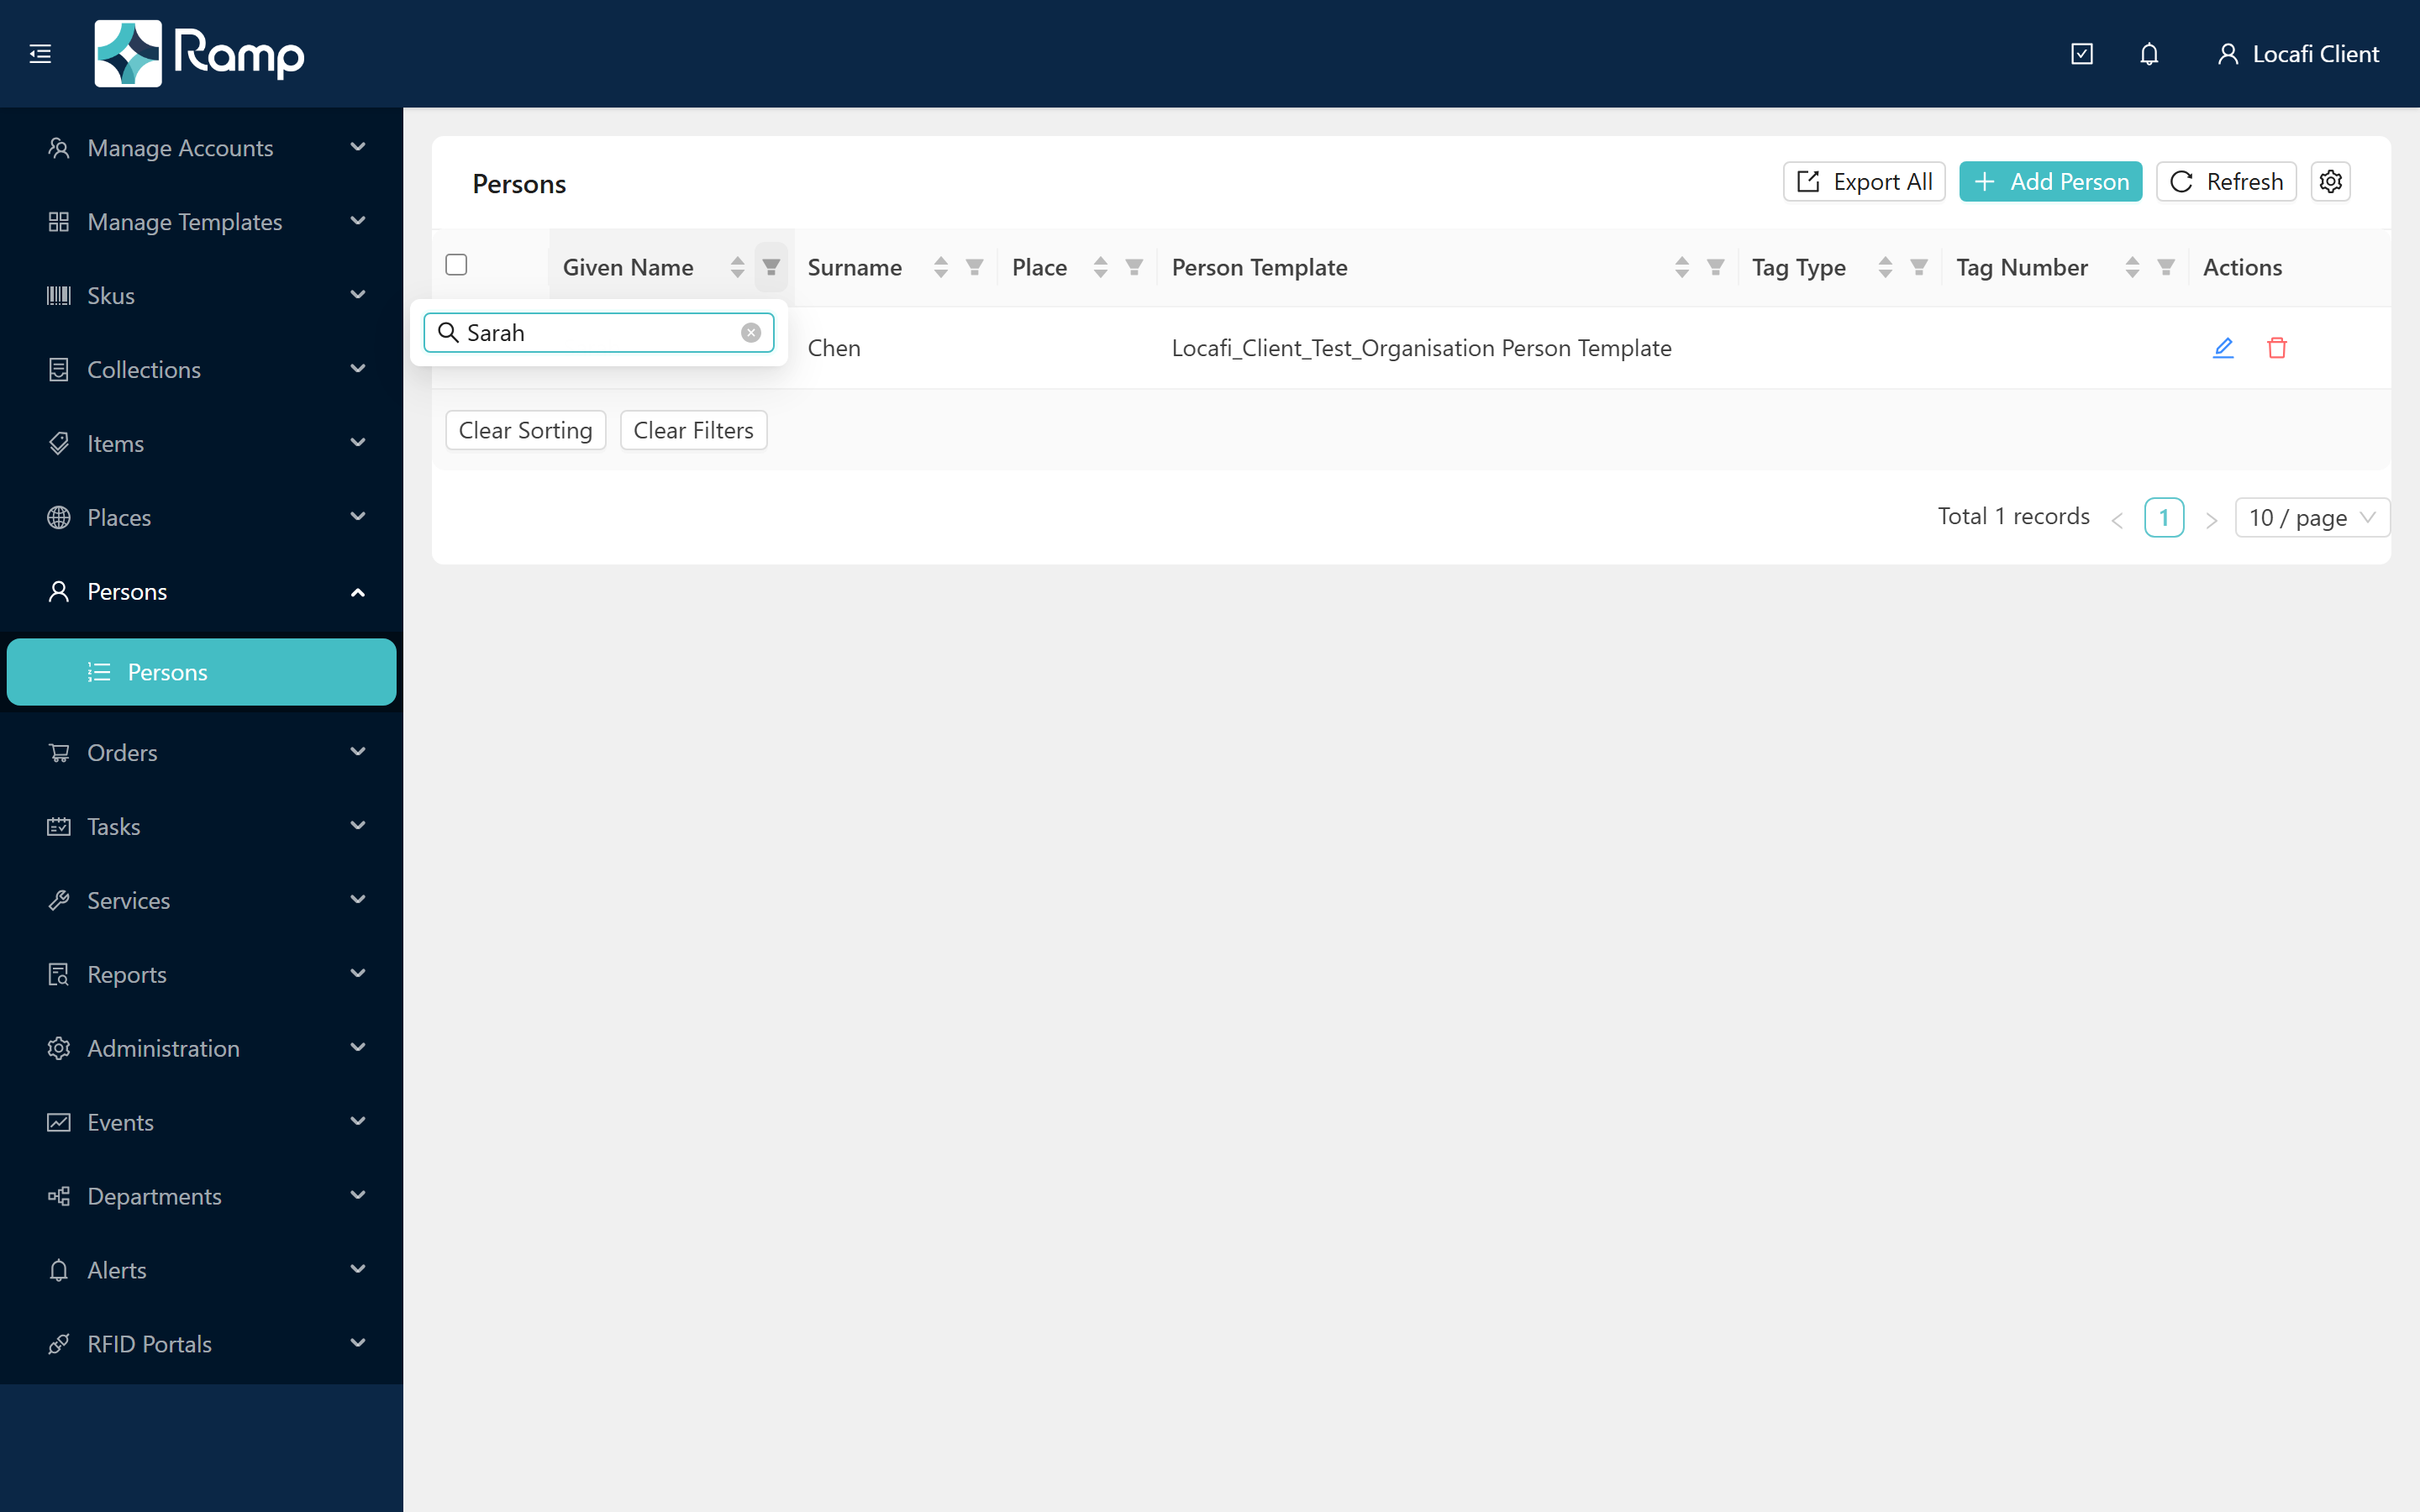
Use the column header filter icons to narrow the list by any field. See Working with lists for sorting, filtering, and export.
Add a person
-
Click Add Person (top-right of the list).
-
Fill in the Add Person form.
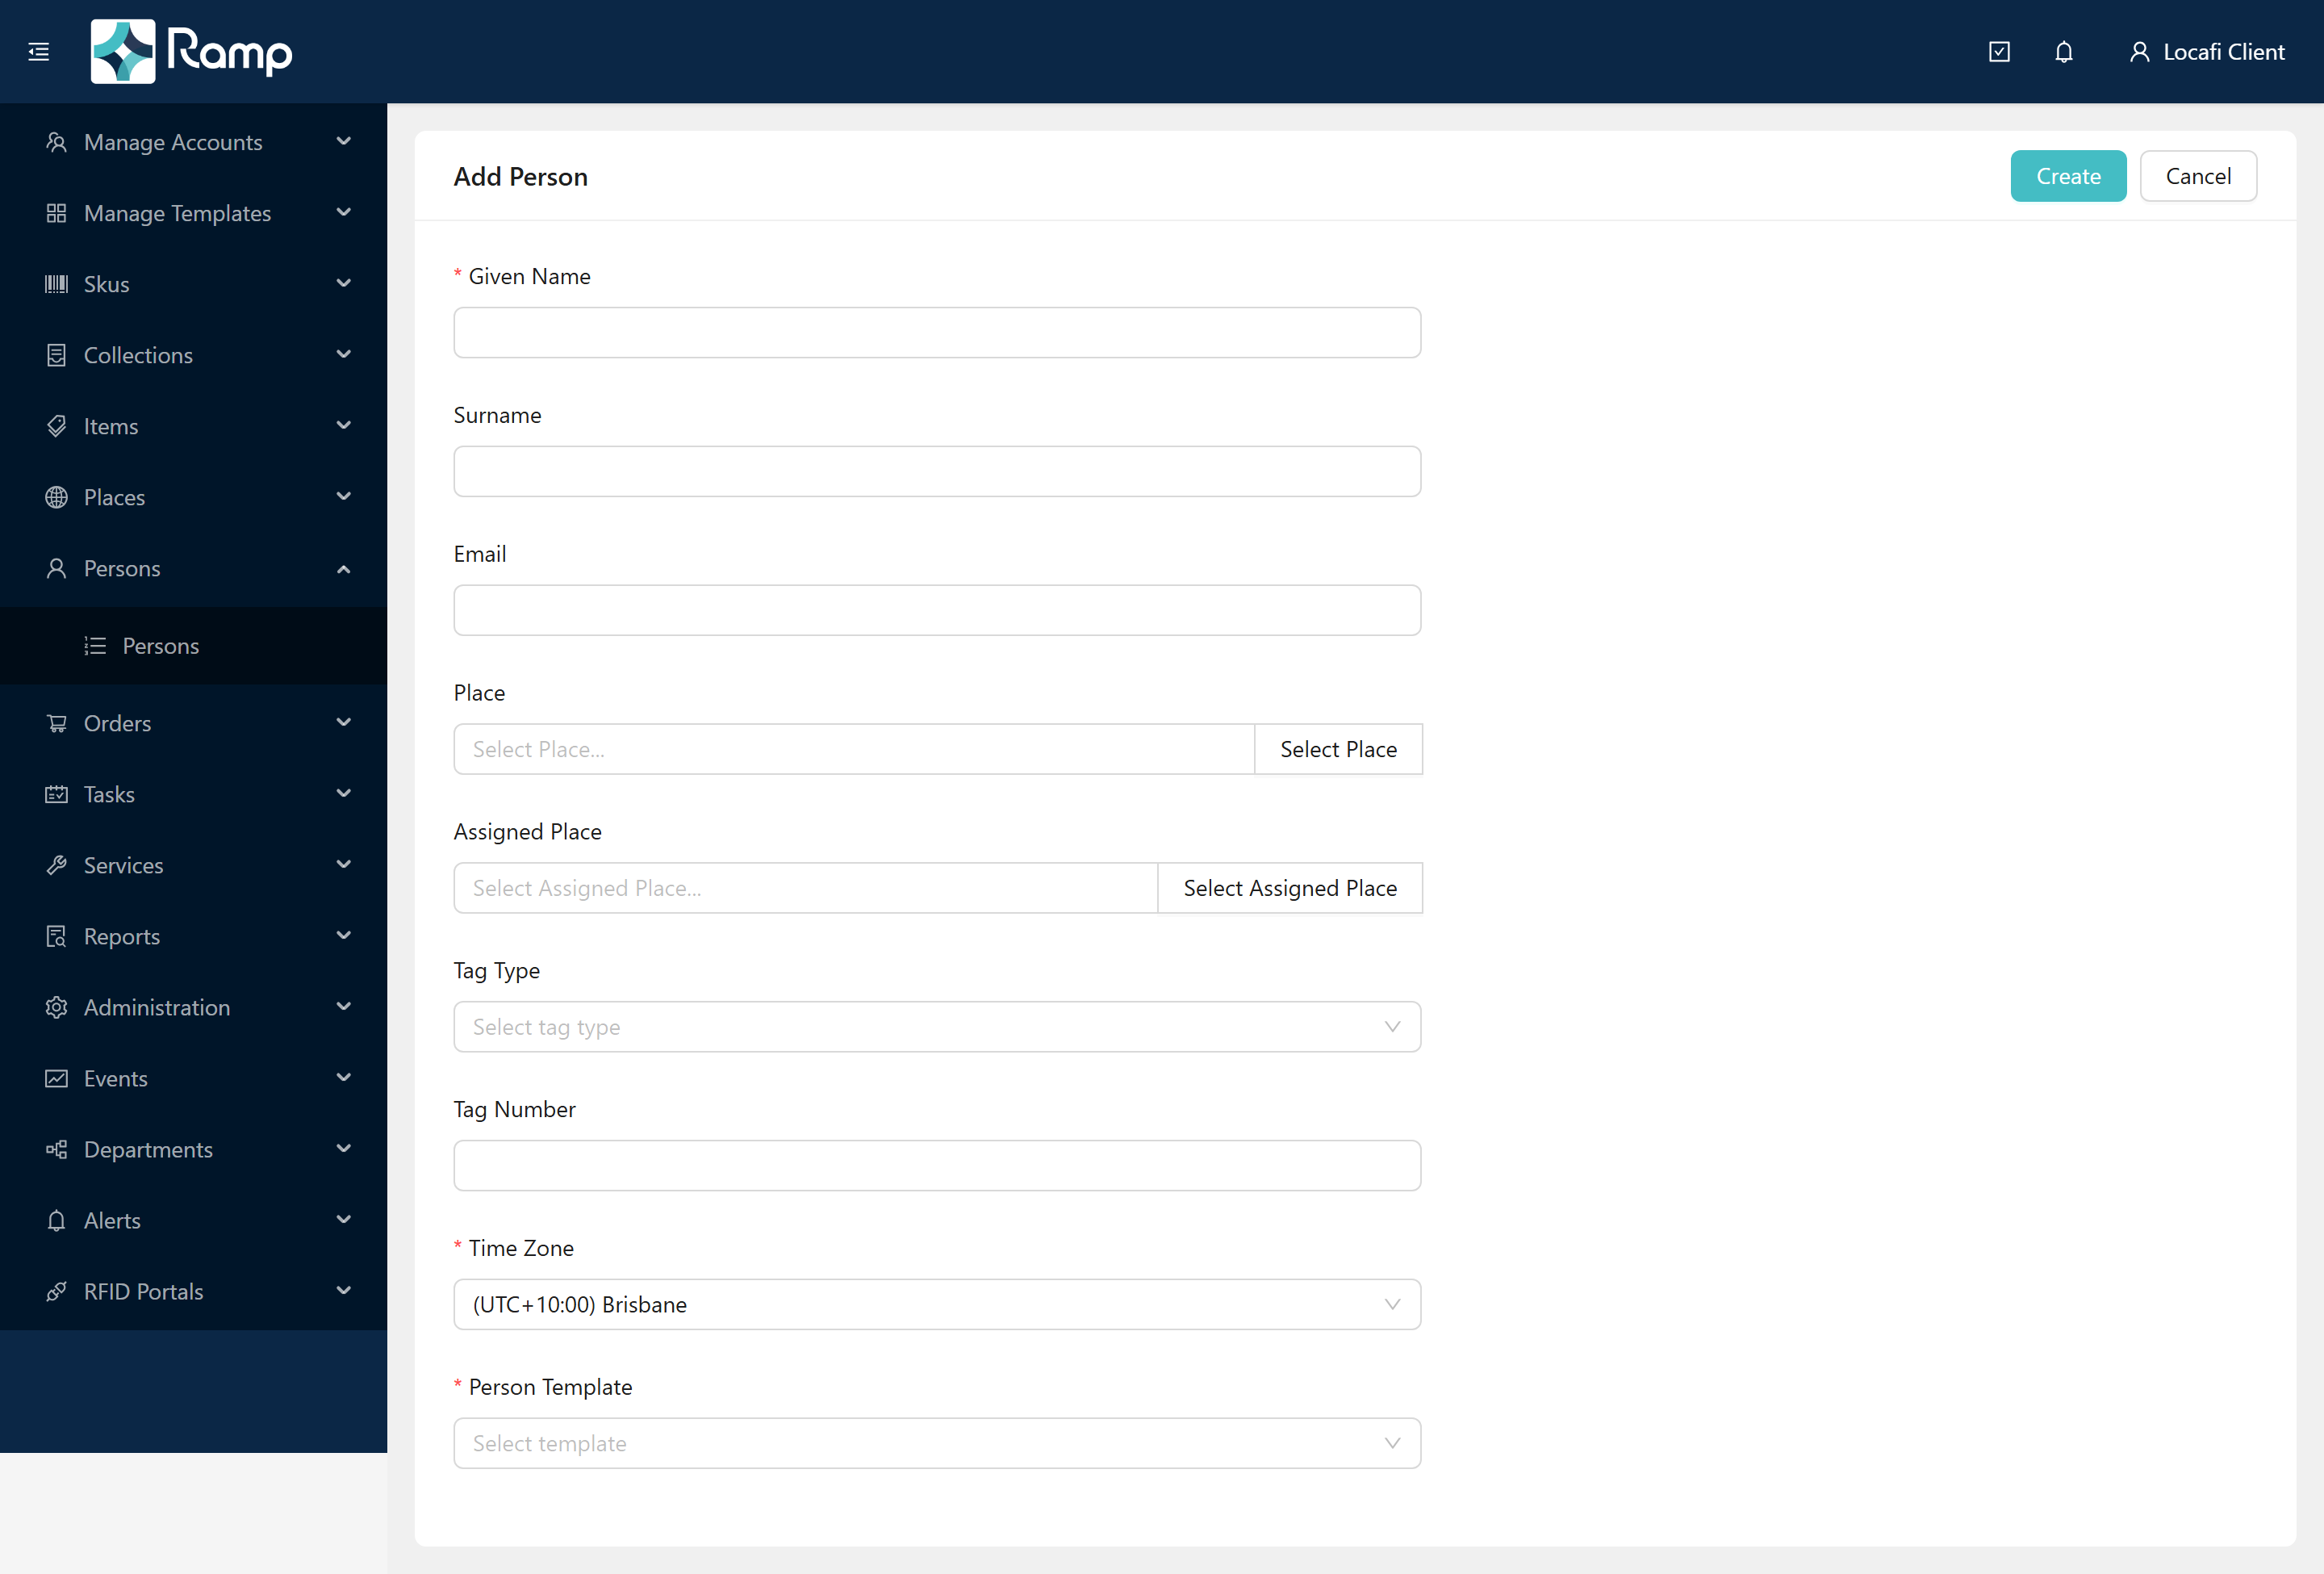
Field Required Notes Given Name Yes Validation message: "Person Given Name is required!" Surname Email Place Read-only box. Click Select Place to open a picker dialog; click Clear to remove. Assigned Place Same pattern as Place. Tag Type Options: PassiveRfid, ActiveRfid, Barcode, Bluetooth. Tag Number The tag identifier. Time Zone Yes Auto-detected from your browser on load. Person Template Yes Determines which extended properties are tracked for this person. Extended PropertiesSelecting a template that defines extended properties reveals an Extended Properties section below the Tag fields. See Templates and extended properties for details on configuring templates.
-
Click Create (top-right of the card) to save. Click Cancel to return to the list without saving.
Edit a person
In the Actions column of the Persons list, click the edit icon for the person you want to change.
The edit page title shows Update Person - <name> and opens on the Update Person Details tab by default.
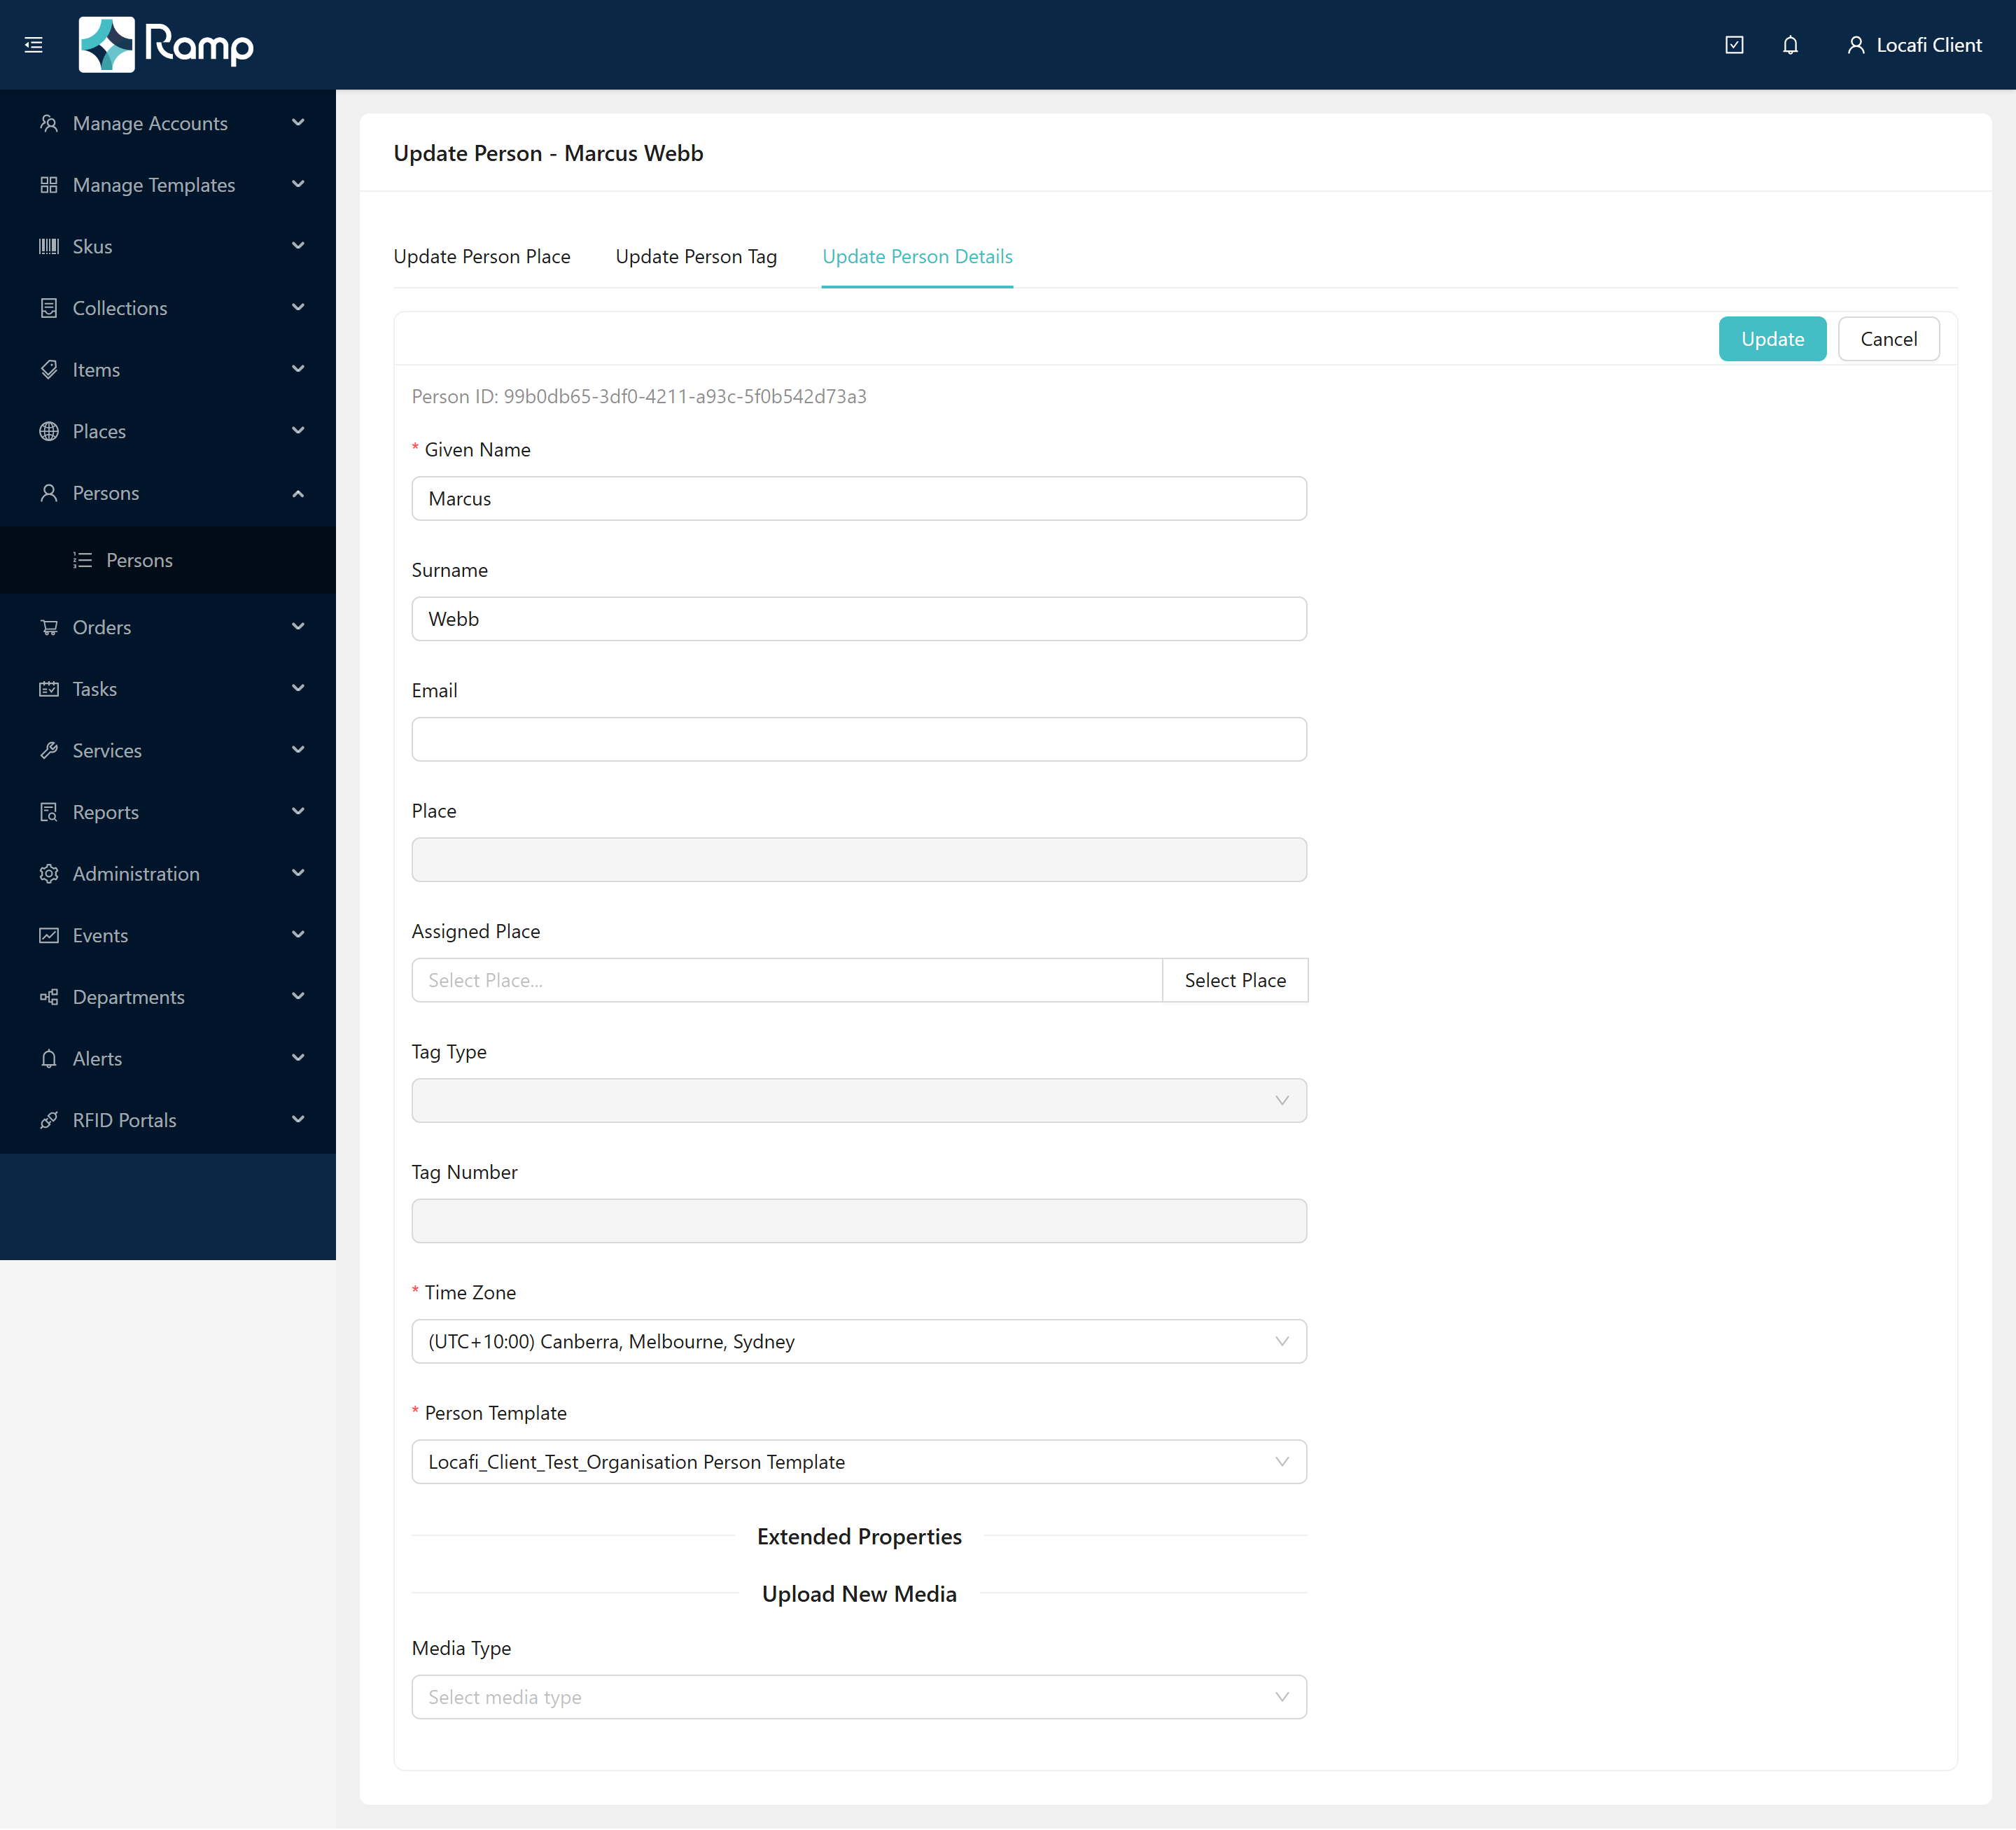
The edit page has three tabs. Although Update Person Details is the default-active tab, it appears third (rightmost) in the tab bar — the visual left-to-right order is: Place, Tag, Details.
Update Person Details (default)
Edit the person's core fields — Given Name, Surname, Email, Assigned Place, Time Zone, and Person Template. The Place field on this tab is read-only; to move the person to a different place, use the Update Person Place tab.
This tab also shows any uploaded photos and documents. The Upload New Media section at the bottom lets you attach images, documents, hyperlinks, and archives: select a Media Type, optionally add a description, choose a file, click Add File to queue it, then click Upload to submit the queue.
Click Update (top-right of the card) to save details changes.
Update Person Place
Shows the current place (read-only). Click Select Place to open a place picker and choose a new location, then click Update. A Place Changed! toast confirms the change.
Update Person Tag
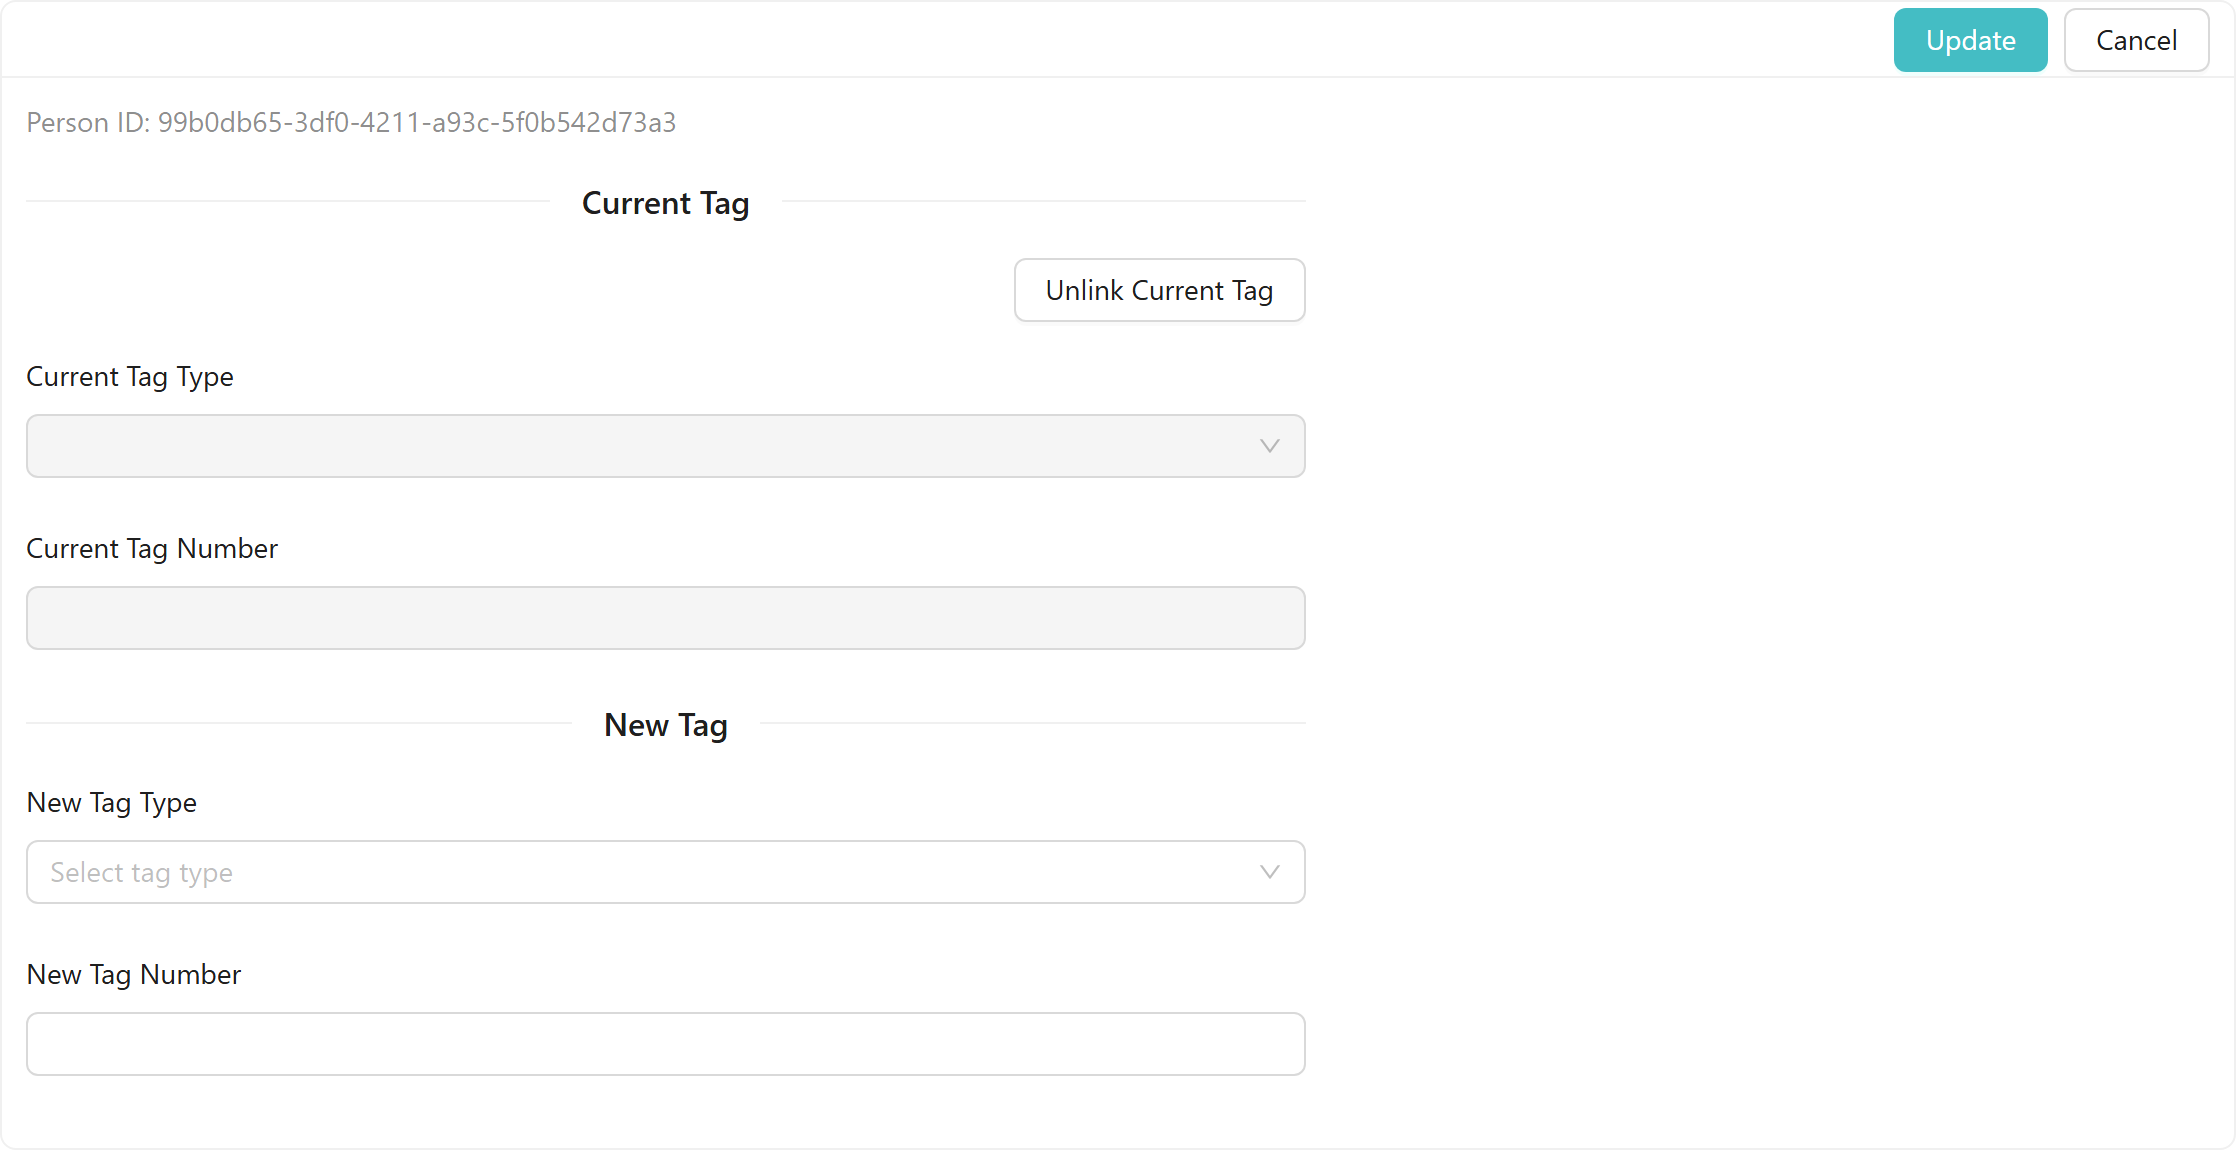
Shows the current tag fields (read-only). Fill in New Tag Type and New Tag Number, then click Update to assign a new tag. A Tag Updated! toast confirms.
To remove the current tag without assigning a new one, click Unlink Current Tag. A Tag removed! toast confirms the unlink.
Promote a person to a user
A person record becomes a login account via the Users list — click Add User ▾ then Create User from Person and select the person from the dialog. See User accounts — Create User from Person for the complete flow.
Delete a person
In the Actions column, click the delete icon for the person you want to remove. Confirm the deletion in the dialog that appears.
To delete multiple persons at once, select their checkboxes and click Bulk Delete in the toolbar that appears at the bottom of the list.
Deleting a person is permanent and cannot be undone. If the person has a linked user account, delete the user account first.
Related
- User accounts — creating login credentials and promoting a person to a user
- Templates and extended properties — setting up person templates and extended property fields
- Working with lists — sorting, filtering, column settings, and export