Roles & permissions
A role is a named set of permissions that controls what a user can see and do in the portal. Every user account must be assigned exactly one role. When you need different people to have different levels of access — for example, a warehouse operator who can view stock but not create or delete records — you create a role for each access profile and assign users to the appropriate one.
Open the Roles list
In the left sidebar, expand Manage Accounts and click Roles.
The list shows every role in your organisation with the columns: Name, Description, and Actions.
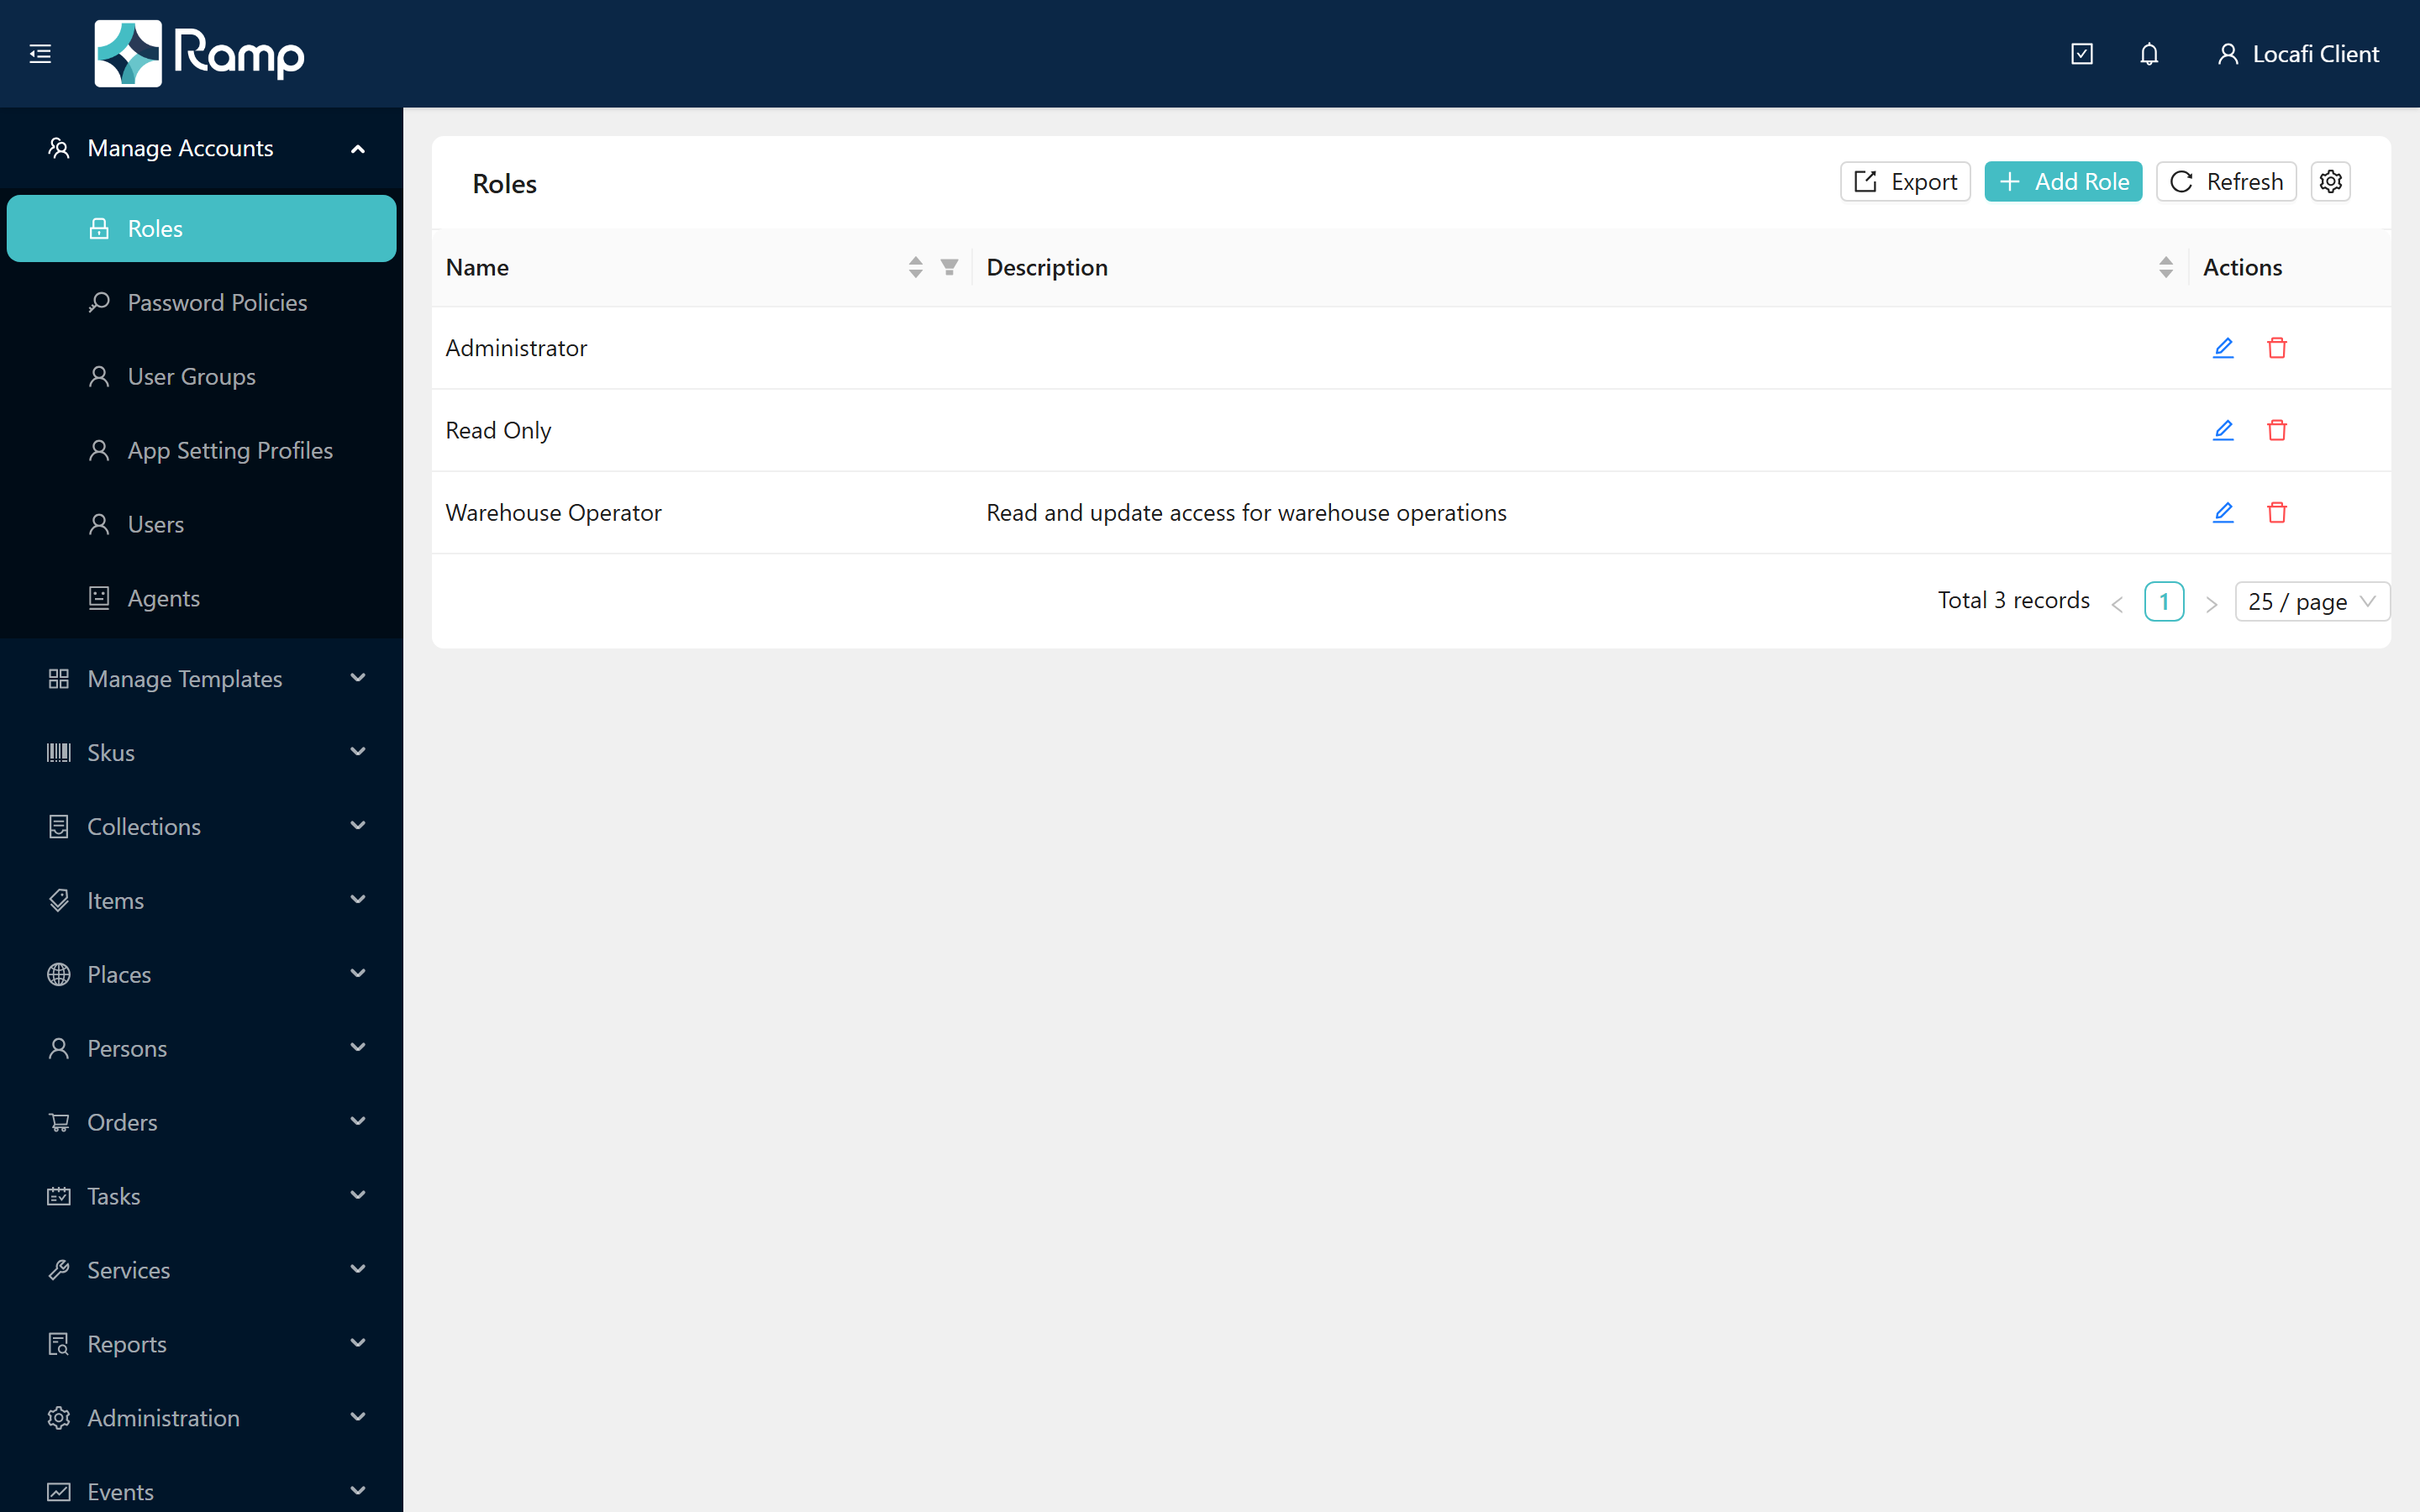
Use the column header filter icons to narrow the list by name. See Working with lists for sorting, filtering, and export.
Create a role
- Click Add Role (top-right of the list).
- Fill in the Name (required) and, optionally, a Description.
- Select a Password Policy (required). A password policy defines the complexity rules — minimum length, character requirements, and expiry period — that apply when users assigned to this role set or change their password.
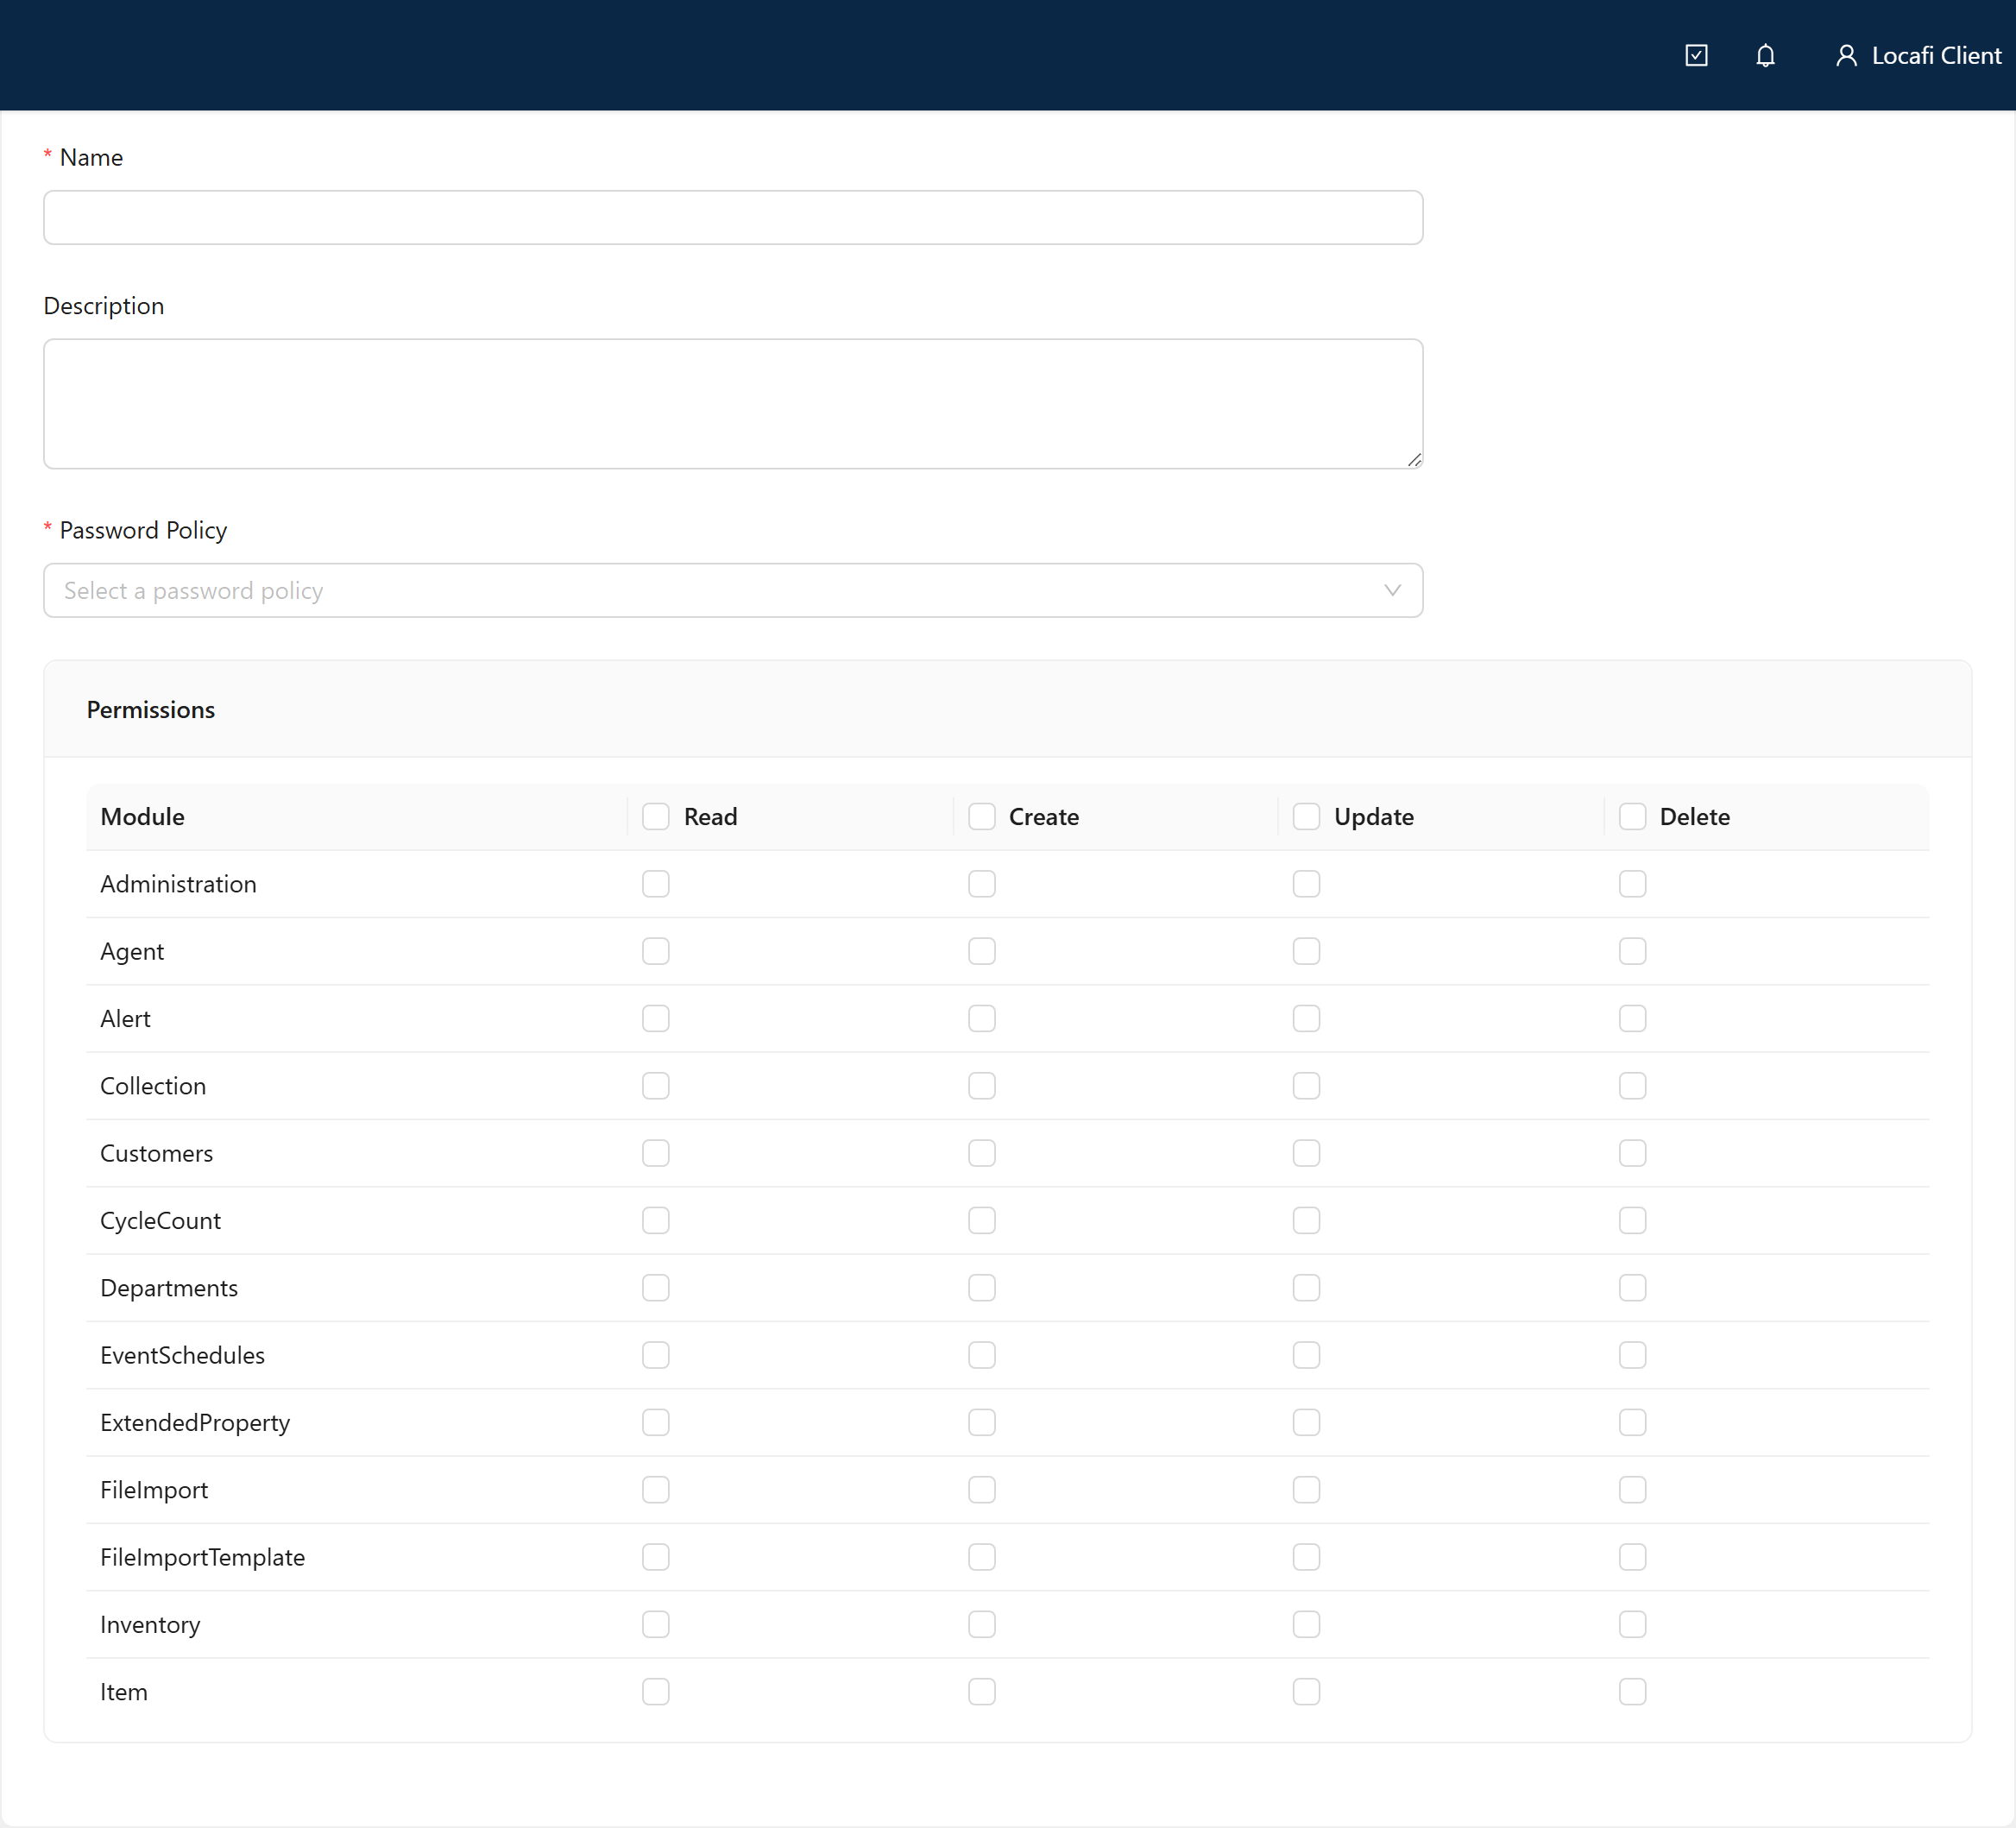
- In the Permissions card below the form fields, tick the permissions each module should grant (see Understanding the permissions matrix below).
- Click Create. You are returned to the Roles list and the portal shows a confirmation: Role created successfully.
Edit a role
- In the Roles list, click the edit icon (pencil) in the Actions column for the role you want to change.
- Adjust the name, description, password policy, or permissions as needed.
- Click Update. The page stays open and the portal shows a confirmation: Role updated successfully.
Avoid editing the role assigned to your own account while you are signed in. Reducing your own permissions can lock you out of pages immediately, including this one.
Understanding the permissions matrix
The Permissions card contains a matrix with one row per module — Item, Place, Person, User, Role, and more — and four columns: Read, Create, Update, and Delete.
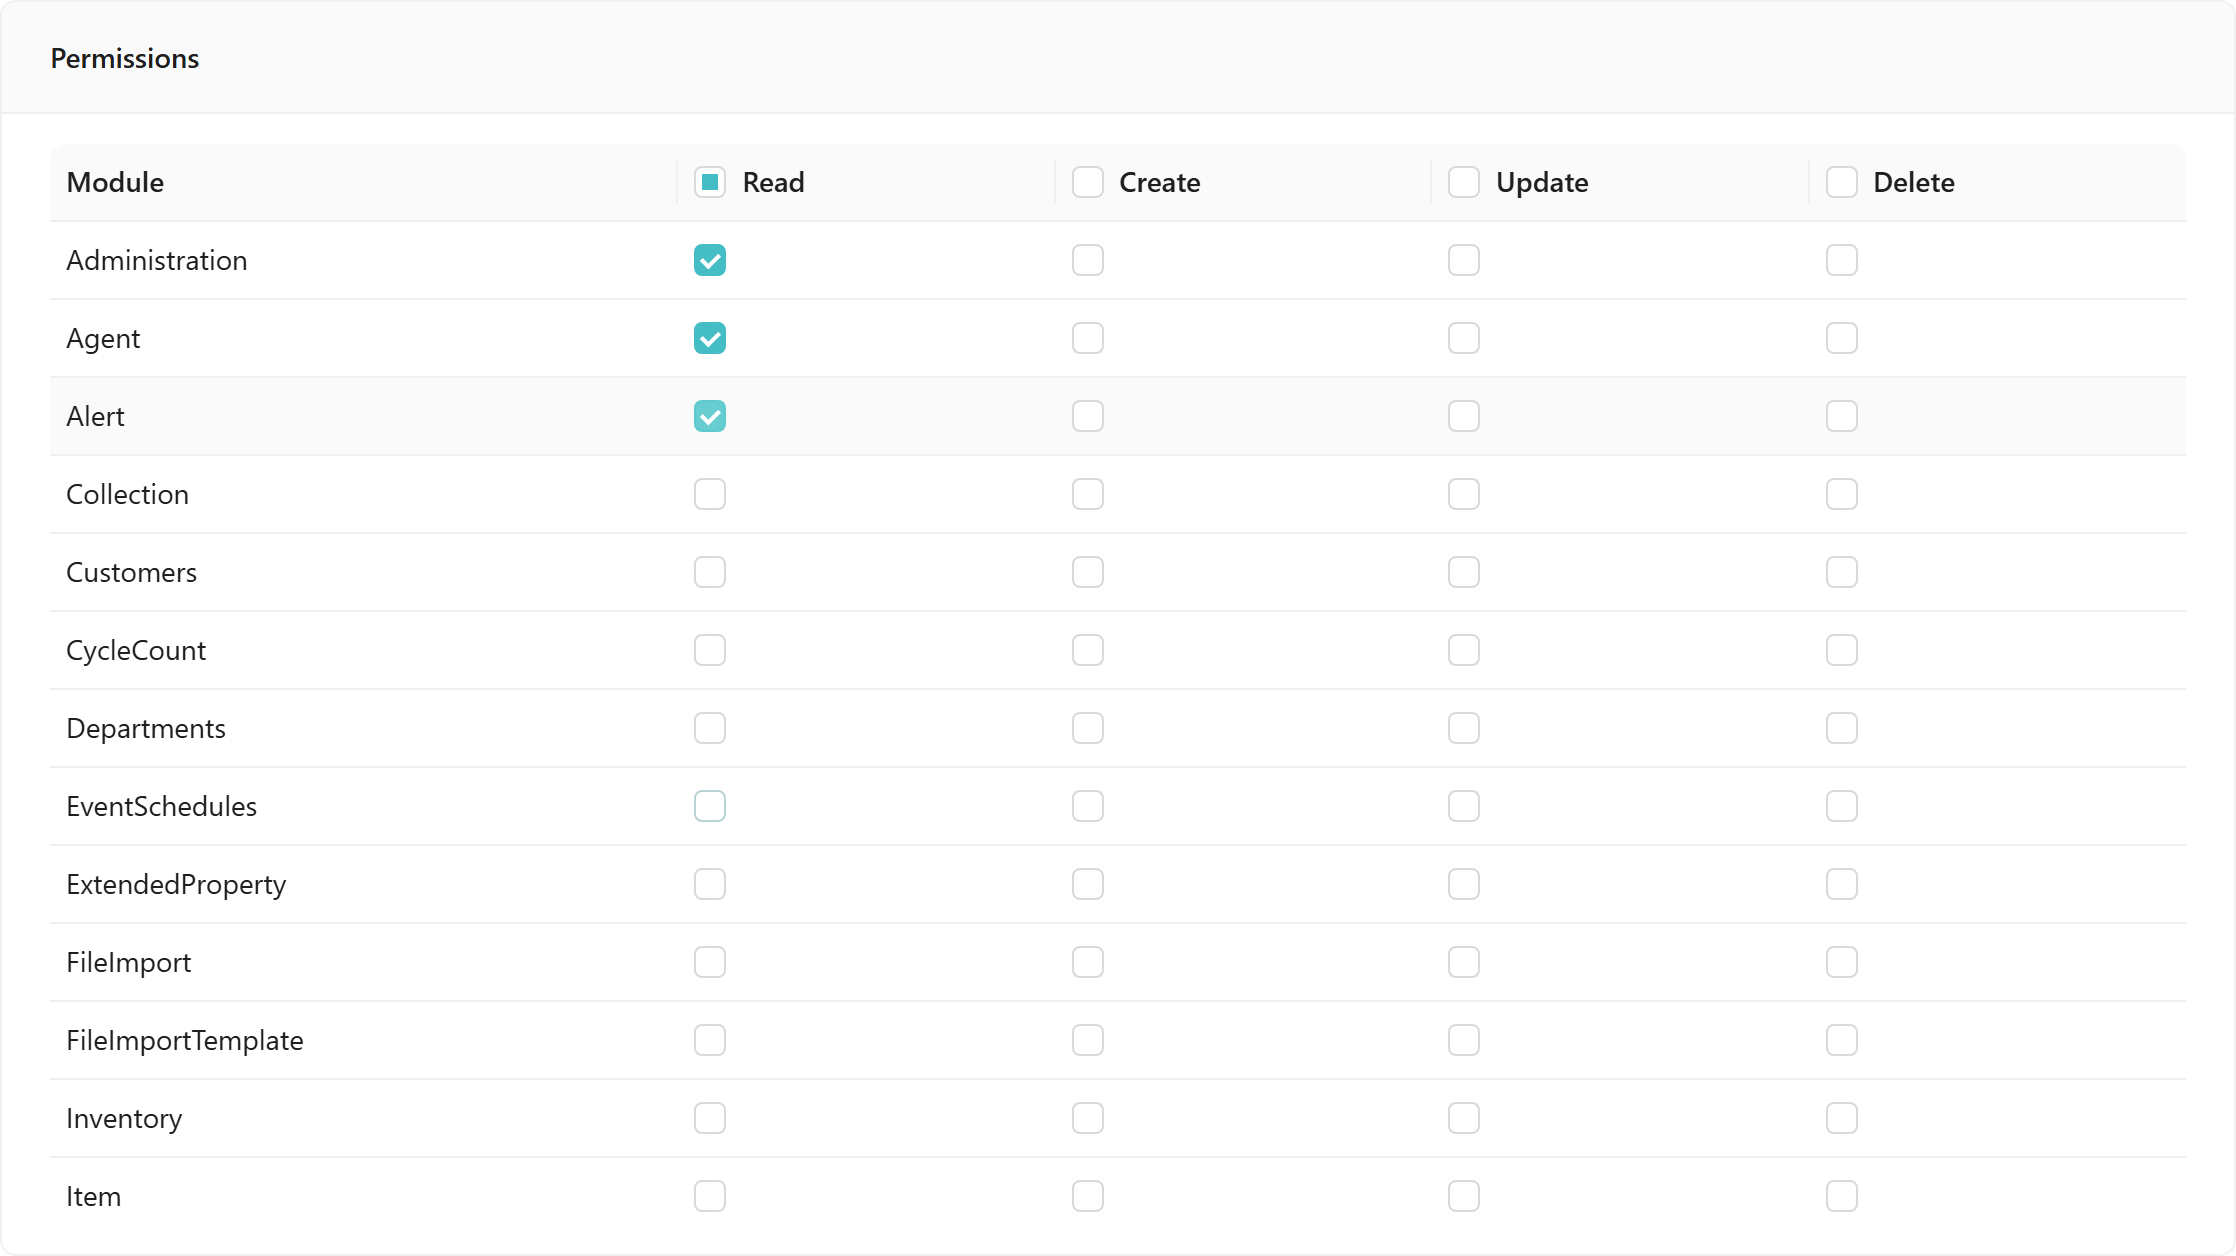
The matrix enforces these rules automatically:
- Column select-all — the checkbox in each column header ticks or unticks that permission for every module at once.
- Create, Update, or Delete implies Read — ticking any of these automatically ticks Read for the same row. A user cannot modify records they cannot see.
- Unticking Read clears the row — if you untick Read, Create, Update, and Delete are cleared for that row automatically.
Least-privilege guidance
Start by granting Read broadly — most users need to see data across modules to do their work. Grant Create, Update, and Delete only to the roles that genuinely need to write data, and reserve Delete for senior roles where accidental removal is costly. Review permissions whenever a role's responsibilities change rather than accumulating rights over time.
Delete a role
Click the delete icon (bin) in the Actions column. Confirm the prompt. A role that is currently assigned to one or more users cannot be deleted — reassign those users first.
Related
- User accounts — assigning a role when creating or editing a user account
- Working with lists — sorting, filtering, and exporting list pages
- User groups — grouping users for bulk access control
- Persons — the person record linked to each user account