Your profile
Your profile page lets you update your display name, email address, and contact details, adjust dashboard and alert timing preferences, manage notification rules, and change your password — all without leaving the portal.
Open your profile
-
Click your name or avatar in the top-right corner of any page to open the user menu.
-
Select Profile from the menu.
The profile page opens at the Update Profile Details tab.
The Details tab
Update your details
The Update Profile Details card shows your current account information.
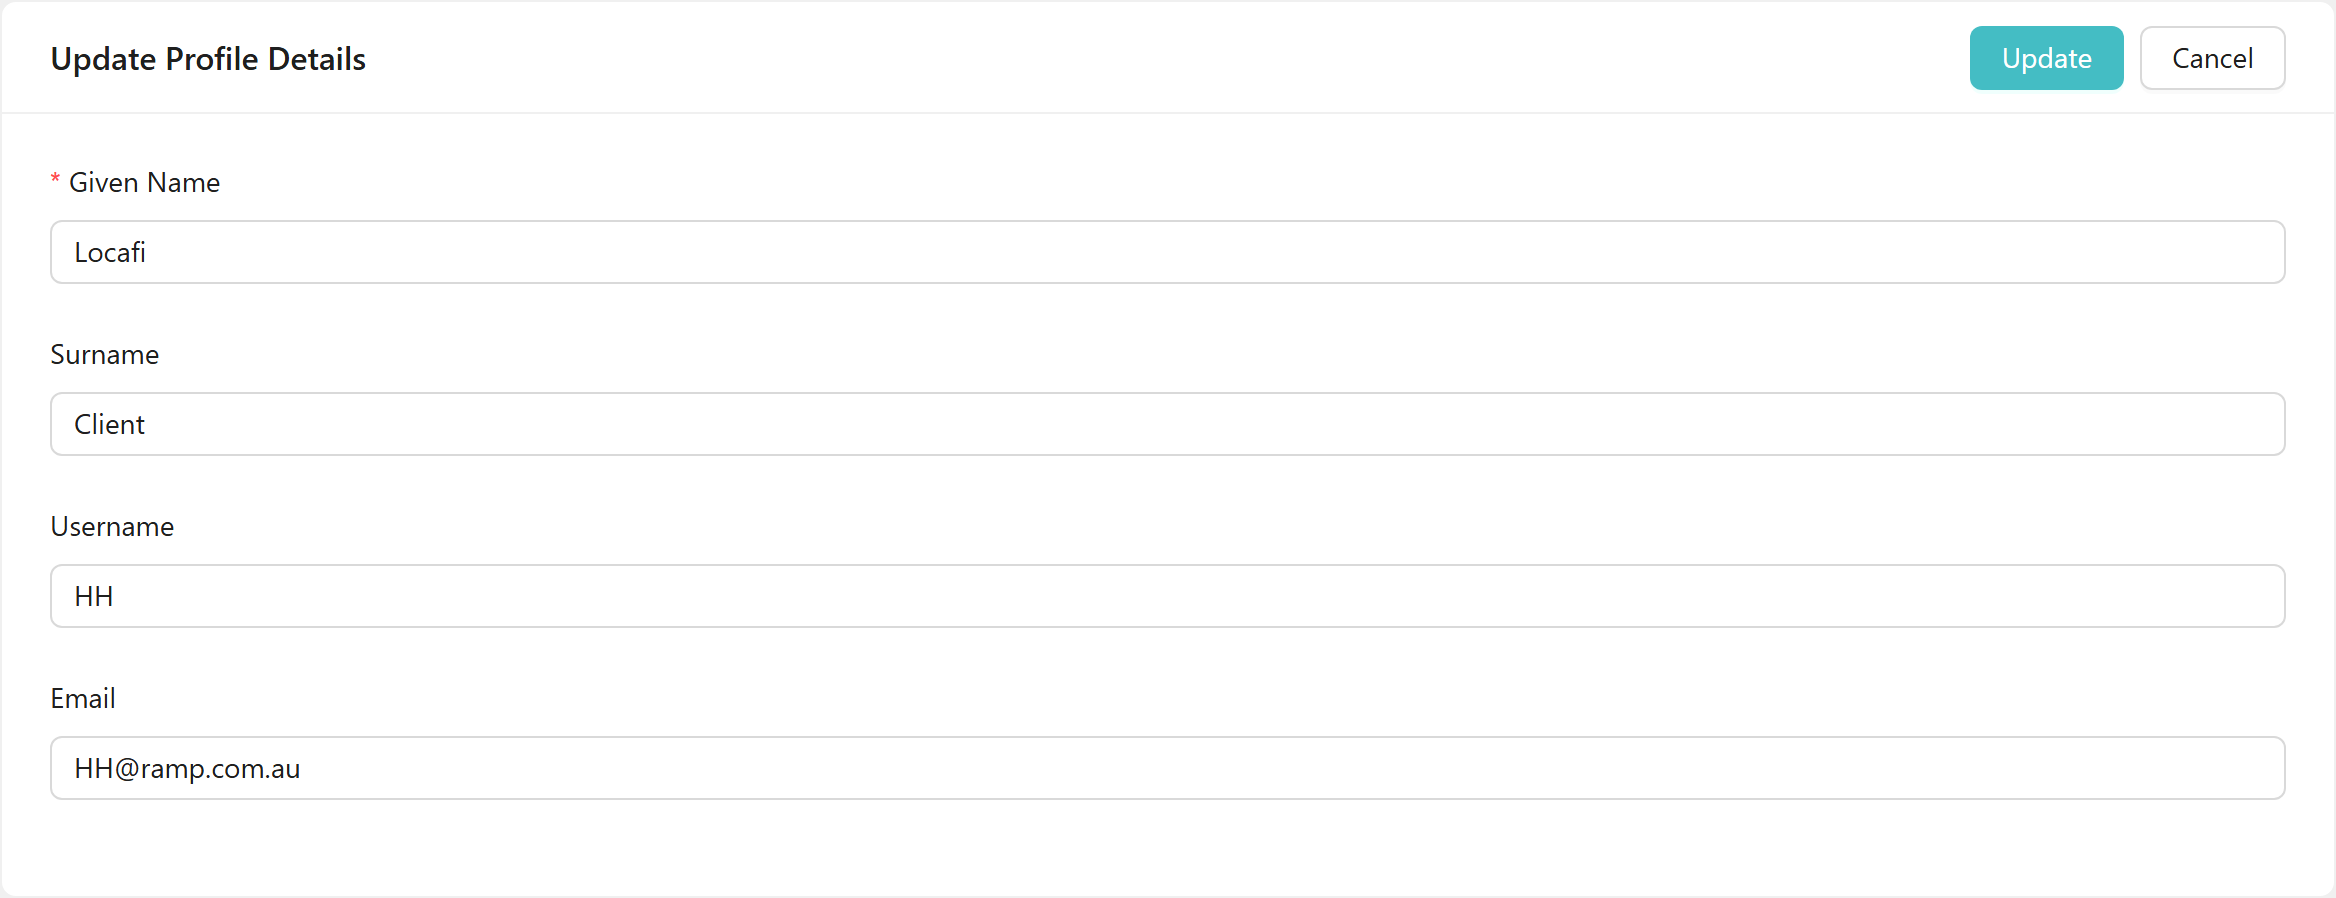
| Field | Notes |
|---|---|
| Given Name | Required. The portal displays this name in the header and on records you create. |
| Surname | Optional. |
| Username | Your sign-in name. |
| Used for password-reset emails and notifications. |
To save your changes:
- Edit any of the fields above.
- Click Update (top-right of the card).
- A Profile Updated! confirmation appears briefly at the top of the page.
To discard your edits without saving, click Cancel — the fields revert to the last saved values.
Given Name is required. If you clear it and click Update, the form shows "Person Given Name is required!" and no changes are saved.
Dashboard Settings and Notification Preferences
Below the main details card are two further sections.
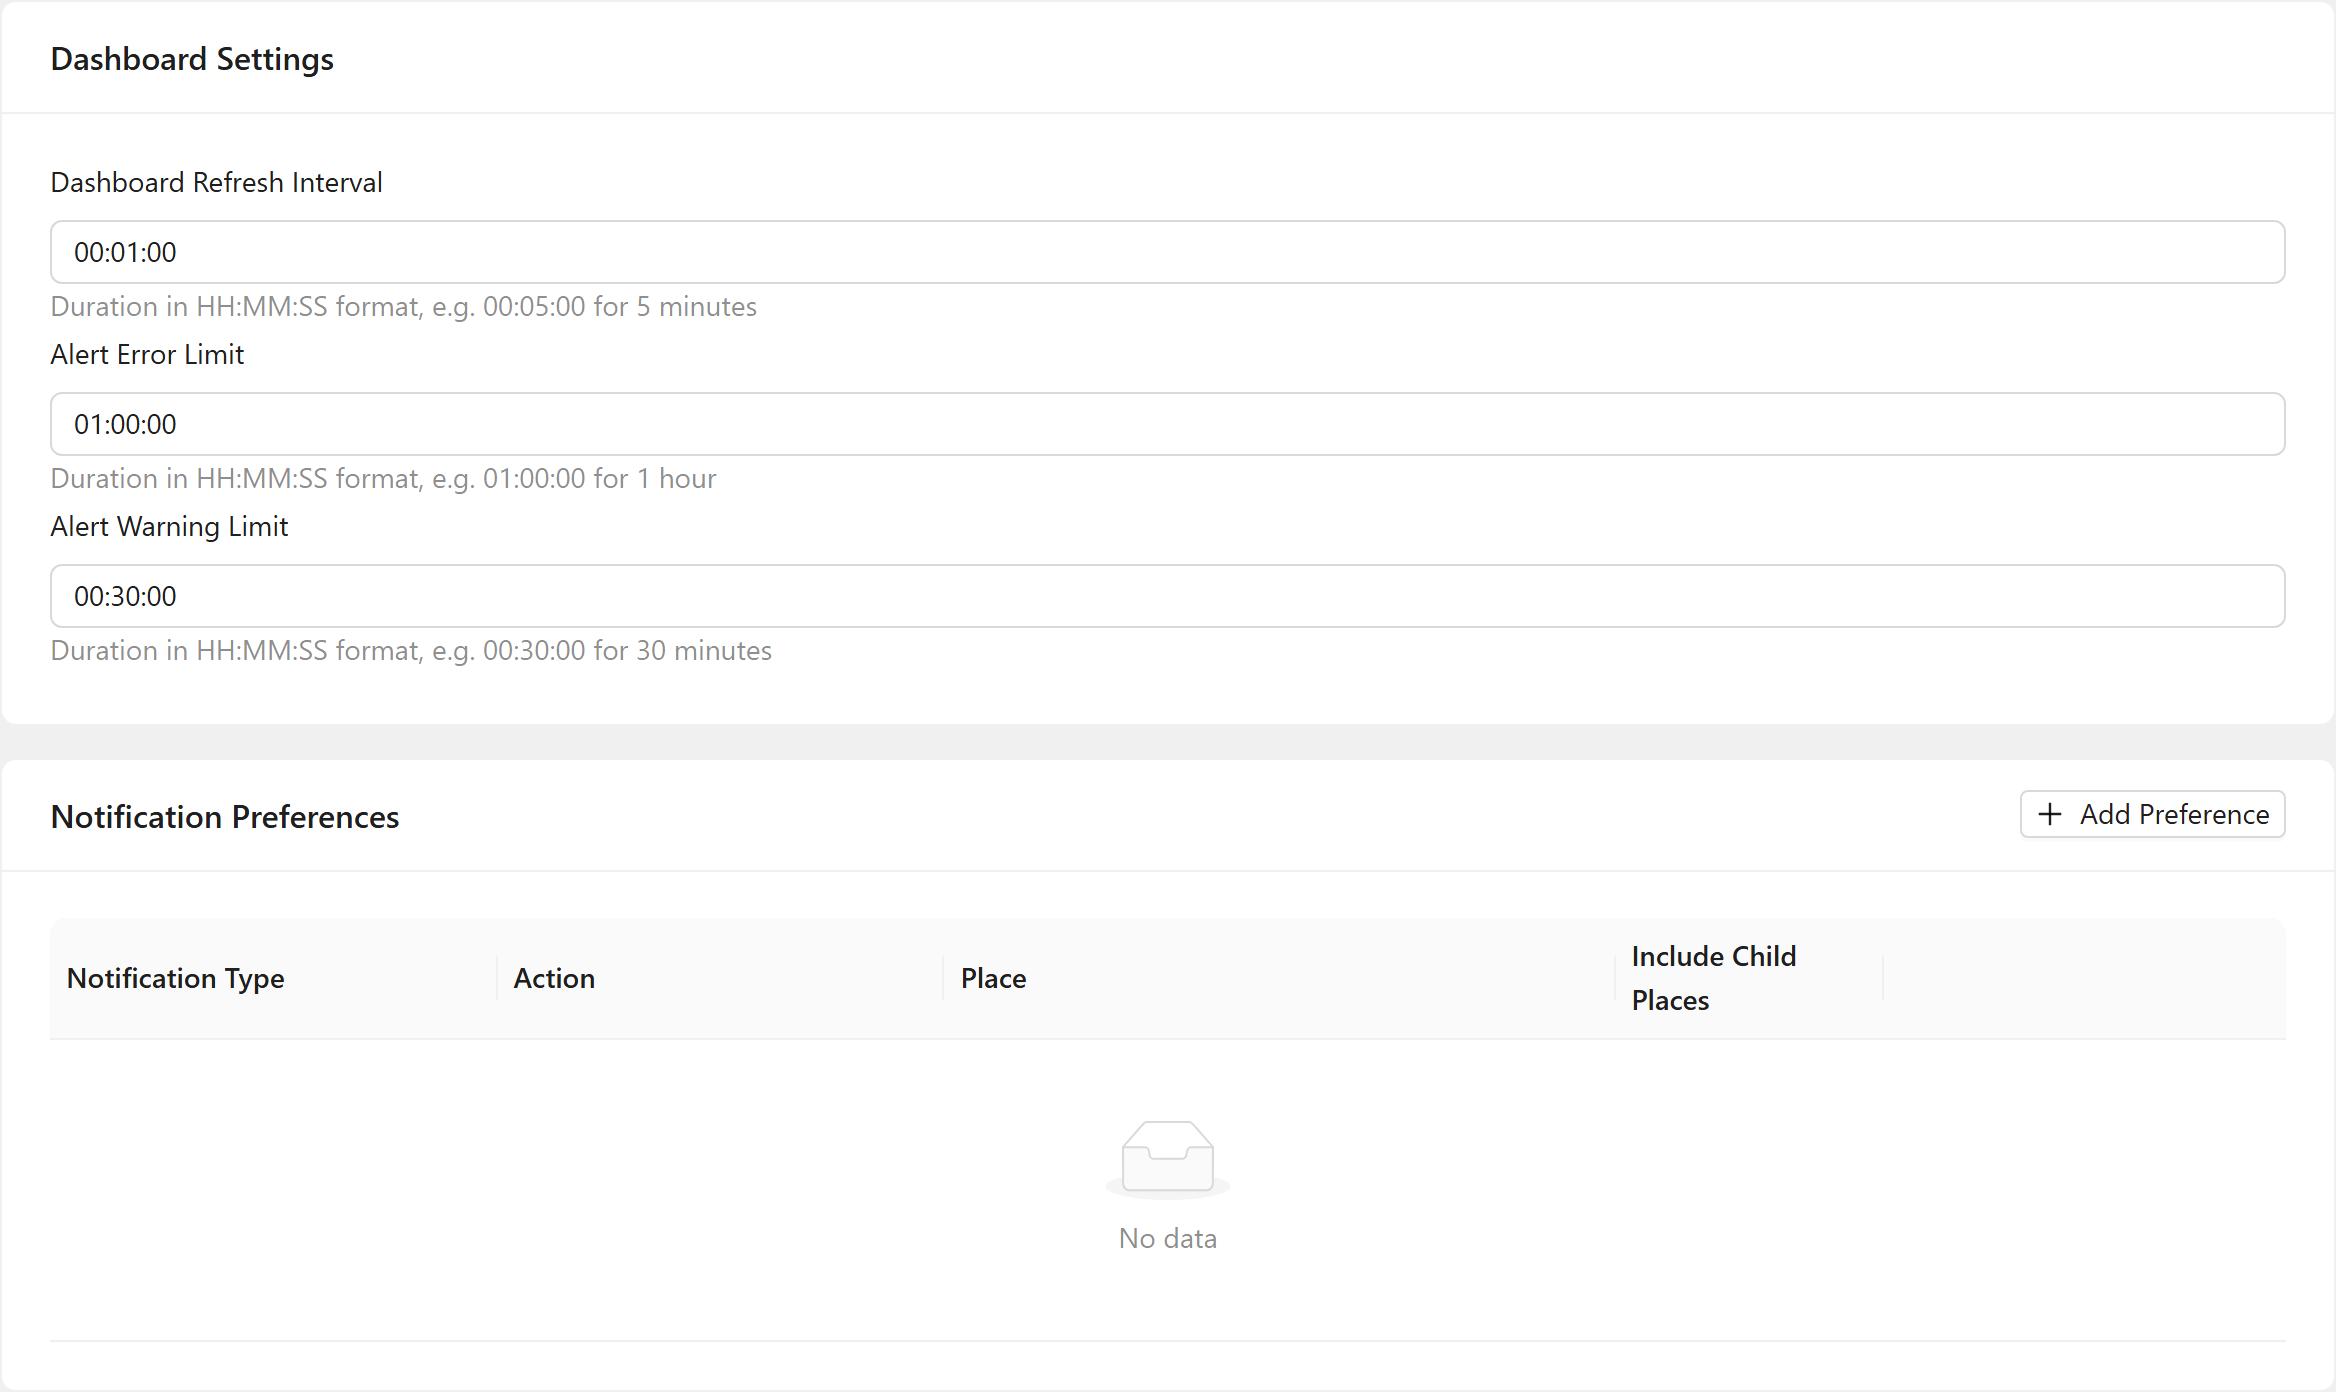
Dashboard Settings controls timing for live data refresh and alert thresholds:
| Field | Description |
|---|---|
| Dashboard Refresh Interval | How often the dashboard polls for new data. Enter a duration in HH:MM:SS format — for example, 00:05:00 for every 5 minutes. |
| Alert Error Limit | How far back the portal looks when counting error-level alerts. |
| Alert Warning Limit | How far back the portal looks when counting warning-level alerts. |
Changes to Dashboard Settings are saved together with your profile details when you click Update.
Notification Preferences lets you subscribe to portal events so that you receive a notification when something specific happens in a place you care about.
To add a preference:
- Click + Add Preference. A new row appears in editing mode.
- Choose a Notification Type (for example, Order).
- Choose an Action (for example, Order Completed).
- Optionally click Select Place in the row to restrict the notification to a specific location. Leave it blank to receive the notification regardless of place.
- Tick Include Child Places if you also want notifications from all locations nested beneath the selected place.
- Click Save in the row to confirm.
- Click Update (top-right of the Update Profile Details card) to persist all changes.
To edit an existing preference, click Edit in its row. To remove one, click Remove.
User Logs
The User Logs card at the bottom of the Details tab shows a read-only history of system events associated with your account. Click Export to download the log as a CSV file.
The Password tab
Click the Update Password tab to change your password while you are already signed in.
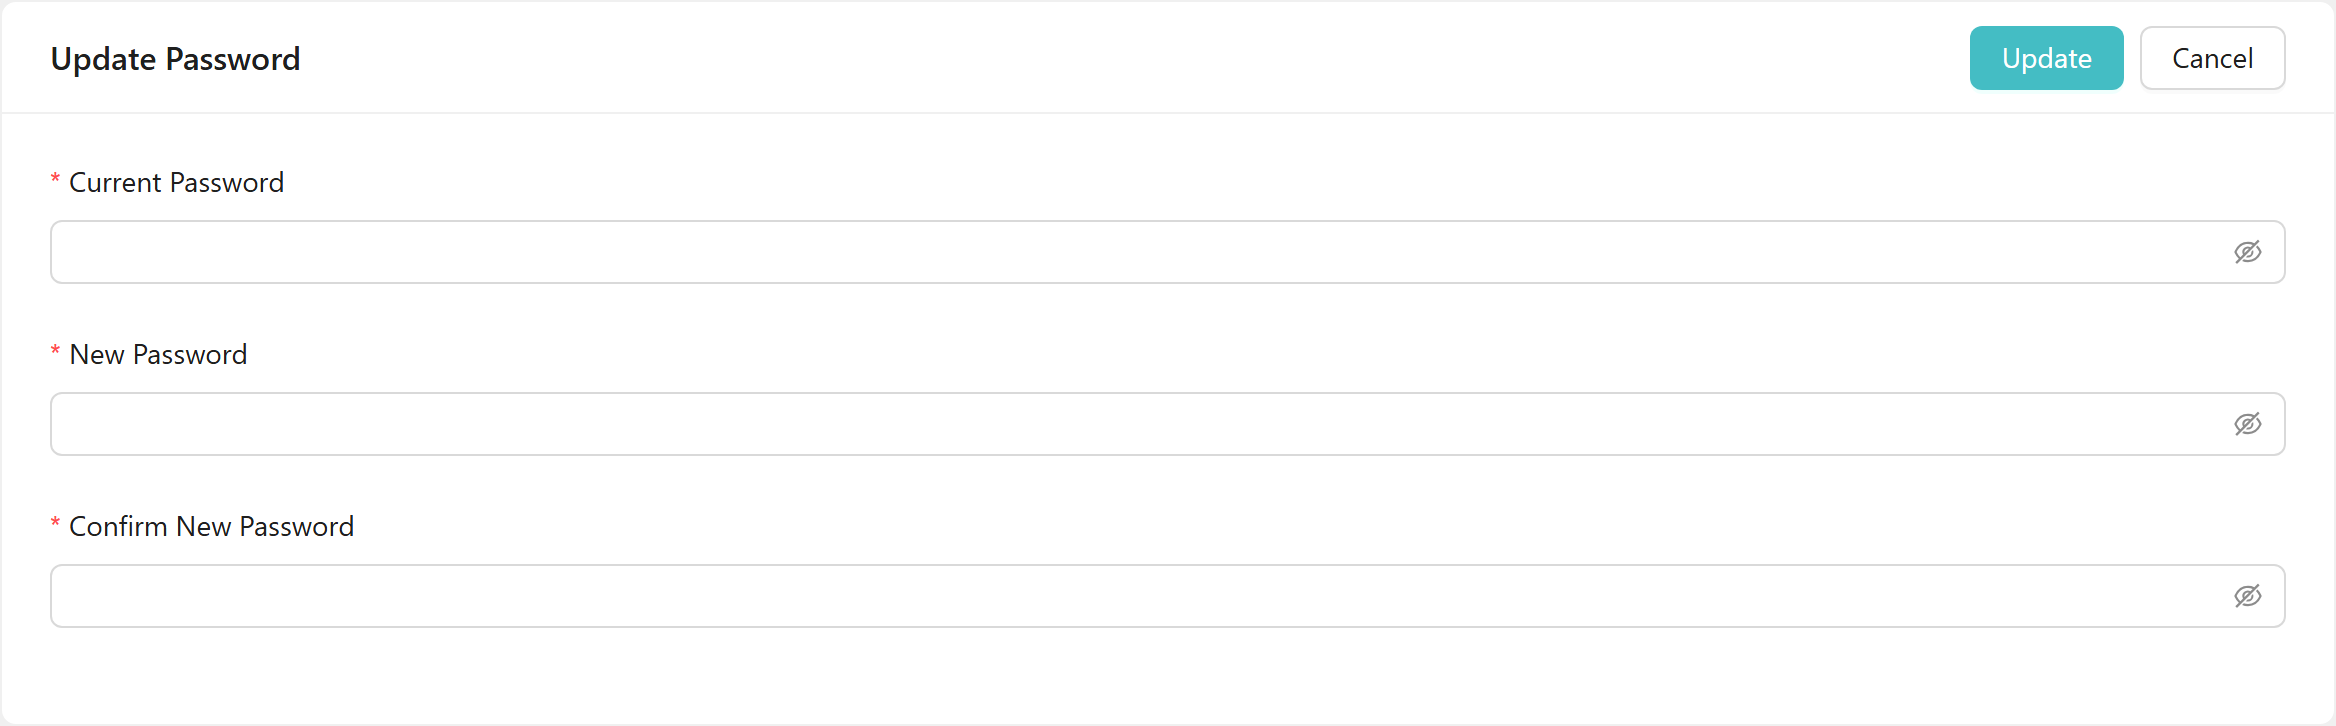
- Enter your current password in Current Password.
- Enter your chosen new password in New Password.
- Repeat the new password in Confirm New Password.
- Click Update. A Password Changed! confirmation appears at the top of the page.
If New Password and Confirm New Password do not match, the form shows "Passwords do not match!" and no change is submitted.
The user menu also has a Change Password option that takes you to a standalone page — useful when your current password has expired and you cannot reach the profile tab. Both routes change your password; use whichever is convenient. See Logging in for details on the standalone page.
Related
- Logging in — sign-in, password recovery, and the standalone change-password flow
- Welcome — finding the user menu and navigating the portal